Q. How do I setup my account in Outlook Express 6?
A. Step 1. Creating a new profile
1. Start Outlook Express. Select "Accounts..." from under "Tools"
(If you already have an account setup, continue on to "Step 2. Configuring/Modifying SMTP (outgoing mail) server.")

2. Click on the "Mail" tab in the "Internet Accounts" window.

3. If this is your first time setting up an account, click on "Add" and select "Mail." If you already have an account setup and listed here, please continue on to "Step 2. Configuring/Modifying SMTP (outgoing mail) server."

4. Enter your name in the "Internet Connection Wizard" page.

- Display name: Enter your name here
Click "Next."
5. Configure the "Internet E-mail Address" as follows:

- E-mail address: Enter your email address here (user-id@gol.com)
Click "Next."
6. Configure the "E-mail Server Names" as follows:

- My incoming mail server is a "POP3" server.
- Incoming mail (POP3, IMAP, or HTTP) server: popmail.gol.com
- Outgoing mail (SMTP) server: mail.gol.com
Click "Next."
7. Configure "Internet Mail Logon" as follows:

- Account name: user-id@gol.com
- Password: Your Rakuten Broadband Premium account password
Click "Next."
8. Click "Finish" in the following screen.

When the "Internet Connection Wizard" window goes away, you've finished configuring.
Please continue on to "Step 2. Configuring/Modifying SMTP (outgoing mail) server."
Step 2. Configuring/modifying SMTP (outgoing mail) server
1. Start Outlook Express. Select "Accounts" from under "Tools."

2. Click on the "Mail" tab in the "Internet Accounts" window. Select your GOL configuration and click on "Properties."

3. Configure the "General" tab of "popmail.gol.com Properties" as follows:

- Mail Account: popmail.gol.com
User Information
- Name: Your name
- Organization: Enter if required
- E-mail address: Your email address (user-id@gol.com)
- Reply address: Enter if a different reply-to address is required
Include this account when receiving mail or synchronizing: Check
4. Click on the "Servers" tab and configure as follows:

Server Information
- Incoming mail (POP3): popmail.gol.com
- Outgoing mail (SMTP): mail.gol.com
Incoming Mail Server
- Account name: user-id@gol.com
- Password: Your Rakuten Broadband Premium account password
- Remember password: Check
- Log on using Secure Password Authentication : Do not check
Outgoing Mail Server
- My server requires authentication : Check
Click on the "Settings" button.
5. Configure the "Outgoing Mail Server" window as follows and click OK.

Logon Information
- Use same settings as my incoming mail server: select this
Click "OK."
6. Click on the Advanced tab and confirm that your Incoming server port is 110 and Outgoing SMTP port is 587.

- Incoming Server (POP3): 110
- This server requires a secure connection (SSL): Unchecked
- Outgoing server (SMTP): 587
- This server requires a secure connection (SSL): Unchecked
Click on "Apply" and then "OK."
Your account has now been setup inside Outlook Express and you should now be able to send and receive email from here.
Author: Support
Last update: 2017-07-03 02:40
Q. How do I setup my account in Microsoft Outlook 2003?
A. Step 1. Creating a new profile
1. Start Microsoft Outlook 2003. Select "Email accounts..." from under "Tools"
(If you already have an account setup, continue on to "Step 2. Configuring/Modifying SMTP (outgoing mail) server.")

2. Select "Add a new e-mail account" and then click "Next"

3. Select "POP3" and then click "Next"

4. Configure the "E-mail Accounts" screen as follows:

User Information
- Your Name: Your Name
- E-mail Address: Your email address (user-id@gol.com)
Server Information
- Incoming mail server (POP3): popmail.gol.com
- Outgoing mail server (SMTP): mail.gol.com
Logon Information
- User Name: user-id@gol.com
- Password: Your Rakuten Broadband Premium account password
- Remember password: check
- Log on using Secure Password Authentication (SPA): Do not check
Click on the "More Settings..." button after entering the information
5. Select the "Outgoing Server" tab and then check the option "My outgoing server (SMTP) requires authentication" and "Use same settings as my incoming mail server"

6. Select the "Advanced" tab and then configure the screen as follows:

- Incoming server (POP3): 110
- This server requires an encrypted connection (SSL): Unchecked
- Outgoing server (SMTP): 587
- This server requires an encrypted connection (SSL): Unchecked
Click "OK" to return to the "E-mail Accounts" screen and then click "Next"
7. Click the "Finish" button to complete the setup of your account

Step 2. Configuring/Modifying SMTP (outgoing mail) server
Note: If you have already completed Step 1, you do not not need to complete Step 2 to send and receive email.
1.Select "Email accounts..." from under "Tools"
2. Select "View or change existing e-mail accounts" and then click "Next"

3. Select your account in the "E-mail Accounts" screen and then click on the "Change..." button

4. Click on the "More Settings..." button
5. Select the "Outgoing Server" tab and then check the option "My outgoing server (SMTP) requires authentication" and "Use same settings as my incoming mail server"
6. Select the "Advanced" tab and then configure the screen as follows:
- Incoming server (POP3): 110
- This server requires an encrypted connection (SSL): Unchecked
- Outgoing server (SMTP): 587
- This server requires an encrypted connection (SSL): Unchecked
Click "OK" to return to the "E-mail Accounts" screen and then click "Next" and "Finish" to save the changes.
Author: Support
Last update: 2017-07-03 03:46
Q. How do I setup my account in Apple Mail 3?
A. Step 1. Create a new profile
1. Open the Apple Mail software and then click on "Mail" and "Preferences..." in the top left corner of the screen.

2.Select the "Accounts" icon at the top of the screen and then click on the "+" button in the bottom left corner to add a new account.
(If you already have an account setup, continue on to "Step 2. Configuring/Modifying SMTP (outgoing mail) server.")

3. Enter your information into the first screen

Full Name: Your Name
Email Address: user-id@gol.com
Password: Your Rakuten Broadband Premium account password
Click on the "Continue" button to go to the next screen
4. Enter the "Incoming Mail Server" information as show below;

Account Type: POP
Description: The name of your account (For example, My Account)
Incoming Mail Server: popmail.gol.com
User Name: user-id@gol.com
Password: Your Rakuten Broadband Premium account password
Click on the "Continue" button to test these settings and then go to the next screen
5. You may be asked to select the security settings for Incoming Mail

Use Secure Sockets Layer (SSL) - Unchecked
Authentication: Password
Click on the "Continue" button to go to the next screen
6. Enter the "Outgoing Mail Server" information as show below;

Description: The name for the SMTP server (For example, GOL SMTP)
Outgoing Mail Server: mail.gol.com
Use only this server: Check
Use Authentication: Check
User Name: user-id@gol.com
Password: Your Rakuten Broadband Premium account password
Click on the "Continue" button to test these settings and then go to the next screen
7. You may be asked to select the security settings for Outgoing Mail

Use Secure Sockets Layer (SSL) - Unchecked
Authentication: Password
Click on the "Continue" button to go to the next screen
8. You will now see an Account Summary screen showing all of your settings. Check the box "Take Account Online" and then click the "Create" button to complete the setup of the account.

Step 2. Configuring/Modifying SMTP (outgoing mail) server
1. After completing the setup of your account, you should be returned to the "Accounts" screen. If not, click on "Mail" and then "Preferences..." in the top left corner of the screen to return to this window. You can now see your account and all of your details listed here.

2. Click on the "Advanced" tab in this window to check the incoming mail settings for your account.

Enable this account: Check
Include when automatically checking for new mail: Check
Remove copy from server after retrieving a message: Check and choose your own preference from the drop-down menu box.
Please note, the mailbox is only 100MB in size by default.
Port: 110
Use SSL: Do not check
Authentication: Password
3. Click on the "Account Information" tab again, click on the drop-down menu next to "Outgoing Mail Server (SMTP):" and then select the option "Edit Server List..."

4.Click on the "Advanced" tab in the following screen and enter the information as shown;

Use default ports (25, 465, 587): Check
Use Secure Sockets Layer (SSL): Do not check
Authentication: Password
User Name: user-id@gol.com
Password: Your Rakuten Broadband Premium account password
Click on the "OK" button to save these changes and return to the "Accounts" screen
5. Close the "Accounts" window and make sure to click "Save" to save the changes when prompted

Author: Support
Last update: 2017-07-03 02:53
Q. How do I setup my internet connection in Windows XP?
A. Please follow the guide below to setup your connection ID and password from Rakuten Broadband Premium in your Windows XP machine.
NOTE - These instructions apply when you are connecting your computer directly to the NTT device. If you are using a router, please refer to the manufacturers guide to configure this device.
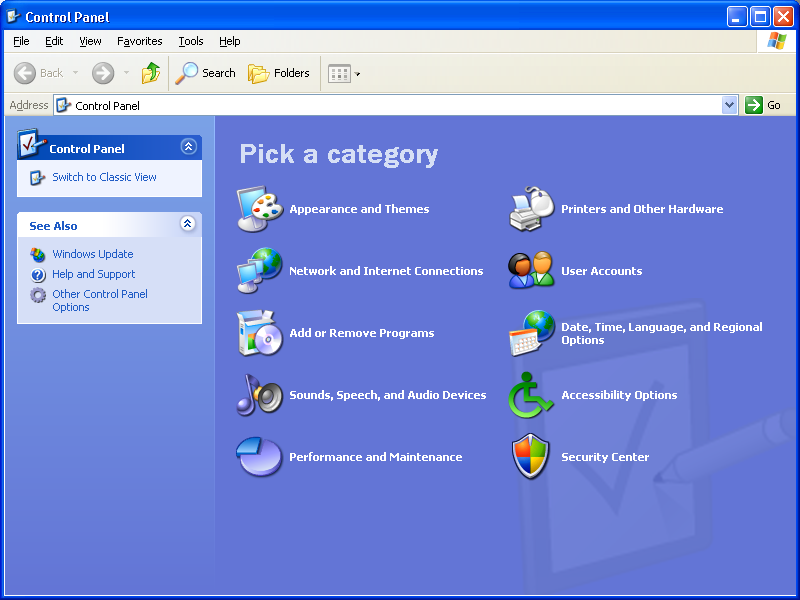
1. Click on the "Start Menu" and click on "Control Panel" here
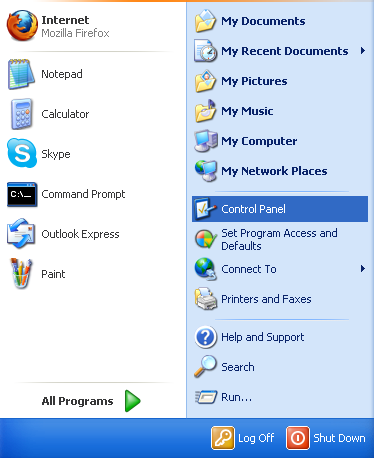
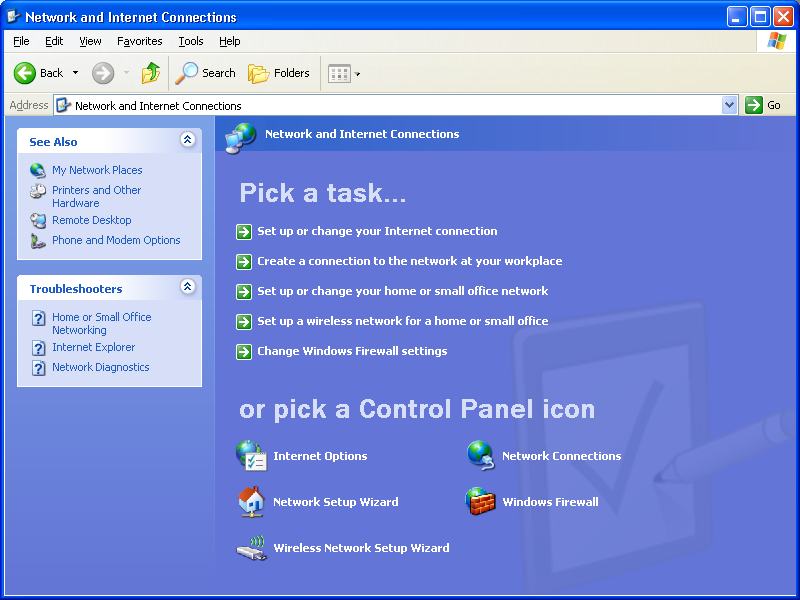
2. Click on "Network and Internet Connections" in the Control Panel
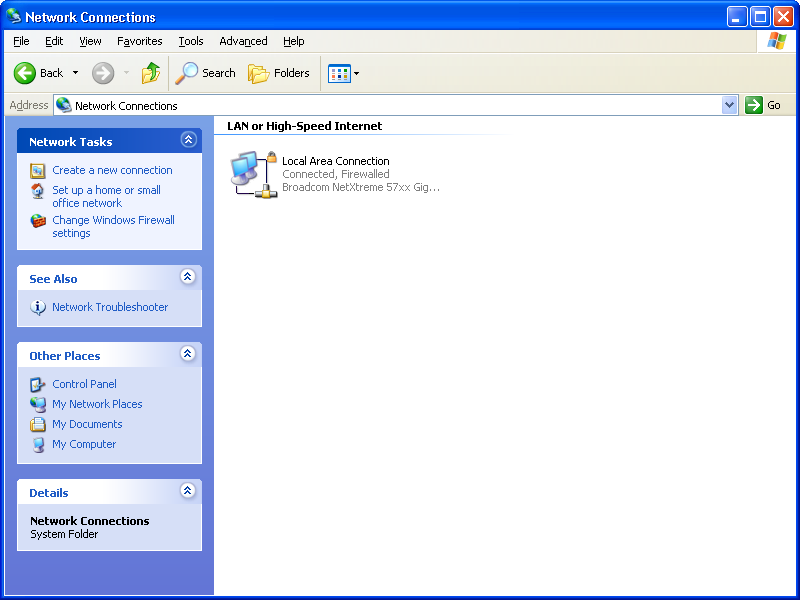
3. Click on "Network Connections"
4. Click on "Create a new connection"
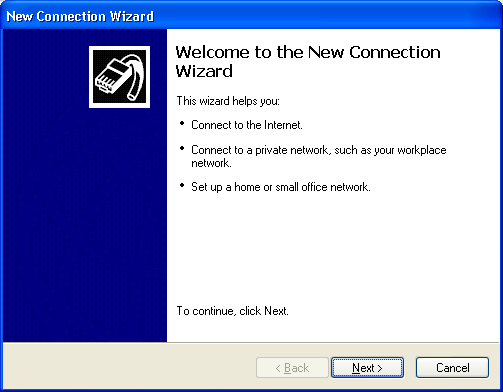
5. The New Connection Wizard will appear. Click "Next"
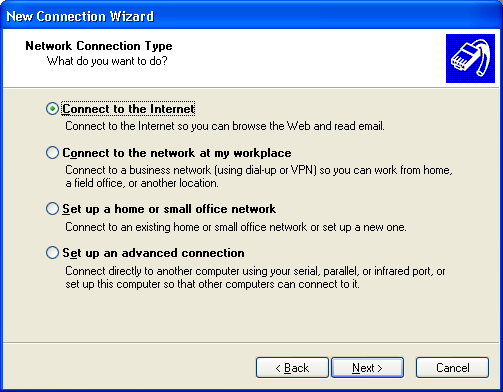
6. Select "Connect to the Internet" and then click "Next"
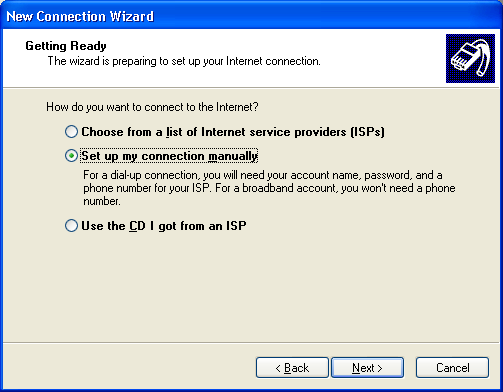
7. Select "Set up my connection manually" and then click "Next"
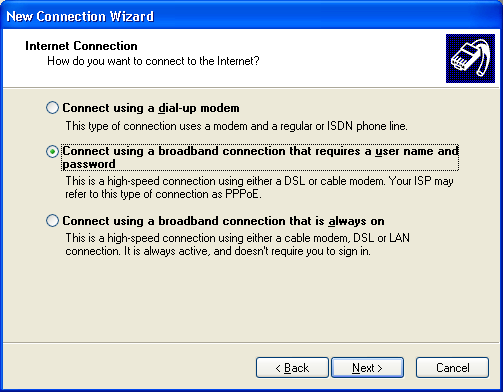
8. Select "Connect using a broadband connection that requires a user name and password" and then click "Next"
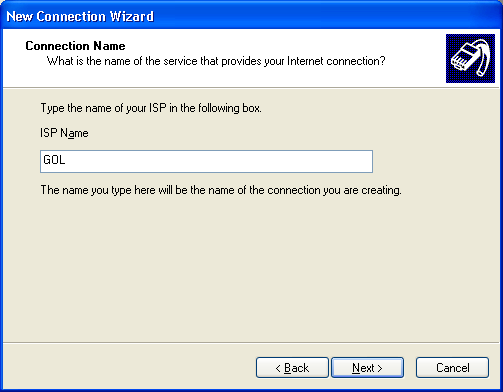
9. Enter a name for the new connection. We recommend something simple such as "GOL". Click "Next" once you have entered the name
10. Enter your connection ID and password from Rakuten Broadband Premium here. Depending on the service you are using, the connection ID should look like one of those listed below;
FLETS ADSL - user-id@adsl8.vips.gol.com
BFETS/FLETS NEXT Fiber Optic Mansion type - user-id@b-man.vips.gol.com
BFETS/FLETS NEXT Fiber Optic Family type -user-id@b-fam.vips.gol.com
NOTE - The connection ID and password is case sensitive. Please enter this exactly as shown on your documentation from us
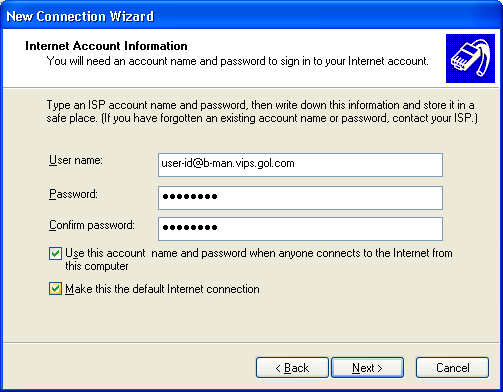
Once you have entered the "User name" and "Password", check the boxes at the bottom of the screen and then click "Next"
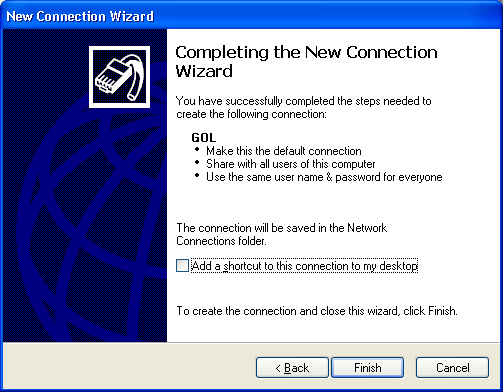
11.Click "Finish" to complete the connection setup
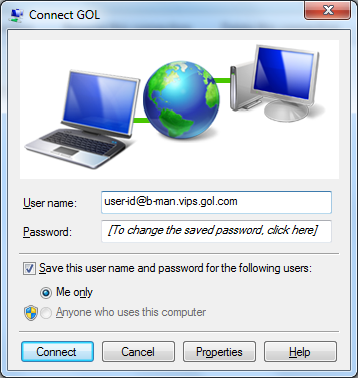
12. The "Connect GOL" screen will appear automatically after completing the connection wizard. Click the "Connect" button to establish the connection to the internet
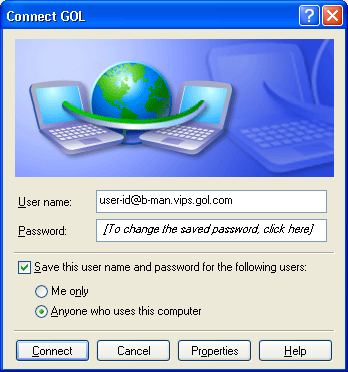
13. You should now be connected to the internet.
If you have any problems connecting, please refer to our other FAQs or contact us.
Author: Support
Last update: 2017-07-03 03:09
Q. How do I make changes to an existing internet connection in Windows XP?
A. Please follow the guide below to make changes to your connection setup in Windows XP. You may need to do this when you have changed the password on your account or have changed the service type (e.g. FLETS ADSL to BFLETS Mansion) on your account and need to enter the new connection ID.
NOTE - These instructions apply when you are connecting your computer
directly to the NTT device. If you are using a router, please refer to
the manufacturers guide to configure this device.
1. Click on the "Start Menu" and click on "Control Panel" here
2. Click on "Network and Internet Connections" in the Control Panel
3. Click on "Network Connections"
4. You should see the connection you have created previously listed here. In this case it has been named "GOL" and is referred to as a "WAN Miniport (PPPOE)" type connection. Double click on this icon.
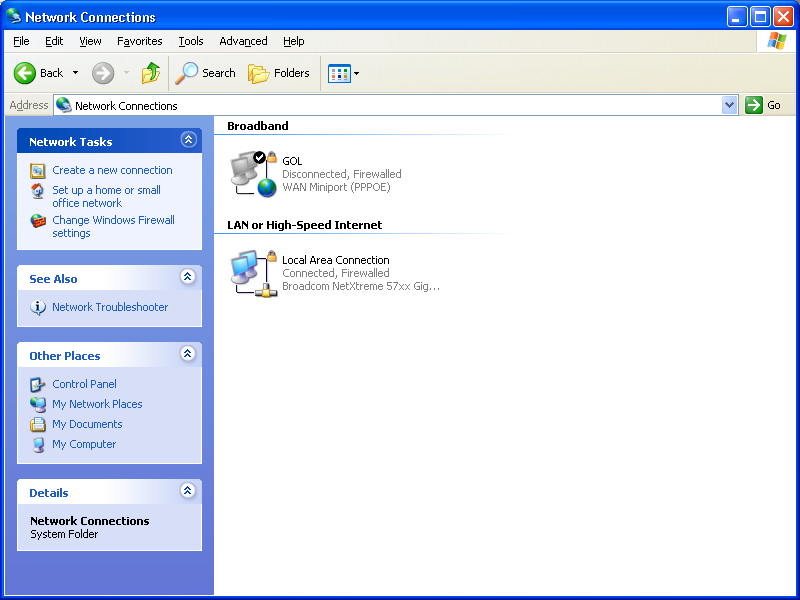
NOTE - If you do not see this icon, you will need to create a new connection. Instructions on how to do this can be found here
5. In the "Connect GOL" window you will see your connection ID in the "User name:" field and a box explaining "[To change the saved password, click here]". You can now either update your connection ID in the "User name:" field or change the saved password.
After you have made any changes, click on the "Connect" button to establish a connection. These changes will be saved and you should now be connected to the internet if the information you have entered is correct.
If you have any problems connecting, please refer to our other FAQs or contact us.
Author: Support
Last update: 2011-05-19 05:31
Q. What does error 678 in Windows XP mean?
A. This error appears when there is no connection to our PPPoE server
available. This is commonly caused by either a disabled account
with NTT or a faulty line or NTT device. Please contact NTT if you are receiving this error message to confirm the status of the account with them.
If the account is active and working with NTT, this error can occur when the computer is not connected directly to the NTT device and is connected to a router instead. If this is the case, please connect the cable to the NTT device directly and try connecting again.
If you continue to have receive this error message when trying to connect, please contact us
Author: Support
Last update: 2011-05-19 05:39
Q. What does error 691 in Windows XP mean?
A. This error appears when either the user name or password has been entered incorrectly. The only other instance in which this message appears is when the connection ID you have received from Rakuten Broadband Premium does not match the service type from NTT. For example, if you are using a Mansion type fiber optic service from NTT but have received a Family type connection ID from us. If this is the case, please contact us so that we can update the connection ID or go to the Members Station and make the change there
Author: Support
Last update: 2017-07-03 03:10
Q. How do I setup my internet connection in Windows Vista?
A. Please follow the guide below to setup your connection ID and password from Rakuten Broadband Premium in your Windows Vista machine.
NOTE - These instructions apply when you are connecting your computer directly to the NTT device. If you are using a router, please refer to the manufacturers guide to configure this device.
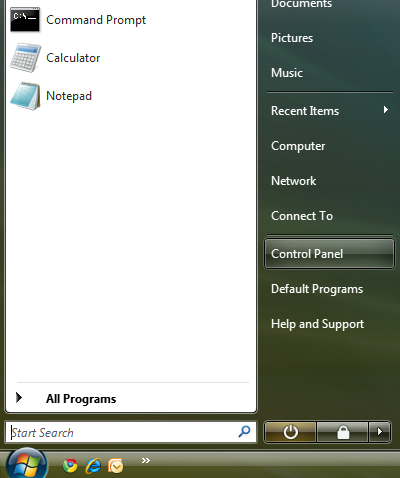
1. Click on the "Start Menu" and click on "Control Panel" here
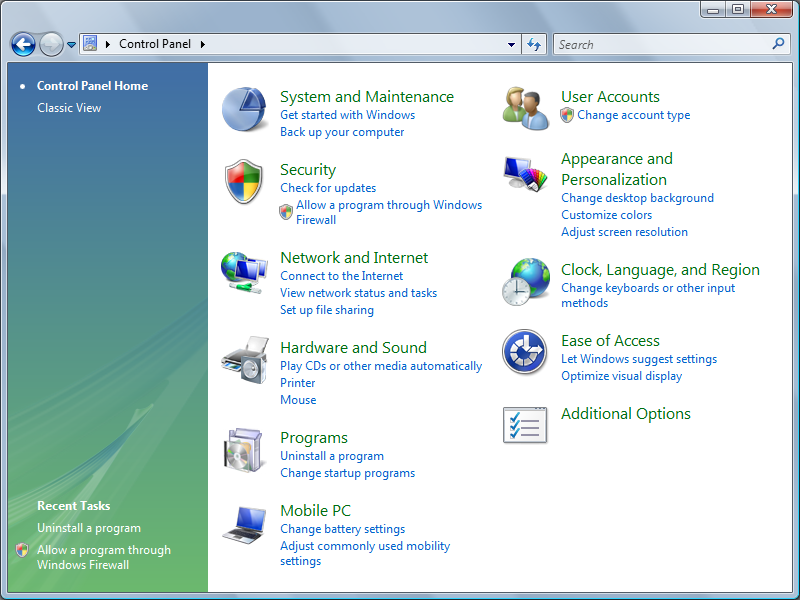
2. Click on "Network and Internet" in the Control Panel
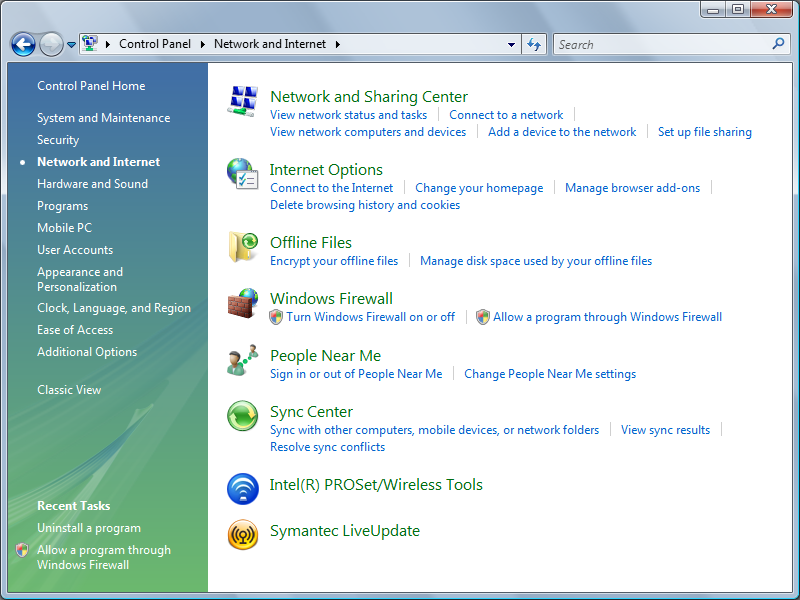
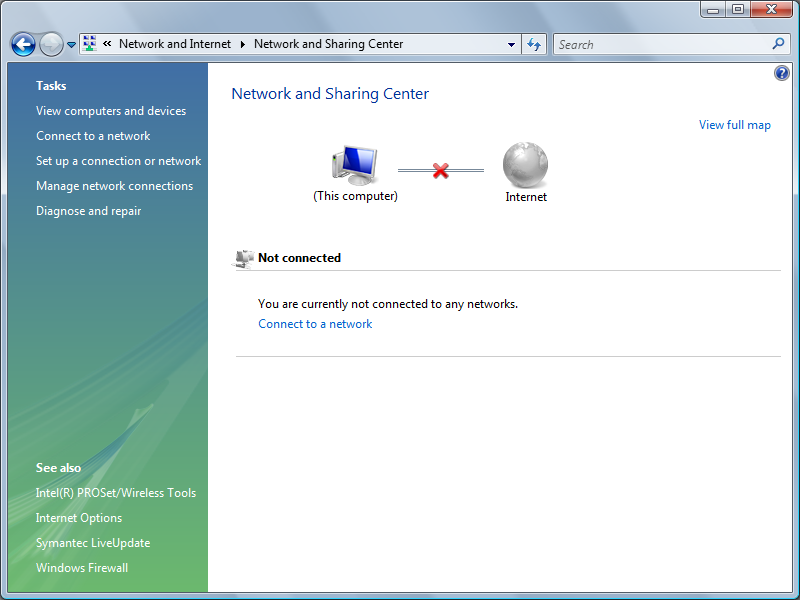
3. Click on "Network and Sharing Center"
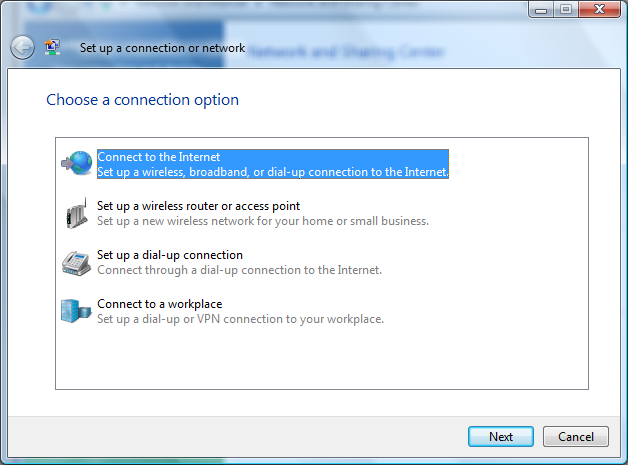
4. Click on "Set up a connection or network"
5. Select "Connect to the Internet" and then click "Next"
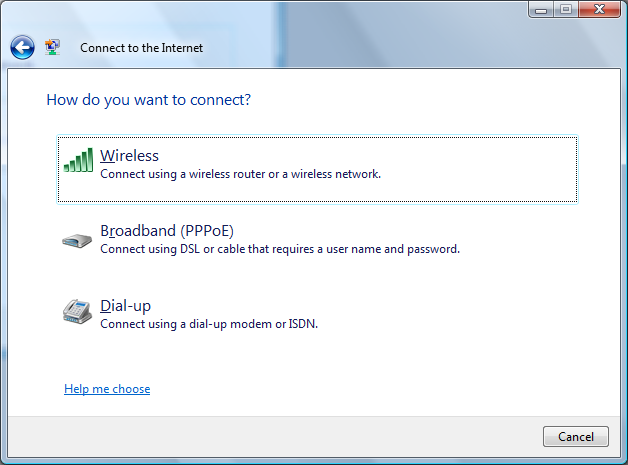
6.Click on "Broadband (PPPoE)"
7. Enter your connection ID and password from Rakuten Broadband Premium here. Depending on the service you are using, the connection ID should look like one of those listed below;
FLETS ADSL - user-id@adsl8.vips.gol.com
BFETS/FLETS NEXT Fiber Optic Mansion type - user-id@b-man.vips.gol.com
BFETS/FLETS NEXT Fiber Optic Family type -user-id@b-fam.vips.gol.com
NOTE - The connection ID and password is case sensitive. Please enter this exactly as shown on your documentation from us
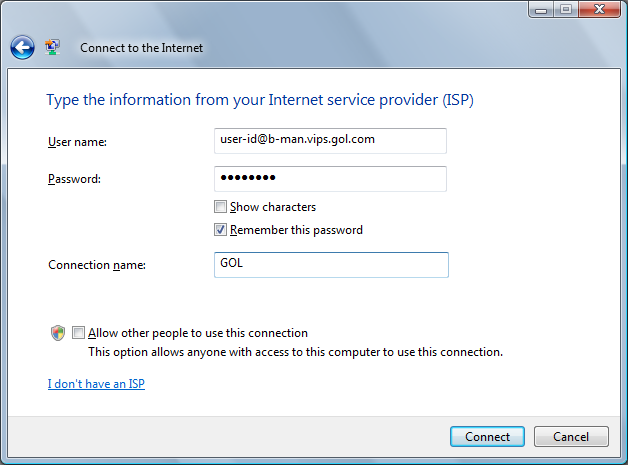
Once you have entered the "User name" and "Password", you can check "Show Characters" to make sure the password has been entered correctly and check "Remember this password" to save this. You can also enter a connection name and we recommend using something simple such as "GOL"
Click on "Connect" once all the information has been entered
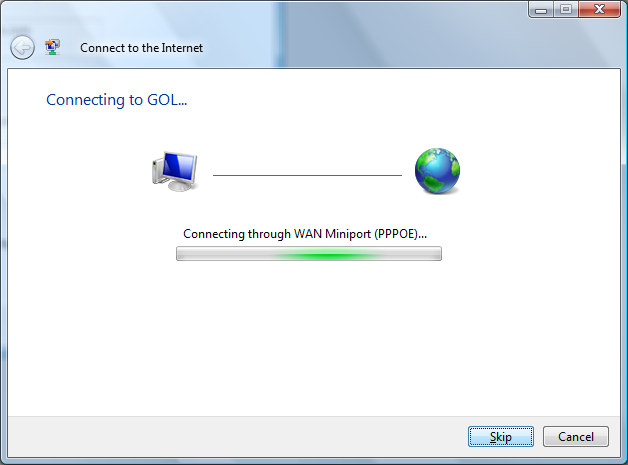
8. You will see a screen showing the connection progress
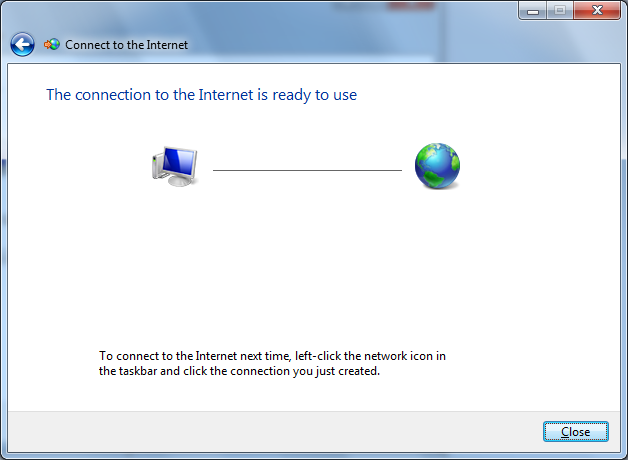
9. Once the connection has been established, you will see the following screen
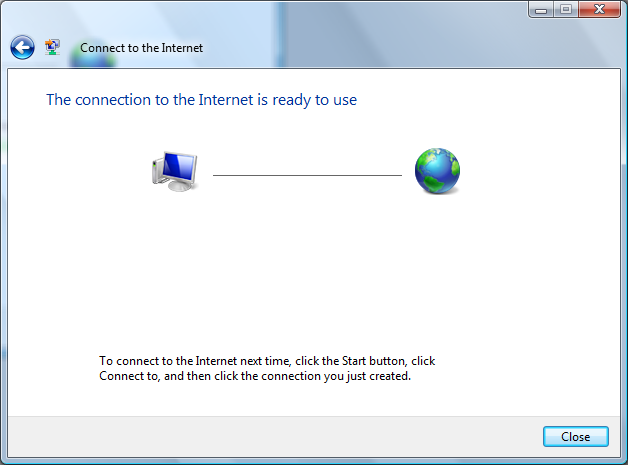
As per the message at the bottom of this screen, to connect to the internet next time, click the Start button, click Connect to, and then click the connection you just created
If you have any problems connecting, please refer to our other FAQs or contact us
Author: Support
Last update: 2017-07-03 03:11
Q. How do I make changes to an existing internet connection in Windows Vista?
A. Please follow the guide below to make changes to your connection
setup in Windows Vista. You may need to do this when you have changed the
password on your account or have changed the service type (e.g. FLETS
ADSL to BFLETS Mansion) on your account and need to enter the new
connection ID.
NOTE - These instructions apply when you are connecting your computer
directly to the NTT device. If you are using a router, please refer to
the manufacturers guide to configure this device.
1. Click on the "Start Menu" and click on "Control Panel" here
2. Click on "Network and Internet" in the Control Panel
3. Click on "Network and Sharing Center"
4. Click on "Manage network connections"
5. You should see the connection you have created previously listed here.
In this case it has been named "GOL" and is referred to as a "WAN
Miniport (PPPOE)" type connection. Double click on this icon.
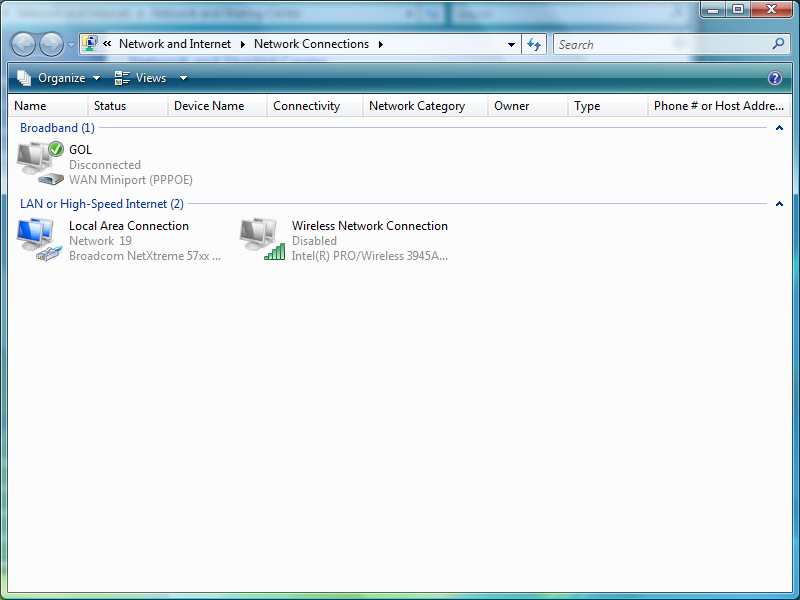
NOTE - If you do not see this icon, you will need to create a new connection. Instructions on how to do this can be found here
6. In the "Connect GOL" window you will see your connection ID in the "User
name:" field and a box explaining "[To change the saved password, click
here]". You can now either update your connection ID in the "User
name:" field or change the saved password.
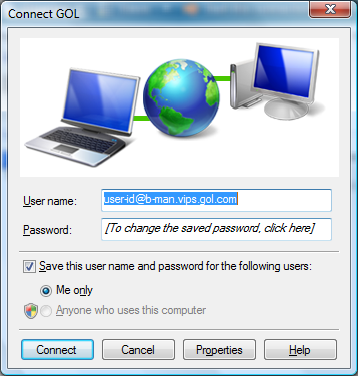
After you have made any changes, click on the "Connect" button to
establish a connection. These changes will be saved and you should now
be connected to the internet if the information you have entered is
correct.
If you have any problems connecting, please refer to our other FAQs or contact us.
Author: Support
Last update: 2011-05-20 06:01
Q. What does error 815 in Windows Vista mean?
A. This error appears when there is no connection to our PPPoE server
available. This is commonly caused by either a disabled account
with NTT or a faulty line or NTT device. Please contact NTT if you are receiving this error message to confirm the status of the account with them.
If
the account is active and working with NTT, this error can occur when
the computer is not connected directly to the NTT device and is
connected to a router instead. If this is the case, please connect the
cable to the NTT device directly and try connecting again.
If you continue to have receive this error message when trying to connect, please contact us
Author: Support
Last update: 2011-05-20 08:10
Q. What does error 691 in Windows Vista mean?
A. This error appears when either the user name or password has been entered incorrectly. The only other instance in which this message appears is when the connection ID you have received from Rakuten Broadband Premium does not match the service type from NTT. For example, if you are using a Mansion type fiber optic service from NTT but have received a Family type connection ID from us. If this is the case, please contact us so that we can update the connection ID or go to the Members Station and make the change there
Author: Support
Last update: 2017-07-03 03:12
Q. How do I setup my internet connection in Mac OS 10.4?
A. Please follow the guide below to setup your connection ID and password from Rakuten Broadband Premium in Mac OS 10.4.
NOTE - These instructions apply when you are connecting your computer directly to the NTT device. If you are using a router, please refer to the manufacturers guide to configure this device.
1. Click on the Apple Logo in the top left corner of the screen and click "System Preferences..." here
2. Click on "Network" in the Systems Preferences screen
3. Click on the "Location:" drop down menu and select "New Location..." here
4. Enter a name for the new location here. We recommend something simple such as "GOL". Click "OK" once the name has been entered
5. The "Location" field should now read "GOL". Make sure "Built-in Ethernet" has been selected in the "Show:" drop down menu box and then click on the "PPPoE" tab
Check the option "Connect using PPPoE"
Next, enter your connection ID from Rakuten Broadband Premium in the "Account Name:" field. Depending on the service you are using, the connection ID should look like one of those listed below;
FLETS ADSL - user-id@adsl8.vips.gol.com
BFETS/FLETS NEXT Fiber Optic Mansion type - user-id@b-man.vips.gol.com
BFETS/FLETS NEXT Fiber Optic Family type -user-id@b-fam.vips.gol.com
Next, enter the password you received from Rakuten Broadband Premium in the "Password:" field.
NOTE - The connection ID and password is case sensitive. Please enter this exactly as shown on your documentation from us
Check the option to "Save password" and then click on the "PPPoE Options..." button
6. You should now see the following screen
Make sure you have the following options checked here;
- Connect automatically when starting TCP/IP applications - Checked
- Send PPP echo packets - Checked
- Use verbose logging - Not checked
The other options on this screen are optional. Once you have selected what settings you would like to check, click the "OK" button
7. Click "Apply Now" to save the changes.
You can now close the "Network" window
8. At this point, you should be able to open a web browser such as Safari and connect to the internet. If you are unable to do so, the settings inside the "Internet Connect" application may also need to be updated.
Click on the "Finder" in the "Dock" at the bottom of the screen
9. Click on "Applications"

10. Double click the "Internet Connect" icon here. If you cannot see the "Internet Connect" icon in the "Applications" folder, open the "Utilities" folder and you should see this icon here.
11. In the "Internet Connect" screen, make sure the option "Built-in Ethernet" has been selected from the "Configuration:" drop down menu box and that your connection ID and password is shown here.
Click the "Connect" button here and you should now be able to connect to the internet. You should now be able to connect automatically in the future as well by simply opening your web browser.
If you have any problems connecting, please refer to our other FAQs or contact us.
Author: Support
Last update: 2017-07-03 03:20
Q. How do I make changes to an existing internet connection in Mac OS 10.4?
A. Please follow the guide below to make changes to your connection
setup in Mac OS 10.4. You may need to do this when you have changed the
password on your account or have changed the service type (e.g. FLETS
ADSL to BFLETS Mansion) on your account and need to enter the new
connection ID.
NOTE - These instructions apply when you are connecting your computer
directly to the NTT device. If you are using a router, please refer to
the manufacturers guide to configure this device.
1. Click on the Apple Logo in the top left corner of the screen and click "System Preferences..." here
2. Click on "Network" in the Systems Preferences screen
3. Select the "PPPoE" tab and you should see your current connection settings
You can now either update your connection ID in the "Account name:" field or change the saved password. Once you have made any required changes, click the "Apply Now" button in the bottom right hand corner to save the settings.
If you have any problems connecting, please refer to our other FAQs or contact us.
Author: Support
Last update: 2011-06-21 09:37
Q. What does the "Cannot find PPPoE server" error in Mac OS 10.4 mean?
A. This error appears when there is no connection to our PPPoE server
available. This is commonly caused by either a disabled account
with NTT or a faulty line or NTT device. Please contact NTT if you are receiving this error message to confirm the status of the account with them.
If
the account is active and working with NTT, this error can occur when
the computer is not connected directly to the NTT device and is
connected to a router instead. If this is the case, please connect the
cable to the NTT device directly and try connecting again.
If you continue to have receive this error message when trying to connect, please contact us
Author: Support
Last update: 2011-06-22 09:59
Q. What does the "Authentication failed" error in Mac OS 10.4 mean?
A. This error appears when either the user name or password has been entered incorrectly. The only other instance in which this message appears is when the connection ID you have received from Rakuten Broadband Premium does not match the service type from NTT. For example, if you are using a Mansion type fiber optic service from NTT but have received a Family type connection ID from us. If this is the case, please contact us so that we can update the connection ID or go to the Members Station and make the change there
Author: Support
Last update: 2017-07-03 03:21
Q. How do I setup my account in Thunderbird 2?
A. Step 1. Create a new profile
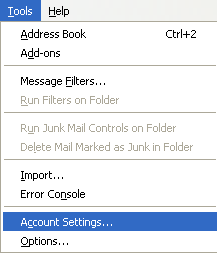
1. Open Thunderbird 2 and click on "Tools" and then "Account Settings..." here
(If you already have an account setup, continue on to "Step 2. Configuring/Modifying SMTP (outgoing mail) server.")
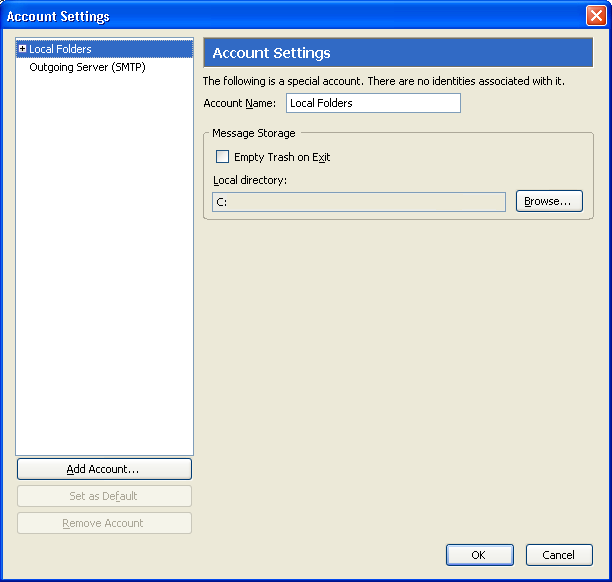
2. Click on "Add Account..." in the bottom left corner of the screen
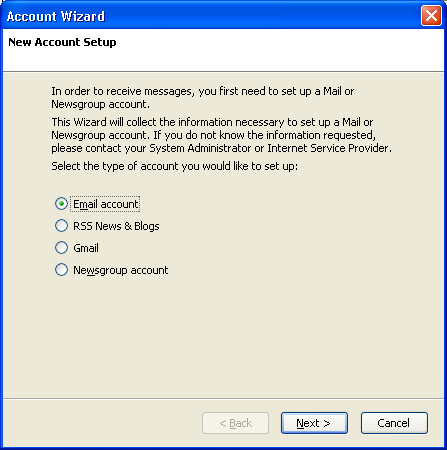
3. Select "Email account" and then click "Next"
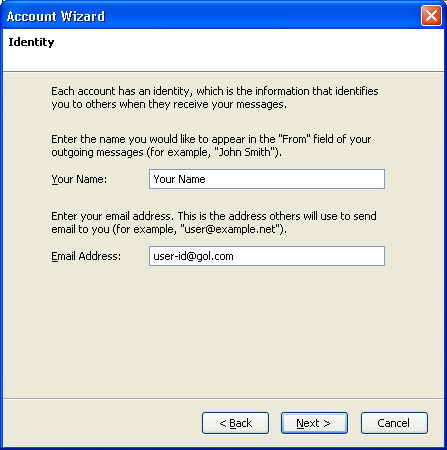
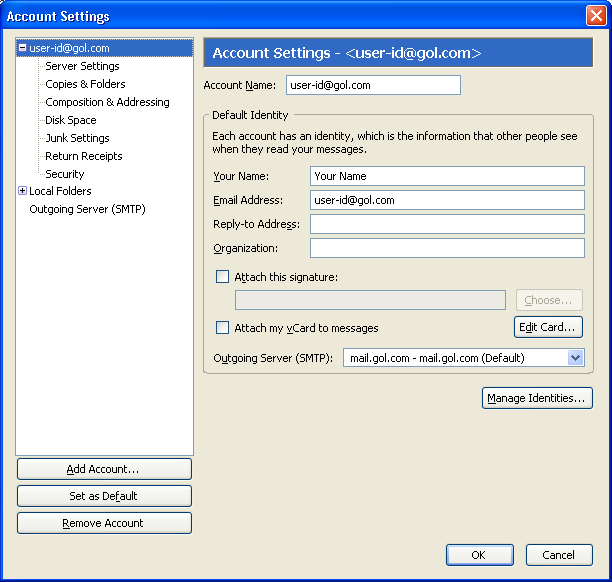
4. Enter your account information here;
Your name: Enter your name here
Email Address: Enter your email address
Click "Next" once this information has been entered
5. Select "POP" as the account type here and then enter the incoming mail server;
Incoming Server: popmail.gol.com
The option "Use Global Inbox" is up to you. Once you have entered the information here, click "Next"

NOTE - Please see this FAQ page to see the difference between a POP and IMAP type account
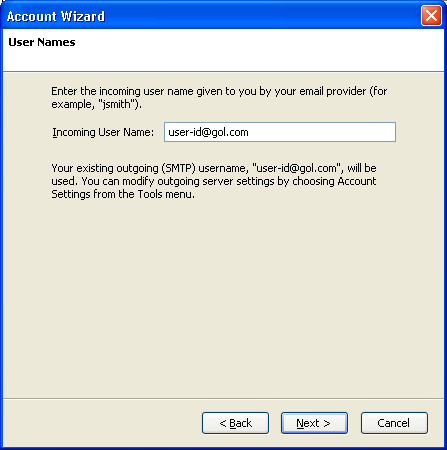
6. Enter your email address here and then click "Next"
Incoming User Name: user-id@gol.com
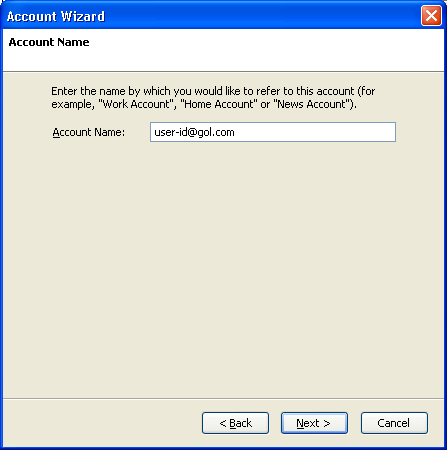
7. You can enter any name here to refer to the account. For simplicity, we have entered the email address again
Account Name: user-id@gol.com
Click "Next" once you have entered an account name
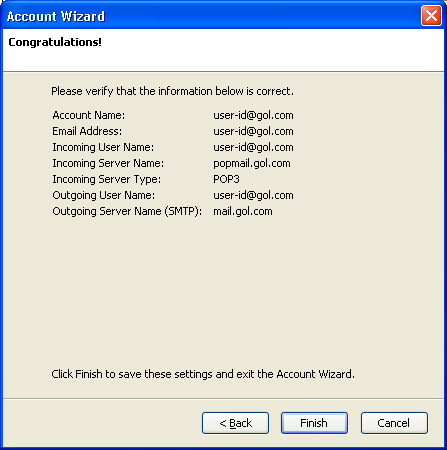
8. You should now see a summary of the account settings. Click "Finish" here
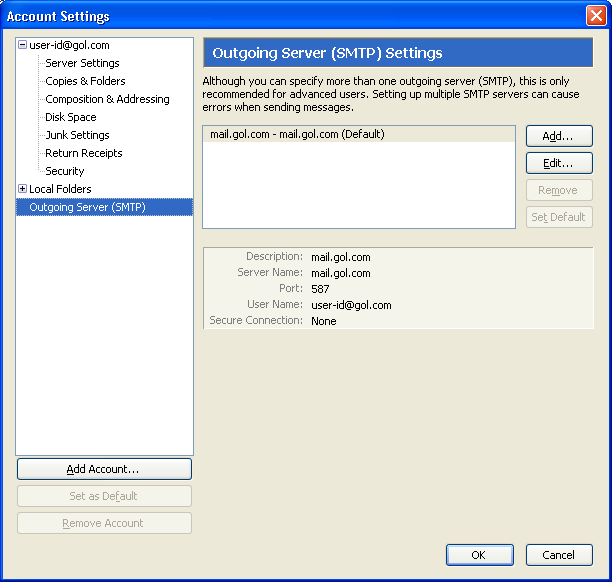
Step 2. Configuring/Modifying SMTP (outgoing mail) server
1. After creating the account in Step 1, you should be returned to the Account Settings window. If you are not returned to this screen or need to access it again, click on "Tools" and then "Account Settings..." in Thunderbird
2. You should now see your account listed in the left hand side menu. Select "Outgoing Server (SMTP)" here
3. Select the mail.gol.com server on the right hand side of the screen and click the "Edit..." button
4. Please make sure you have the following settings here;
Description: mail.gol.com
Server name: mail.gol.com
Port: 587
Use name and password: Checked
User name: Enter your email address
Use secure authentication: No
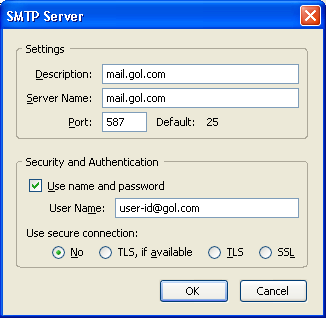
Once you have checked these settings, click "OK". You will be returned to the Account Settings screen and you can click "OK" again here to close this screen
You should now be able to send and receive email in Thunderbird 2. If you have any problems sending or receiving mail after confirming the settings you have are correct, please refer to our other FAQs or contact us
Author: Support
Last update: 2017-07-03 02:59
Internet Services
Q. Can you provide a list of all services that Rakuten Broadband Premium offer?
A. The following is a list of the service we can provide;
1. Fiber Optics
Rakuten Broadband Premium can provide connections IDs to be used in conjunction with any FLETS service provided by NTT;
NTT East - FLETS Hikari Next, FLETS Hikari Next High Speed Type, FLETS Hikari Light
NTT West - FLETS Hikari Premium, FLETS Hikari Next, FLETS Hikari Super High Speed Type (Hayabusa)
Please refer to this page for a full breakdown of costs for this service
2. ADSL
Rakuten Broadband Premium can provide connections IDs to be used in conjunctions with the FLETS ADSL service offered by NTT East and NTT West. There are 2 different types of FLETS ADSL service provided by NTT
Type 1 - The ADSL signal runs over a phone line and so requires a land line to be installed in your home
Type 2 - A phone line is not required for this ADSL service but is often not recommended as it can involve expensive initial setup fees
Please refer to this page for a full breakdown of costs for this service
3. Static IP (Fiber Optics and ADSL)
If you require a static IP address or several static IP addresses, Rakuten Broadband Premium can provide this service. The static IP service includes free reverse DNS and we can also provide forward DNS for an additional cost of 5,250yen per year (inc. tax)
4. Web Hosting
Rakuten Broadband Premium currently provides 3 different Web Hosting Packages. For a side-by-side comparision of the 3 different packages we offer, please check our site here
5. Domain Name Registration
Rakuten Broadband Premium can currently register the following domain names; .com, .net, .info, .org, .cc, .tv, .de, .jp, .co.jp, .gr.jp, .ne.jp, .or.jp, .ac.jp
6. IP Phone
Rakuten Broadband Premium can provide an IP phone service in conjunction with our internet service. Unfortunately, we cannot provide IP phone services to users who are not using our internet service as well
7. Optional Services (Applied for via the Members Station)
Mail Plus - Increased mailbox size (@gol.com account)
Advanced SPAM Filter - Reduce the amount of spam mail you receive (@gol.com account)
Virus Filter - Block mail carrying attachments containing viruses (@gol.com account)
Additional Mailbox - Create an additional mailbox to use (@gol.com account)
Alias - Create an alias for your main email account (@gol.com account)
8. Other services
We can provide other services such as IP-PBX, B2BUA and more but with limited English support. If you are interested in these services, please feel free to contact us for more information
Author: Support
Last update: 2017-07-03 03:38
Q. What services are available and what are the monthly charges for an internet service with Rakuten Broadband Premium and NTT?
A. Rakuten Broadband Premium can provide Fiber Optic and ADSL services across Japan when used in conjunction with an NTT line. The types of service NTT provides along with the charge for the connection ID for this service from Rakuten Broadband Premium can be found below;
FLETS Hikari (Fiber Optic) Mansion and Family Type Services;
Rakuten Broadband Premium Monthly Charge - 1,780yen excluding tax
Rakuten Broadband Premium Initial Account Setup Fee - 2,000yen excluding tax
NOTE - The initial fee is waived if you apply online, apply with a credit card or have an account with us already
NTT Monthly and Initial Charge - This will vary depending on the exact line that is installed, the construction work required and any campaigns that NTT are currently running. Please contact NTT directly for more information.
FLETS ADSL Service;
Rakuten Broadband Premium Monthly Charge - 1,230yen excluding tax
Rakuten Broadband Premium Initial Account Setup Fee - 2,000yen excluding tax
NOTE - The initial fee is waived if you apply online, apply with a credit card or have an account with us already
NTT Monthly and Initial Charge - This will vary depending on any construction work that is required to install the line and any campaigns that NTT are currently running. Please contact NTT directly for more information.
NOTE - In order to use the FLETS ADSL service from NTT, a land line (Type 1 ADSL) will need to be provided to your home by NTT as well. If you do not currently have a land line, one can be provided by NTT but there is an additional charge for this. Please contact NTT for further details.
In some rare cases, an ADSL service can be used without a land line (dependent on location) and this is known as a Type 2 FLETS ADSL line. Please contact NTT directly if you are interested in using this service as there can be significant installation charges for Type 2 ADSL lines.
If you have any questions about the charges for these services, please feel free to contact us
Author: Support
Last update: 2017-07-03 03:40
Q. Is there a minimum contract period for a service with Rakuten Broadband Premium?
A. There is currently no minimum contract period for any service with Rakuten Broadband Premium.
If you are going to be using an internet service though, it should be noted that NTT do have a minimum contract period for their services and in order to confirm what this is, please contact them directly.
Author: Support
Last update: 2017-07-03 03:41
Q. What are the differences between the Mansion type and Family type fiber optic services provided by NTT?
A. NTT East and NTT West can, in most cases, provide either a Mansion or Family type fiber optic service to your home. The type of service they provide depends on the location and the differences are as follows;
Mansion type fiber optic service (NTT East and NTT West)
The Mansion type fiber optic services are provided to apartment buildings where the apartment/building owner has agreed to let NTT provide fiber optic services there. NTT will provide a 100/200Mbps or 1Gbps (NTT West only) line to the building itself which is then shared between apartments in the building via a local conduit. The more apartments there are in the building, the lower the cost of the service as it is shared between more users. There are currently 3 different Mansion plans that NTT will provide;
Mini - Available when 4 or more users from a building are expected to sign-up
Plan 1 - Available when 8 or more users from a building are expected to sign-up
Plan 2 - Available when 16 or more users from a building are expected to sign-up
There are also 3 possible ways that NTT will distribute the service in the apartment building. The type of wiring system used depends on the building architecture and the 3 different types are as follows;
Optical Wiring System - System that uses an optical fiber to connect to each residence
VDSL System - A system that uses existing phone lines to connect to each residence
LAN Wiring System - A system that uses existing LAN wiring within a building
Family type fiber optic service (NTT East and NTT West)
The Family type fiber optic service is provided when the Mansion type service is not available* or when you are living in a house and not an apartment.
*For example, you are living in a apartment building with 4 or less units, no network infrastructure for the Mansion service, etc.
The Family type service is similar to the Mansion type service in that a 100/200Mbps line is provided to a local conduit and up to 4 houses or other domiciles are connected to this conduit. As a result of this, the line is shared between less people and tends to provide more bandwidth when compared to the Mansion type service. However, this is reflected in the increased cost from NTT for the service.
Author: Support
Last update: 2014-02-07 08:29
Q. What are the differences between the Hikari FLETS Fiber Optic services?
A. NTT
East and NTT West both provide a variety of different Hikari Flets (Fiber Optic)
services. Here is a breakdown of what each service offers and the differences
between them
Please
note, the information below refers to both the Family type and Mansion type
Hikari FLETS services from NTT. Please refer to the FAQ page here for a
description of the difference between Family and Mansion type services.
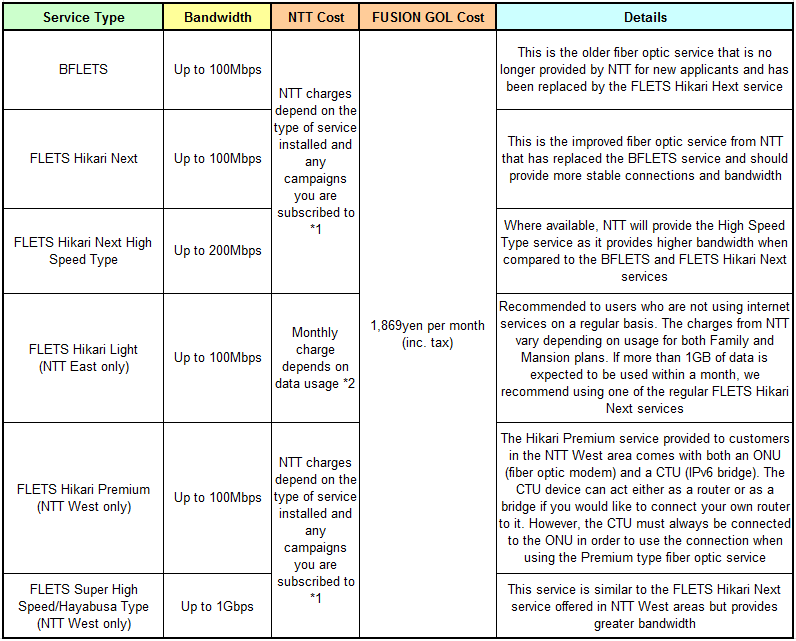
*1 Please
contact NTT directly to confirm the monthly charge for the service
*2 Please
refer to the NTT site here for a more detailed description of the varying cost
of this service (Japanese)
Author: Support
Last update: 2014-02-07 08:46
Q. How do I apply for a service with Rakuten Broadband Premium?
A. If you do not currently have an account with Rakuten Broadband Premium or an internet connection in Japan and would like to setup an account and internet connection at your home, please refer to the information below
Fiber Optic Services* (100Mbps, 200Mbps and 1Gbps)
In order to apply for a Fiber Optic type internet connection with Rakuten Broadband Premium, please contact us by phone or email or apply online and be ready to provide the following information;
- Name
- Address
- Contact phone number
- Contact email address
- Fiber optic line installation date
- Preferred payment method (Payment slip, credit card or direct debit)
*There are several Fiber Optic services available from NTT and you can compare the differences and costs between these types of services here and here
In order to arrange the installation** of a line and modem with NTT, you will need to contact NTT and provide the information above and the following to them;
- Building owner contact information (where applicable)
- ID card, Drivers Licence, Passport, etc.
- Preferred installation days and time period (Any day is available, morning or afternoon)
You can find the number you need to contact NTT for your area here
**The online application we provide does include a section for applying to NTT on your behalf. It is possible to do this but it can sometimes take up to a month to arrange an installation date. Contacting NTT directly will usually get you an installation date within 2 weeks depending on your schedule
Once the installation date and time has been set and NTT have confirmed what service they are going to be installing, the account here at Rakuten Broadband Premium can be setup and you will receive a copy of your connection ID and password by postal mail before the NTT line is installed
Once NTT have completed the installation, you can then setup your internet connection. Our FAQ site here provides connection setup instructions for Windows, Mac and some routers.
The Rakuten Broadband Premium service also provides an email account to you. If you would like to use this email account, please refer to the site here for instructions on how to set this up in your email software.
ADSL Services (Up to 47Mbps)
In order to apply for an ADSL type internet connection***, you will need to contact NTT to arrange the installation of a phone line, ADSL line and modem. You can find the contact information for NTT in your area here
***In most cases, the cost of an ADSL type line is only slightly cheaper than a Fiber Optic line when taking the cost of a phone line into consideration. We usually recommend using Fiber Optic services for this reason and the fact that ADSL signals can vary in strength and stability depending on your location, i.e. the distance from your home to the closest NTT exchange point can greatly affect bandwidth due to signal degradation over long distances
Once you have arranged the installation of the ADSL line with NTT, please contact us by phone or email or apply online and provide the following information
- Name
- Address
- Contact phone number
- Contact email address
- ADSL line Installation date
- Preferred payment method (Payment slip, credit card or direct debit)
Once we have received this information, the account here at Rakuten Broadband Premium will be setup and you will receive a copy of your connection ID and password by postal mail before the NTT line is installed.
Once NTT have completed the installation, you can then setup your internet connection. Our FAQ site here provides connection setup instructions for Windows, Mac and some routers.
The Rakuten Broadband Premium service also provides an email account to you. If you would like to use this email account, please refer to the site here for instructions on how to set this up in your email software.
If you have already arranged for the installation of a Fiber Optic or ADSL line with NTT and just require a provider in order to use the service, please contact us by phone or email and provide the following information
- Name
- Address
- Contact phone number
- Contact email address
- Preferred contact method
- Line Installation date
- Service type (Fiber Optic Mansion type, Fiber Optic Family type or ADSL)
- Preferred payment method (Payment slip, credit card or direct debit)
If you have a credit card, you can also apply for an account with Rakuten Broadband Premium online
If you have any questions about using an internet service with Rakuten Broadband Premium and NTT, please do not hesitate to contact us
Author: Support
Last update: 2017-07-03 03:44
Internet Connection Setup
111@111.com
This entry is in revision and can not be displayed.Author: 111@111.com
Last update: 2023-04-21 08:29
Web Hosting Package
Q. How do I connect to the Web Hosting Package server via FTP?
A. In order to connect to the server via FTP, the first thing you will need to do is make sure that you have an FTP account setup in the Subscriber Control Panel (SCP). You can do this by;
1. Browsing to the SCP
2. Log in with your Subscriber ID and password
3. Select "Site Manager" and then "FTP Manager" in the control panel
4. Check to see if an account is setup:
- If there isn't an account listed here, click on "Add New" to create a new FTP account.
- If there is an account listed here but you can't remember the password for it, you can change this now by clicking on the "Edit" button under "Change Password"
If you cannot remember your Subscriber ID or password, please contact us.
Once you have your FTP account setup, you will need to use an FTP client to connect to the server. If you do not have an FTP client already, we can recommend that you use FileZilla which can be downloaded for free here.
You can now connect to the Web Hosting Package server by using the following information;
1. Host name/Server name - ftp.your-domain-name.com*
2. User name - Created in the Control Panel (e.g. user-name@your-domain-name.com)
3. Password - Specified in the Control Panel
4. Port Number - Depending on the FTP client you are using, you may need to specify this. In this case, please use port 21

*If your-domain-name.com is not currently pointing to our DNS servers (dns01.whp-gol.com/dns02.whp-gol.com), you can still connect to the server via FTP by using the web server name. This server is web0xx.whp-gol.com, where xx is the number of the server your site is hosted on, e.g. 01. You can check the number of the server in the FTP Manager or Site Summary in the Control Panel.
Once you have entered this information into your FTP client, you should now be able to connect to the server and upload your web site data. This should be uploaded into the "public_html" folder or the "www" folder, depending on the Web Hosting Package you are using. By default, the FTP account created in the Control Panel will upload data to the correct directory but if you modified the "Path" entry when you created the account you may need to browse to "public_html" or "www" yourself.
The first file loaded when browsing to www.your-domain-name.com is the one named index.html/index.php/index.(file extension) in the "public_html" directory. Please make sure you have a file named index uploaded on the server and make sure to delete or rename the index.htm file that is on the server the first time you connect to it via FTP. This file is the "Welcome" page that is put on to the server by default.
If you have any problems connecting to the server via FTP or have any questions about it, please feel free to contact us.
Author: Support
Last update: 2011-08-22 07:00
Q. What are the settings I need to use to setup my Web Hosting Package email account?
A. If you are using the Web Hosting Package service with your domain name, you can use the following information to setup your email account.
Please note, if you have not created any email accounts in the Subscriber Control Panel already, please do this first. You can find more information on how to do this here.
Incoming mail server - mail.your-domain-name.com
Incoming mail user name - username@your-domain-name.com
Incoming mail password - Your email account password (Setup inside of the Subscriber Control Panel)
Incoming mail SSL - Off or On (We usually recommend turning this off first to check you can receive email)
Incoming mail port number
POP - 110 or 995 when using SSL (Usually updated automatically by the email client)
IMAP - 143 or 993 when using SSL (Usually updated automatically by the email client)
Outgoing mail server - mail.your-domain-name.com
Outgoing mail user name - username@your-domain-name.com
Outgoing mail password - Your email account password (Setup inside of the Subscriber Control Panel)
Outgoing mail SSL - Off
Outgoing mail port number - 587
Depending on your email client, you will need to make sure that
authentication is setup when you are sending mail. The server confirms
you are an authentic user based on your user name and your password so if you are unable to send email,
please check the authentication settings for outgoing mail in your email
client.
Author: Support
Last update: 2011-06-28 05:05
Q. How do I create an email account with my Web Hosting Package service?
A. Once you have received your Web Hosting Package account information from us, you will be able to access the Subscriber Control Panel. After logging into the control panel, click on the "Mail Manager" link here and a new window will open. Once this has loaded, click on "Edit E-mail Address" to see all of the current email accounts setup, to create new email accounts and to make changes to existing accounts.
In order to create a new email account, click on the "Add New" button in this window and then add the address and information you want to use here. Once you have completed the required fields, click on the "Save" button to create the email account.
Once you have created the account in the "Mail Manager", you can setup your email client to send and receive email using this account. You can find more information on how to do this here
You can also use the "Mail Manager" to change the password for your email address, setup mail forwarding and setup auto-responders for individual accounts. You can do this by clicking on the "Edit" button to the right of an account you have already created.
Author: Support
Last update: 2017-07-03 02:36
Domain Name Registration
Q. How do I register a new domain name with Rakuten Communications?
A. In order to register a domain name with us, please complete our Domain Name Registration application form and return this to us by email, fax or by post. If you do return the form to us by fax, please contact us so that we can confirm receipt of this
The cost to register any domain name with us is 15,000yen per year (excluding tax) unless you are using it in conjunction with our Web Hosting Package. In this case, the domain name is free for the first year and then the charge to renew the domain name each year is 5,000yen (excluding tax)
The Domain Name Registration service also includes the option to use our name servers and setup a custom zone file with A, MX, CNAME records, subdomains, etc. Unfortunately, we do not have a control panel for our users to customize the zone file themselves so if you do want to do this, please contact us directly by email so that we can ensure no mistakes are made with the records you wish to use
Some domain names will require additional documentation before they can be registered as well. Please see the table below for a breakdown of the requirements and limitations for different domain names;

If you do want to register a .xx.jp domain name and are not sure of what documentation to provide with the domain name application, please contact us
Author: Support
Last update: 2017-07-03 02:30
Q. How do I transfer control of a domain name to Rakuten Communications?
A. Depending on the domain name and the current domain registrar, there are several different ways to transfer control of a domain name to Rakuten Communications. The basic process is as follows;
1. Contact us and inform us that you would like to transfer control of your domain name to us. We will then ask you to complete an application for the registration of the domain name or a Web Hosting Package if you are planning on using this in conjunction with the domain name
2. Contact your current domain registrar and explain that you would like to transfer control of the domain name away from them. At this point, they may ask you to complete some form of documentation or login to a Control Panel to authorize any transfer request that is received
If you are not sure who your current domain registrar is, you can normally find this out by doing a WHOIS lookup. If you are using a .xx.jp domain and cannot find this information on the JPRS site, please either contact JPRS or us and we can try to confirm this for you
3. After we have received your application for the Domain Name registration or Web Hosting Package service, we will send a domain transfer request to your current registrar. They will then either authorize the transfer, ask you to authorize the transfer via a Control Panel or will provide an authorization code to provide to us.
Once the transfer process has been initialized, it will usually take 1-3 days to complete
If you have any questions or concerns about the domain transfer process, please feel free to contact us
Author: Support
Last update: 2017-07-03 02:33
Q. How do I transfer control of a domain name away from Rakuten Communications?
A. Depending on the domain name and the domain registrar you would like to transfer control of the domain name to, there are several different ways to complete the transfer. The basic process is as follows;
1. Contact the new domain registrar and explain that you would like to transfer control of the domain name away from us and to them. At this point, they should ask you to complete some form of application to start this process
2. Contact us and inform us that you would like to transfer control of your domain name to another registrar. We will then ask you to complete a cancellation form to cancel the service and transfer the domain. Once we have received the completed cancellation form, we will either;
- Send an authorization code to the contact email address registered with this domain (Noted in the WHOIS)
- Release the domain name to the new registrar upon receiving their request
The action taken by Rakuten Communications depends on the type of domain name being transferred. For example, when transferring a .com domain, an authorization code will be sent out by email and this should then be provided to the new domain registrar. When transferring a .xx.jp domain, the domain will simply be released to the new domain registrar, noted on the cancellation form, once we receive their transfer request
3. Once the transfer process has begun, initilalized either by submitting the authorization code to the new registrar or receiving their transfer request, it will usually take 1-3 days to complete
If you have any questions or concerns about the domain transfer process, please feel free to contact us
Author: Support
Last update: 2017-07-03 02:35
Email » Mail Server Settings
Q. What are the settings I need to use to setup my email account?
A. If you cannot find the instructions for your specific email client on our FAQ site or just want to check the settings you need to use to be able to send and receive email with your @gol.com account, please refer to the following information;
Incoming mail server name - popmail.gol.com (for POP or IMAP)
Incoming mail user name - username@gol.com
Incoming mail password - Your Rakuten Broadband Premium account password
Incoming mail server security (SSL/TLS) - On
Incoming mail port number - POP (995), IMAP (993)
NOTE: If you are unable to connect to the server and receive email with SSL/TLS turned on, we would suggest checking any anti-virus software settings that are blocking the connection.
It is also possible to connect to the server using POP/IMAP ports of 110/143 but we highly recommend using STARTTLS if you are planning to do this to secure the connection to the server.
Outgoing mail server name - mail.gol.com
Outgoing mail user name - username@gol.com
Outgoing mail password - Your Rakuten Broadband Premium account password
Outgoing mail port number - 465 (using SSL/TLS) or 587 (using STARTTLS)
NOTE: Depending on the email client you are using, you may only have the option to use SSL/TLS to secure the connection to the server. In cases like these, you should make sure the port number has been set to 465.
Depending on your email client, you will need to make sure that authentication is setup when you are sending mail. The server confirms you are an authentic user based on your user name (including the @gol.com part) and your password so if you are unable to send email, please check the authentication settings for outgoing mail in your email client.
Author: Support
Last update: 2020-10-07 09:46
Q. What's the difference between a POP and IMAP type account?
A. When you create a new account in your email software, you are normally given the option to setup a POP or IMAP type account. The differences between these types of accounts are as follows;
POP - This type of account is what we usually recommend for users of @gol.com email accounts. The reason for this is that POP type accounts are usually setup to remove mail from the server which prevents the mailbox from being filled. The default mailbox size for @gol.com accounts is 100MB so if mail is kept on the server for too long, the account will become full and any new mail will be rejected.
POP accounts can be setup to remove mail from the server immediately after downloading it, after a certain time period (e.g. 1 week), after a certain action (e.g. deleted from the Trash folder) or they can be setup to keep mail on the server indefinitely. In most cases, we recommend that mail is removed from the server immediately or after a short period of time to prevent full mailbox problems.
If you have applied for and are using the Mail Plus service which increases the mailbox size from 100MB to 200MB and up to 3GB, it's possible to keep the mail on the server for a longer period of time. If you are planning on keeping mail on the server indefinitely, we usually recommend using an IMAP type account. The reason for this is timeout errors can occur when there is a very large amount of mail on the server and you are connecting with a POP type account.
IMAP - This type of account is used when you want to keep all email on the server, i.e. received messages, sent messages and trashed messages. In this case, the email software connects to the server and synchronizes with whatever mail is stored there.
The advantage of IMAP is that it makes it very easy to synchronize the mail account when checking it from different computers or devices. For example, if you are using a laptop and a smart phone to check your email, you may want to be able to see all received, sent and trashed messages on each device. Using an IMAP type account allows you to do this. If you were to send a message from the laptop, this sent message would then be stored on the server as well. When you then connect to the server with the smart phone later, the sent message will appear in the "Sent Messages" folder on the smart phone as well since this has synchronized with the data on our server.
The main thing to note is that when you are using an IMAP type account, any change you make on any device will be reflected on the server and then any subsequent device that connects to it. This also means that if you login to our Webmail site and delete a message here, the message will then be deleted on the other devices connecting to the server.
Since an IMAP type account requires mail to be stored on the server, we do not recommend this type of account unless you are using the Mail Plus service as it is very easy for the mailbox to be filled.
Mixing POP and IMAP Accounts
There are some cases where an email account has been setup in 2 (or more) different devices with one of them setup as a POP type account and the other as an IMAP type account. In most cases, it is better to use IMAP when checking email with multiple devices or to be consistent with accounts, for example when using POP on multiple devices, make sure they have been setup to remove mail after the same period of time.
In cases where a mix of POP/IMAP accounts have been used, the following issues can occur;
- Any messages that are deleted via an IMAP account are moved only to a "Trash" or "Deleted Messages" folder on the server. Any messages that are deleted via a POP account are immediately removed from the server and sent to a local "Trash" folder on that device. This can cause inconsistencies between the 2 accounts, particularly when checking the "Trash" folder on an IMAP enabled client.
- Any messages that are sent via an IMAP account are stored on the server in a "Sent" folder. Any messages that are sent via a POP account are stored on the local device in a "Sent" folder. Again, this will cause inconsistency between the 2 clients as messages in the "Sent" folder on the server cannot be seen by the POP enabled client as POP will only check for messages in the Inbox, not any other folders. In addition to this, any messages sent via the POP enabled client and stored in the local "Sent" folder cannot be seen by the IMAP client as the "Sent" folder for the POP account does not get synchronised with the server.
- Any messages that are moved from the Inbox to another folder (e.g. a folder called "Travel") on an IMAP enabled client, can no longer be seen by any POP enabled email clients. This is because the POP type account will only check the Inbox itself and not any sub-directories of this. This also includes any automatic filtering by the IMAP enabled client where this client has rules inside of it to move messages to a specific folder based on the sender address, subject or any other particular flag that has been set.
There are rare use cases for using a mixed POP/IMAP type environment but we would recommend using either POP or IMAP on all devices for consistency.
Author: Support
Last update: 2016-09-26 02:32
Account Settings
Q. How do I cancel my service with Rakuten Broadband Premium?
A. There are currently 2 ways that you can cancel your service with us;
1. Via the Members Station
2. By completing a Cancellation form and submitting it to us
1. If you would like to cancel the account via the Members Station, you will need to know your user ID and password for your account. The user ID is the same as the email address you received, minus the @gol.com part. (For example, if your email address is example@gol.com, the user ID is simply "example")
Once you have your ID and password and have logged into the Members Station, you can cancel your service by clicking on the "Cancel Service" link in the left hand side menu. You can then follow the instructions from here to cancel your service. If you have any problems submitting the cancellation online, please don't hesitate to contact us.
2. If you cannot remember your user ID and password or would prefer to cancel using our Cancellation form, please contact us and we can send this to you either by email, fax or by post. Once you have received and completed the form, you can return it to us by email, fax or by post. If you do return it to us by fax, please make sure to give us a call or send us an email so that we can confirm we have received it.
Cancellations must be received by the 25th of the same month you wish to end your services. If received after the 25th, your account will be cancelled as of the end of the following month. “Desired Month of Termination” refers to the final month in which services remain active. If you do not specify the month of termination, the cancellation process will proceed based on the month in which this form is received.
Rakuten Broadband Premium bills one month in arrears and we do not prorate on a daily basis. Customers are free to cancel at any time during any given month but Rakuten Broadband Premium cannot give any refunds or credit for unused account time. Rakuten Broadband Premium can issue payment slips ahead of time, charge credit cards or provide account information for furikomi payments if you are leaving Japan before your account is canceled or before the final bill is sent/processed. Please contact us for more information about these options.
Please note that Rakuten Broadband Premium will not cancel any services you have with NTT for you. Users of the FLETS ADSL or BFLETS Fiber Optics services will need to contact NTT directly to cancel the service with them as well. NTT can be contacted in English on 0120-364-463 (FLETS ADSL) or 0120-565-950 (BFLETS Fiber Optics).
If you are using an eAccess ADSL service or are renting a router from us, please make sure to return the rental modem/router to the following address;
NEC Access Technica, SL Seizo-bu Rental Group 800 Shimomata, Kakegawa-shi, Shizuoka-ken, 〒436-8501
The devices that Rakuten Broadband Premium provide are as follows;
- Aterm WD701VC rental modem (eAccess ADSL users only)
- Aterm DR304CV rental modem (eAccess ADSL users only)
- Aterm WR7610HV rental router (FLETS ADSL and BFLETS Fiber Optics users only)
Should you have any questions about the cancellation of your account at Rakuten Broadband Premium, please do not hesitate to contact us.
Author: Support
Last update: 2017-07-03 02:09
Q. How do I change the payment method on my account?
A. You can update the payment method on your account at the Members Station;
If you are using a credit card and want to update the information or want to use a credit card, you can update the payment method via the Members Station. You will need to know your user ID* and password to login here and you can then update the information by clicking on the "Credit Card Details" link in the left hand side menu.
(* The user ID is the same as your gol.com email address, minus the @gol.com part)
If you have any further questions regarding changes to the payment method on your account, please do not hesitate to contact us.
Author: Support
Last update: 2018-06-15 05:37
Q. How do I change the address/contact details on my account?
A. There are 2 ways in which you can update the address/contact details on your account;
1. You can update the information on your account via the Members Station. You will need to know your user ID* and password to login here and you can then update the information by clicking on the "Contact Information" link in the left hand side menu.
(* The user ID is the same as your gol.com email address, minus the @gol.com part)
2. Complete the Customer Information Update form and return this to us by email, fax or by post. If you do return it to us by fax, please give us a call or send us an email so that we can confirm receipt.
Please note, if you are changing your address, you may also need to change the type of account you are being provided by Rakuten Broadband Premium. If you have scheduled the installation of the same service type you are using now at your new address with NTT, you don't need to do anything further. However, if the service type is going to change, please refer to the FAQ regarding this here.
If you have not contacted NTT to schedule the installation of an internet line at your new address, we may be able to assist you with this;
- If you are using a FLETS or eAccess ADSL service and would like to upgrade to a Fiber Optic type service, we can arrange the installation of the line for you. Please send us an email or give us a call so that we can obtain the relevant information. Please note, it can take up to 2 weeks to arrange the installation of a new line with NTT.
- If you are using a FLETS ADSL service and want to use the same service at your new address, please contact NTT directly to arrange the installation with them. (NTT English Support - 0120-364-463)
- If you using an eAccess ADSL service and want to use the same service at your new address, please complete the eAccess ADSL relocation form and return this to us. You may need to contact NTT to arrange the use of a phone line at your new address as well. (NTT English Support - 0120-364-463)
- If you are using a BFLETS Fiber Optic line want to use the same service at your new address, please contact NTT directly to arrange the installation with them. (NTT English Support - 0120-565-950)
- If you are using a BFLETS Fiber Optic line and want to downgrade to a FLETS ADSL service, please contact NTT directly to arrange the installation with them. (NTT English Support - 0120-565-950)
If you have any further questions regarding changes to the address/contact details on your account, please do not hesitate to contact us.
Author: Support
Last update: 2017-07-03 02:13
Q. What payment methods are available for my account?
A. The answer to this question depends on whether your account is registered under your name or a company name;
1. Account registered in your name
In this case the service/s on the account can be paid for by convenience store payment slip, credit card, direct debit or furikomi (payment via an ATM).
2. Account registered under a company name
In this case the service/s on the account can be credit card, direct debit or furikomi (payment via an ATM).
If you have any questions about the payment methods available to you, please feel free to contact us.
Author: Support
Last update: 2010-06-24 09:54
Q. What do I do if my account is disabled due to non-payment?
A. If your account becomes disabled due to non-payment, there are 3 ways in which you can get the account enabled again the same day;
1. Use a credit card - You can use a credit card for a one-time payment to Rakuten Broadband Premium to cover the outstanding amount on the account. In order to do this, please give us a call and we can take down your details over the phone. You can also update your account at this time so that it use the same credit card for future bills if you wish.
2. Use a convenience store payment slip - If you have the copy of the payment slip for the outstanding bill/s, you can use this at a convenience store to get the account enabled again. In order to get the account enabled the same day, please make sure to send a copy of the receipt from the payment slip to us by email so that we can verify the payment has been made. If you don't do this, it will take between 2-3 working days to get the account enabled again as we have to wait for confirmation from the convenience store that the payment has been made.
3. Furikomi (Payment at an ATM) - If you know the outstanding amount on your account, you can make a payment at an ATM to Rakuten Broadband Premium to enable your account. The information you need in order to do this is as follows;
The Bank of Tokyo-Mitsubishi UFJ Tokyo Eigyo-bu
Bank Code: 0005
Branch code: 321
Futsu: 1803206
Account Name: Rakuten Mobile, Inc.
金融機関名: 三菱東京UFJ銀行 東京営業部
金融機関コード: 0005
店番: 321
普通: 1803206
口座名義: 楽天モバイル株式会社
If you do make a payment, please make sure to put a note of your user ID (user-name@gol.com) or customer number in the notes so that the payment can be easily identified here. If you want to get the account enabled the same day, please send a copy of the receipt from the ATM to us by email so that we can verify the payment has been made. If you don't do this, the account will be enabled again once we receive confirmation of the payment from the bank which will usually take 1 working day.
If you have any further questions regarding payment for a disabled account, please feel free to contact us.
Author: Support
Last update: 2021-08-03 10:01
Q. Why has my account been disabled?
A. The only times that your account will be disabled are as follows;
1. Outstanding bill on your account
2. Abuse of your service in violation of our service agreement
Outstanding Bills on your Account
There are several reasons why this might happen such as;
- You have changed your address and not informed us (Payment Slips cannot be delivered)
- Credit card on your account can no longer be used (e.g. expired, charge rejected, etc.)
- Direct debit from your account failed
In the case of credit card and direct debit payments, if these are unsuccessful, we will notify you by email of this and automatically change the payment method here and send a copy of the payment slip out to you by post. If you do not receive it because your address is not up to date on your account here, we will try to contact you on the phone number registered on your account here.
Should the account be disabled as a result of the potential issues above, you can get this enabled again by following the instructions provided here.
If you are concerned that your account may be disabled in the future or you haven't received a payment slip for the most recent month of service, please do not hesitate to contact us.
Author: Support
Last update: 2017-07-03 02:24
Q. How do I change my password?
You can change your password via the Member's Station and following the instructions below.
- In the menu on the left-side choose 'Password Change' which is under the 'User Settings' section.
- Enter the new password and then click the 'Set the Password' button on the bottom of the page.
- The new password will take effect in approximately one hour.
- You will need to update your password in your email settings on your computer. Click HERE for instructions.
- You will need to update your password in your Internet connection
settings in your computer. If you are using a wireless router, please
update the password in the router. Click HERE for instructions.
Author: Support
Last update: 2015-02-03 00:11
Q. Where do I return my modem or router?
1. If you are using an eAccess ADSL service or are renting an Aterm modem from
us, please return the rental modem to the following
address.
Return address:
NEC Access Technica, SL Seizo-bu Rental Group 800 Shimomata, Kakegawa-shi, Shizuoka-ken, 〒436-8501
Qualified routers / modems:
- Aterm WD701VC rental modem (eAccess ADSL users only)
- Aterm DR304CV rental modem (eAccess ADSL users only)
- Aterm WR7610HV rental router (FLETS ADSL and BFLETS Fiber Optics users only)
2. Non-Aterm branded models should be returned to NTT. Please contact NTT for details.
NTT East: 0120-565-950
NTT West: 0120-064-337
Author: Support
Last update: 2015-02-03 00:13
Internet Connection Setup » Windows 7 & 8
Q. How do I setup my internet connection in Windows 7?
A. Please follow the guide below to setup your connection ID and password from Rakuten Broadband Premium in your Windows 7 machine.
NOTE - These instructions apply when you are connecting your computer directly to the NTT device. If you are using a router, please refer to the manufacturers guide to configure this device.
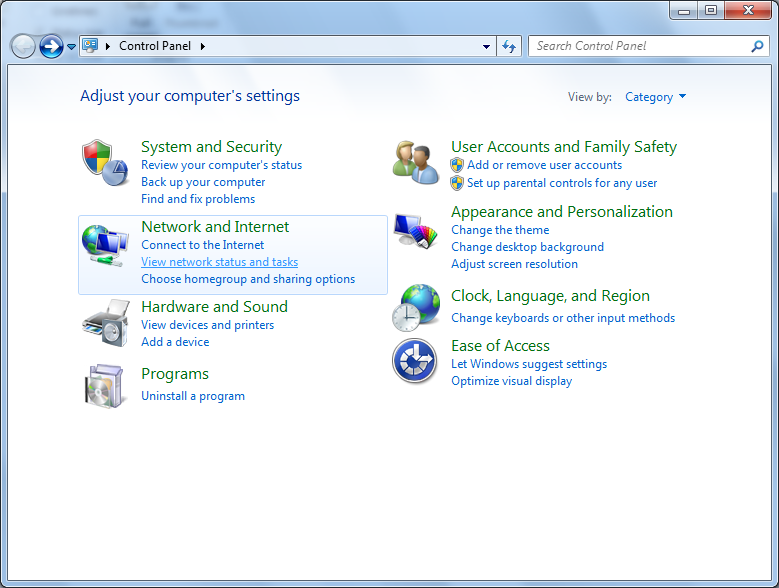
1. Click on the "Start Menu" and click on "Control Panel" here
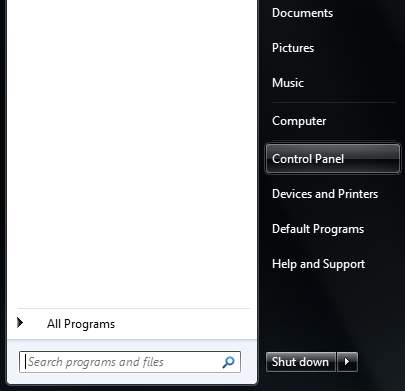
2. Click on "Connect to the Internet" under "Network and Internet" in the Control Panel
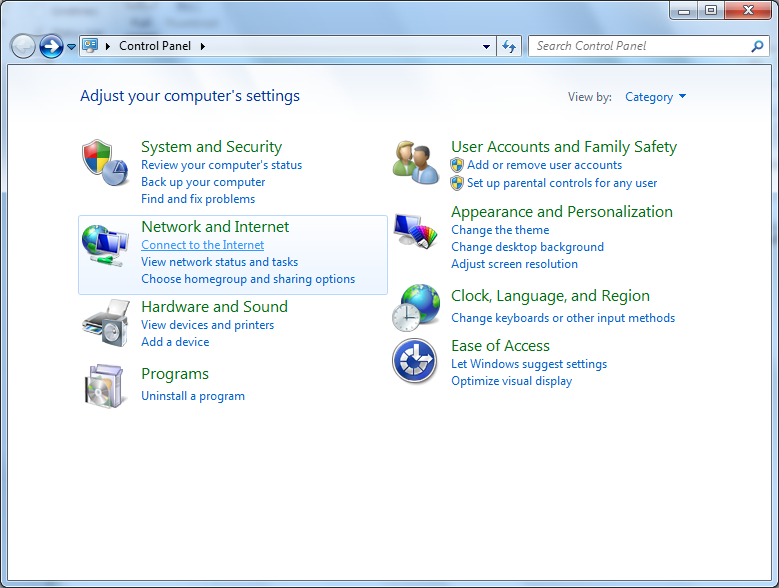
If you do not have this option, please click on "View network status and tasks" here instead and then "Set up a new connection or network" in the screen below

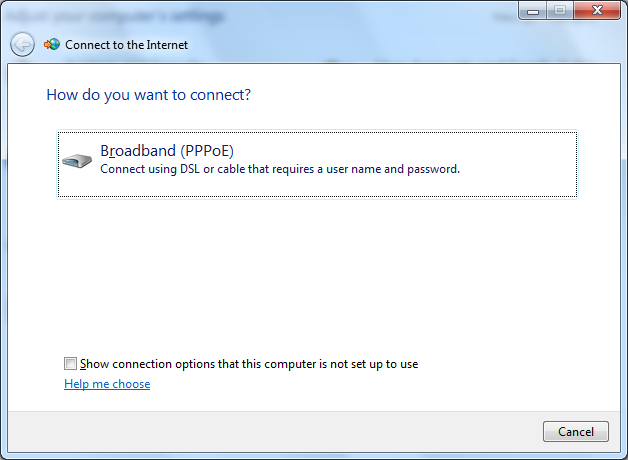
3. Click on "Broadband (PPPoE)"
4. Enter your connection ID and password from Rakuten Broadband Premium here. Depending on the service you are using, the connection ID should look like one of those listed below;
FLETS ADSL - user-id@adsl8.vips.gol.com
BFETS/FLETS NEXT Fiber Optic Mansion type - user-id@b-man.vips.gol.com
BFETS/FLETS NEXT Fiber Optic Family type -user-id@b-fam.vips.gol.com
NOTE - The connection ID and password is case sensitive. Please enter this exactly as shown on your documentation from us

Once you have entered the "User name" and "Password", you can check "Show Characters" to make sure the password has been entered correctly and check "Remember this password" to save this. You can also enter a connection name and we recommend using something simple such as "GOL"
Click on "Connect" once all the information has been entere
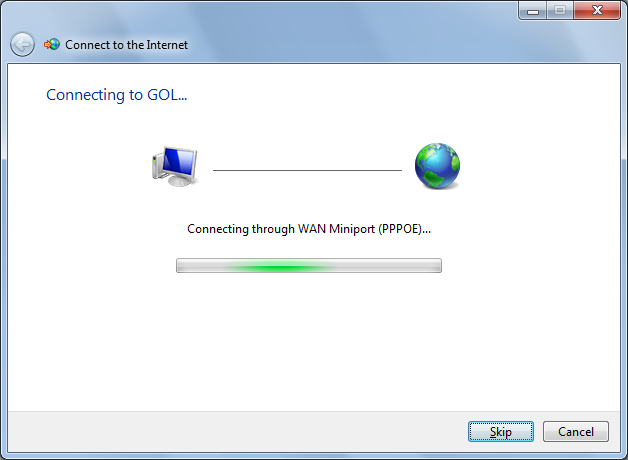
5. You will see a screen showing the connection progress
6. Once the connection has been established, you will see the following screen
7. In order to connect to the internet again in the future, click on the network icon in the taskbar and click the connection you just created
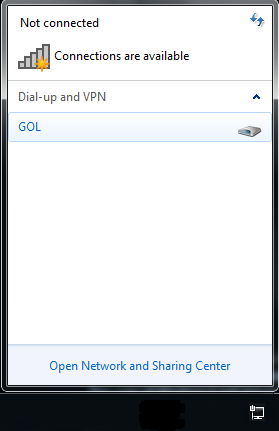
You should now be connected to the internet
If you have any problems connecting, please refer to our other FAQs or contact us
Author: Support
Last update: 2017-07-03 03:18
Q. How do I make changes to an existing internet connection in Windows 7?
A. Please follow the guide below to make changes to your connection
setup in Windows 7. You may need to do this when you have changed the
password on your account or have changed the service type (e.g. FLETS
ADSL to BFLETS Mansion) on your account and need to enter the new
connection ID.
NOTE - These instructions apply when you are connecting your computer
directly to the NTT device. If you are using a router, please refer to
the manufacturers guide to configure this device.
1. Click on the "Start Menu" and click on "Control Panel" here
2. Click on "View network status and tasks" under "Network and Internet" in the Control Panel
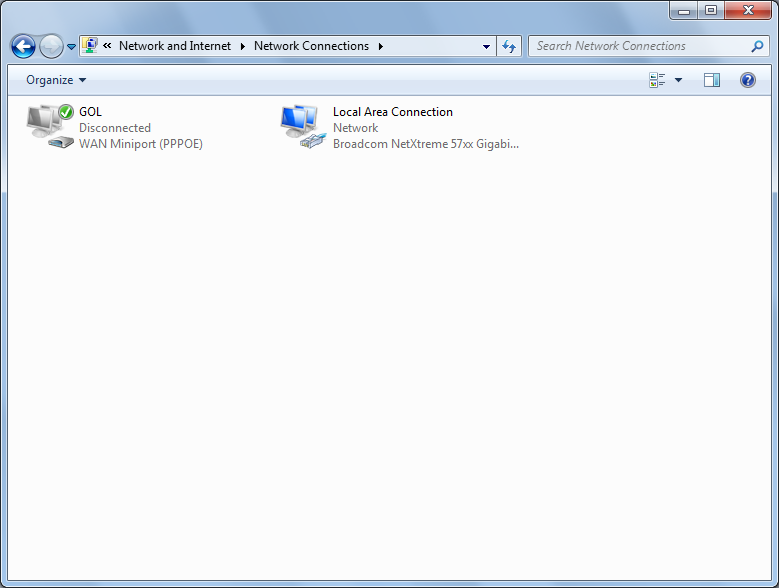
3.Click on "Change adapter settings"
4. You should see the connection you have created previously listed here.
In this case it has been named "GOL" and is referred to as a "WAN
Miniport (PPPOE)" type connection. Double click on this icon.
NOTE - If you do not see this icon, you will need to create a new connection. Instructions on how to do this can be found here
5. In the "Connect GOL" window you will see your connection ID in the "User
name:" field and a box explaining "[To change the saved password, click
here]". You can now either update your connection ID in the "User
name:" field or change the saved password.
After you have made any changes, click on the "Connect" button to
establish a connection. These changes will be saved and you should now
be connected to the internet if the information you have entered is
correct.
If you have any problems connecting, please refer to our other FAQs or contact us.
Author: Support
Last update: 2011-05-31 02:38
Q. What does error 651 in Windows 7 mean?
A. This error appears when there is no connection to our PPPoE server
available. This is commonly caused by either a disabled account
with NTT or a faulty line or NTT device. Please contact NTT if you are receiving this error message to confirm the status of the account with them.
If
the account is active and working with NTT, this error can occur when
the computer is not connected directly to the NTT device and is
connected to a router instead. If this is the case, please connect the
cable to the NTT device directly and try connecting again.
If you continue to have receive this error message when trying to connect, please contact us
Author: Support
Last update: 2011-05-31 08:06
Q. What does error 691 in Windows 7 mean?
A. This error appears when either the user name or password has been entered incorrectly. The only other instance in which this message appears is when the connection ID you have received from Rakuten Broadband Premium does not match the service type from NTT. For example, if you are using a Mansion type fiber optic service from NTT but have received a Family type connection ID from us. If this is the case, please contact us so that we can update the connection ID or go to the Members Station and make the change there
Author: Support
Last update: 2017-07-03 03:19
Internet Connection Setup » Mac OS 10.5-10.10
Q. How do I setup my internet connection in Mac OS versions 10.5 onwards?
A. Please follow the guide below to setup your connection ID and password from Rakuten Broadband Premium in Mac OS 10.4.
NOTE - These instructions apply when you are connecting your computer directly to the NTT device. If you are using a router, please refer to the manufacturers guide to configure this device.
1. Click on the Apple Logo in the top left corner of the screen and click "System Preferences..." here
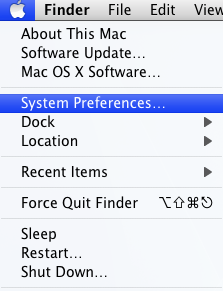
2. Click on "Network" in the Systems Preferences screen
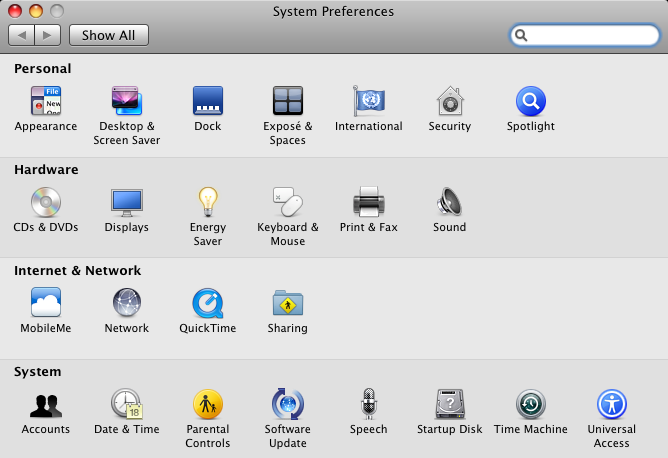
3. Click on the "Location:" drop down menu and select "Edit Locations..." here
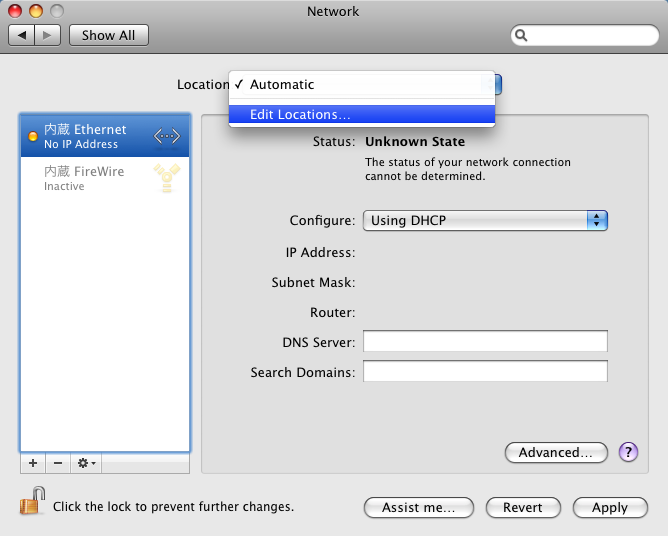
4. Click on the + button in the bottom left corner to add a new location
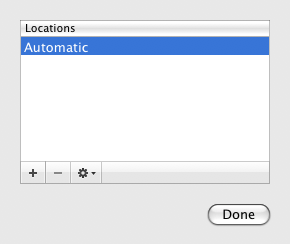
5. Enter a name for the new location here. We recommend something simple such as "GOL". Click "Done" once the name has been entered
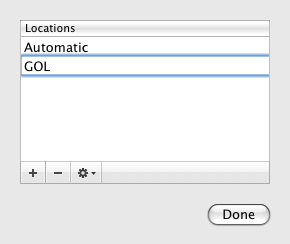
6. You should now see "GOL" listed in the "Location:" at the top of the screen. Click on the "Ethernet" option in the left hand side menu here
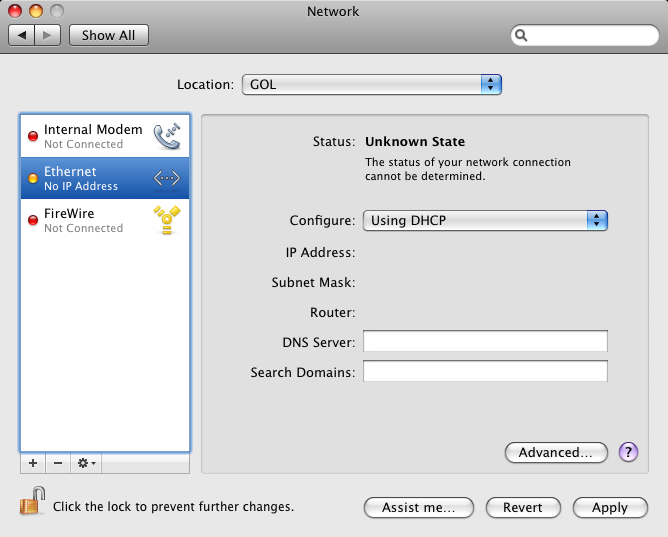
7. Click the drop down menu box next to “Configure” and select the option “Create PPPoE Service…”
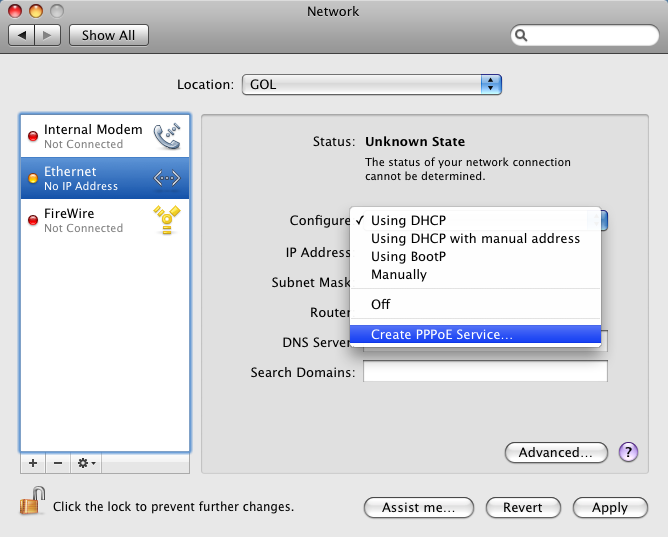
8. You will be asked to name the new PPPoE service. Again, we recommend using something simple such as "GOL". Click "Done" once the name has been entered
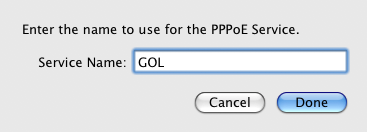
9. Click on the new "GOL" option in the left hand side menu here
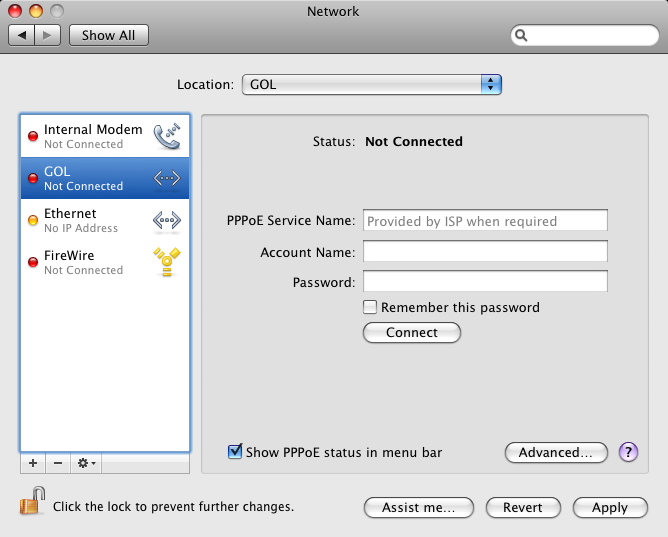
10. Enter your account information from Rakuten Broadband Premium into this screen
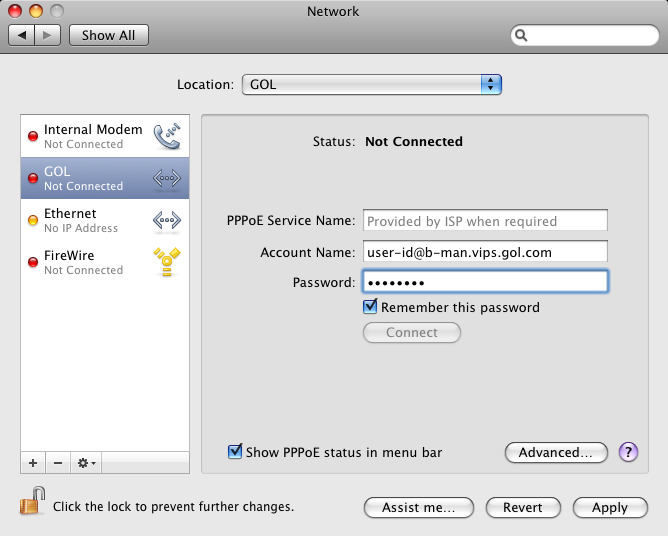
PPPoE Service Name: (This can be left blank)
Account Name: Depending on the service you are using, the connection ID should look like one of those listed below;
FLETS ADSL - user-id@adsl8.vips.gol.com
BFETS/FLETS NEXT Fiber Optic Mansion type - user-id@b-man.vips.gol.com
BFETS/FLETS NEXT Fiber Optic Family type -user-id@b-fam.vips.gol.com
Password: Enter the password you received from Rakuten Broadband Premium here
NOTE - The connection ID and password are case sensitive. Please enter this exactly as shown on your documentation from us
Remember this password: Check
Show PPPoE status in menu bar: Check
Click on the "Advanced..." button after entering your account information
11. Click on the "PPP" tab here and check the option "Connect automatically when needed". Click "OK" after checking this option
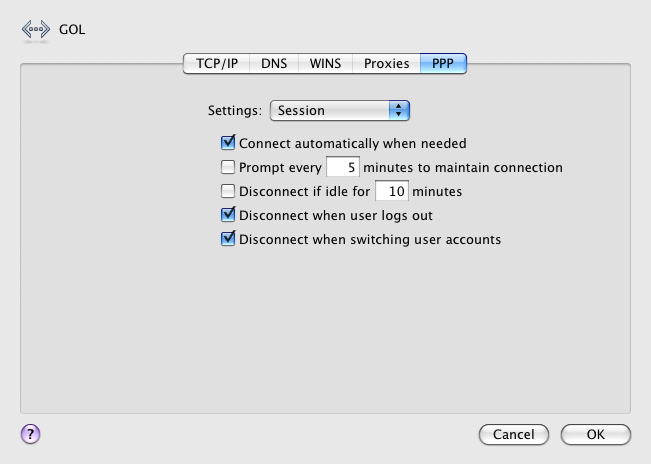
12. Click the "Apply" button here to save the changes
13. After clicking the "Apply" button, make sure the "GOL" option has been selected from the left hand side menu. You should then be able to click the "Connect" button here and connect to the internet.
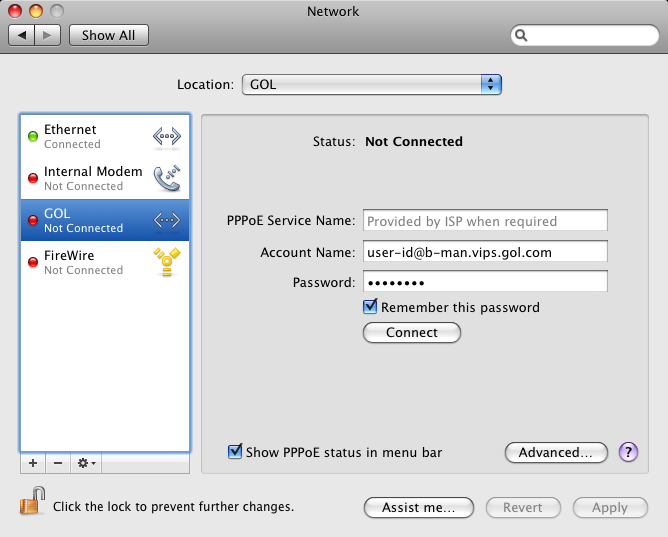
After clicking the "Connect" button, you should be able to connect to the internet. You should now be able to connect automatically in the future as well by simply opening your web browser.
If you have any problems connecting, please refer to our other FAQs or contact us.
Author: Support
Last update: 2017-07-03 03:23
Q. How do I make changes to an existing internet connection in Mac OS versions 10.5 onwards?
A. Please follow the guide below to make changes to your connection setup in Mac OS 10.5/10.6/10.7. You may need to do this when you have changed the password on your account or have changed the service type (e.g. FLETS ADSL to BFLETS Mansion) on your account and need to enter the new connection ID.
NOTE - These instructions apply when you are connecting your computer directly to the NTT device. If you are using a router, please refer to the manufacturers guide to configure this device.
1. Click on the Apple Logo in the top left corner of the screen and click "System Preferences..." here
2. Click on "Network" in the Systems Preferences screen
3. Select the "GOL" option in the left hand side menu and you should see your current connection settings
You can now either update your connection ID in the "Account name:" field or change the saved password. Once you have made any required changes, click the "Apply" button in the bottom right hand corner to save the settings.
If you have any problems connecting after making these changes, please refer to our other FAQs or contact us.
Author: Support
Last update: 2017-07-03 03:23
Q. What does the "Cannot find PPPoE server" error in Mac OS versions 10.5 onwards?
A. This error appears when there is no connection to our PPPoE server available. This is commonly caused by either a disabled account with NTT or a faulty line or NTT device. Please contact NTT if you are receiving this error message to confirm the status of the account with them.
If the account is active and working with NTT, this error can occur when the computer is not connected directly to the NTT device and is connected to a router instead. If this is the case, please connect the cable to the NTT device directly and try connecting again.
If you continue to have receive this error message when trying to connect, please contact us
Author: Support
Last update: 2017-07-03 03:24
Q. What does the "Authentication failed" error in Mac OS versions 10.5 onwards?
A. This error appears when either the user name or password has been entered incorrectly. The only other instance in which this message appears is when the connection ID you have received from Rakuten Broadband Premium does not match the service type from NTT. For example, if you are using a Mansion type fiber optic service from NTT but have received a Family type connection ID from us. If this is the case, please contact us so that we can update the connection ID or go to the Members Station and make the change there
Author: Support
Last update: 2017-07-03 03:24
Internet Connection Setup » Apple Routers
Q. How do I setup my GOL Internet connection in an Apple router?
A. Please follow these instructions to make changes to your Airport Extreme* router or Time Capsule
*Please note, the Airport Extreme is referred to as an AirMac Extreme in Japan
1. Insert the LAN cable from your NTT device into the WAN Port on your Apple router, then connect your computer to one of the ethernet ports in the back of your Apple router.


2. On the top right-hand corner of your computer, choose the wireless signal indicator in the menu bar next to the clock (it will look like an upside down triangle with horizontal lines on the inside of it). Choose the Apple network that appears. This is your wireless network. We will change the name of the wireless network to one of your choice in the steps below.
3. Open the Finder and then go to Applications > Utilities and double-click on the AirPort Utility
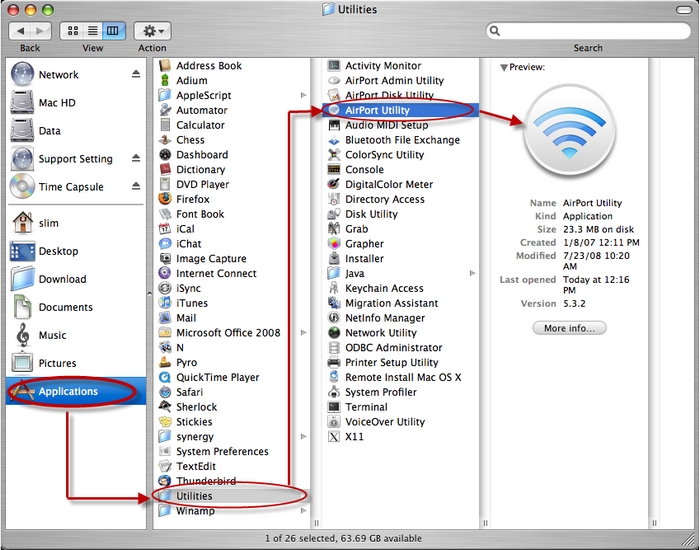
NOTE - If you are using a Windows machine and have already installed the AirPort Utility, you should be able to find the application using the search function, if you do not now know where it is located. If you have not yet installed the AirPort Utility, you can download a copy of this here
4. Once the AirPort Utility has opened, hover over the image of your Apple router (bottom image). In the pop-up window, click EDIT.

5. In this window as shown in the image below:
- Click on the Internet tab at the top
- Choose PPPoE from the drop-down menu
- Fill-in your GOL connection ID and Password
- For the Service Name we suggest GOL
Depending on the service you are using, the connection ID should look like one of those listed below:
- FLETS ADSL - user-id@adsl8.vips.gol.com
- BFETS/FLETS NEXT Fiber Optic Mansion type - user-id@b-man.vips.gol.com
- BFETS/FLETS NEXT Fiber Optic Family type -user-id@b-fam.vips.gol.com
Proceed to Step 6 without clicking Update.

6. Choose the Wireless tab at the top of the page as shown in the image below. Then:
- Choose 'Create a wireless networ' from the Network Mode drop-down menu.
- Enter a Wireless Network Name. Do not use your real name. We also suggest to write this name on a post-it type paper and tape it to the back of your router.
- Choose WPA2 Personal from the Wireless Security drop-down menu.
- Check 'Remember this password in my keychain'.
- Check 'Enable Guest Network' and choose a password. Give this to guests visiting you so that they will not be able to see your computer or it's contents when using your wireless network.
Now click Update.
The Apple router will now restart and you should see a green light on
the router. Open Safari to check that you are connected successfully to
the Internet. If not:
- Reopen the Airport Utility and check
your Connection ID and Password. Note that they are case sensitive and
that there should not be any spaces before or after these.
If the light on the Apple router is amber/yellow and not green:
- Reopen the Airport Utility, hover over your Apple router on the first screen and you should see the errors. Review these errors.
If you have any questions please call us at 0120-987-800 Monday-Friday between the hours of 9:00-17:00.

Author: Support
Last update: 2014-10-16 09:47
Internet Connection Setup » Basic Router Setup
Q. How do I setup my router to connect with NTT and Rakuten Broadband Premium?
A. It is possible to use a router in connection with an account from Rakuten Broadband Premium and a line and modem from NTT. The basic configuration is usually as follows;
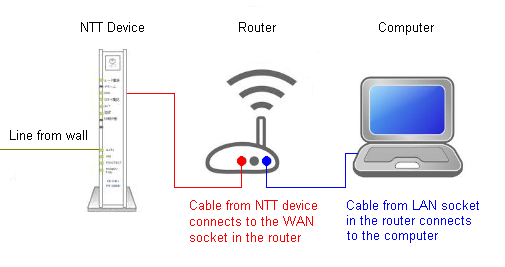
The ethernet cable that comes from the NTT box should go into the WAN/Internet socket on the back of the router. You should then be able to connect the computer to one of the LAN sockets (sometimes labeled as simply numbers, e.g. 1, 2, 3) on the router.
Once you have connected the computer to the router, you will need to setup the connection ID and password from Rakuten Broadband Premium in the router. The type of connection is known as a "PPPoE Connection". Depending on the router you are using, you should be able to connect to the router to configure it in one of the following ways;
1. Use the CD that came with the router and configure if with this software
2. Open up a web browser and type in the IP address of the router in the address bar (e.g. 192.168.1.1). The router manual should confirm the default IP address of the device along with the user name and password required to access the router settings
NOTE - If you are using one of the Apple Airport routers (e.g. the Express, Extreme or Time Capsule), you can access the settings for this device via the Airport Utility in the Mac*. This can normally be found by going to the "Utilities" folder in "Applications".
*If you are using a Windows machine with the Apple Airport router, you will need to make sure the Airport Utility is installed first
Once you have access to the router's settings, you can normally find a section to configure the PPPoE connection. This section usually has a name such as "Internet", "PPPoE" or "WAN". The manual for the router you are using should be able to confirm this.
After entering your Rakuten Broadband Premium connection ID** and password into the PPPoE connection section of the router and saving the changes, you should be able to connect to the internet via the router.
**The Rakuten Broadband Premium connection ID will usually appear in one of the following formats;
user-name@b-fam.vips.gol.com (Compatible with Fiber Optic Family type lines from NTT)
user-name@b-man.vips.gol.com (Compatible with Fiber Optic Mansion type lines from NTT)
Additional Notes
It's possible that the NTT device you have been provided with can also act as a router and will have multiple LAN sockets on the back of it, e.g. the NTT PR-S300NE device. These devices are usually sent out in "Bridge mode" meaning you do not need to configure this device and can use your own router.
However, if the NTT device has been configured to act as a router and then you decide that you would like to use your own router later, the NTT device will either need to be reset to it's factory default settings so you can setup the PPPoE connection in your own router or the second router will need to setup as a hub or wireless access point.
Rakuten Broadband Premium cannot provide support and configuration instructions for devices that have not been provided by us. For more information about NTT devices, please either refer to their online support documents or contact NTT directly. For more information about the router you are using, please refer to the manufacturers manual or other online support documentation.
Rakuten Broadband Premium can provide a rental router to you (Aterm WR7610HV) which we can provide support for. If you would like to apply for the rental router service, please do so via either the Members Station or by contacting us.
Author: Support
Last update: 2017-07-03 03:29
Email » Outlook 2007
Q. How do I setup my account in Microsoft Outlook 2007?
A. Step 1. Create a new profile
1. Open Microsoft Outlook 2007. Select "Account settings..." from under "Tools"
(If you already have an account setup, continue on to "Step 2. Configuring/Modifying SMTP (outgoing mail) server.")

2.Click on "New..." to add your email account

3. Check the "Manually configure server settings or additional server types" box here and then click "Next"

4. Select the "Internet E-mail" option and then click "Next"

5.Enter your "Internet E-mail Settings" as shown below;

User Information
- Your Name: Your Name
- E-mail Address: Your email address (user-id@gol.com)
Server Information
- Account Type: POP3
- Incoming mail server: popmail.gol.com
- Outgoing mail server (SMTP): mail.gol.com
Logon Information
- User Name: user-id@gol.com
- Password: Your Rakuten Broadband Premium account password
- Remember password: check
- Log on using Secure Password Authentication (SPA): Do not check
Click on the "More Settings..." button after entering the information
6. Select the "Outgoing Server" tab and then check the option "My outgoing server (SMTP) requires authentication" and "Use same settings as my incoming mail server"

7. Select the "Advanced" tab and then configure the screen as follows:

- Incoming server (POP3): 110
- This server requires an encrypted connection (SSL): Unchecked
- Outgoing server (SMTP): 587
- Use the following type of encrypted connection: None
Click "OK" to return to the "E-mail Accounts" screen and then click "Next"
8. Click the "Finish" button to complete the setup of your account

Step 2. Configuring/Modifying SMTP (outgoing mail) server
Note: If you have already completed Step 1, you do not not need to complete Step 2 to send and receive email.
1.Select "Email accounts..." from under "Tools"
2. Select your email account and then click on "Change..."

3. Click on the "More settings..." button
4. Select the "Outgoing Server" tab and then check the option "My outgoing server (SMTP) requires authentication" and "Use same settings as my incoming mail server"
5. Select the "Advanced" tab and then configure the screen as follows:
- Incoming server (POP3): 110
- This server requires an encrypted connection (SSL): Unchecked
- Outgoing server (SMTP): 587
- Use the following type of encrypted connection: None
Click "OK" to return to the "E-mail Accounts" screen and then click "Next" and "Finish" to save the changes.
Author: Support
Last update: 2018-05-18 10:52
Email » Outlook 2010&2013
Q. How do I setup my account in Microsoft Outlook 2010?
A. Step 1. Create a new profile
1. Open Microsoft Outlook 2010. Select "Account settings..." from under "File"
(If you already have an account setup, continue on to "Step 2. Configuring/Modifying SMTP (outgoing mail) server.")
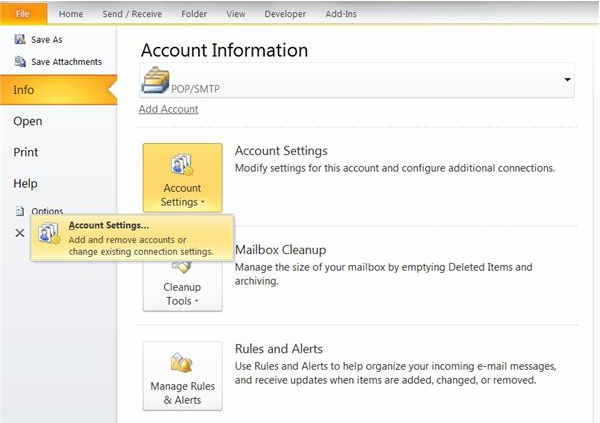
2.Click on "New..." to add your email account
3. Check the "Manually configure server settings or additional server types" box here and then click "Next"
4. Select the "Internet E-mail" option and then click "Next"
5.Enter your "Internet E-mail Settings" as shown below;
User Information
- Your Name: Your Name
- E-mail Address: Your email address (user-id@gol.com)
Server Information
- Account Type: POP3
- Incoming mail server: popmail.gol.com
- Outgoing mail server (SMTP): mail.gol.com
Logon Information
- User Name: user-id@gol.com
- Password: Your Rakuten Broadband Premium account password
- Remember password: check
- Log on using Secure Password Authentication (SPA): Do not check
Click on the "More Settings..." button after entering the information
6. Select the "Outgoing Server" tab and then check the option "My outgoing server (SMTP) requires authentication" and "Use same settings as my incoming mail server"
7. Select the "Advanced" tab and then configure the screen as follows:
- Incoming server (POP3): 110
- This server requires an encrypted connection (SSL): Unchecked
- Outgoing server (SMTP): 587
- Use the following type of encrypted connection: None
Click "OK" to return to the "E-mail Accounts" screen and then click "Next"
8. Click the "Finish" button to complete the setup of your account
Step 2. Configuring/Modifying SMTP (outgoing mail) server
Note: If you have already completed Step 1, you do not not need to complete Step 2 to send and receive email.
1.Select "Account settings..." from under "File"
2. Select your email account and then click on "Change..."
3. Click on the "More settings..." button
4. Select the "Outgoing Server" tab and then check the option "My outgoing server (SMTP) requires authentication" and "Use same settings as my incoming mail server"
5. Select the "Advanced" tab and then configure the screen as follows:
- Incoming server (POP3): 110
- This server requires an encrypted connection (SSL): Unchecked
- Outgoing server (SMTP): 587
- Use the following type of encrypted connection: None
Click "OK" to return to the "E-mail Accounts" screen and then click "Next" and "Finish" to save the changes.
Author: Support
Last update: 2018-05-24 04:38
Email » Windows Mail
Q. How do I setup my account in Windows Mail?
A. Please follow the instructions below to setup your account in Windows Mail
1. Open Windows Mail and click on "Tools" and then "Accounts"
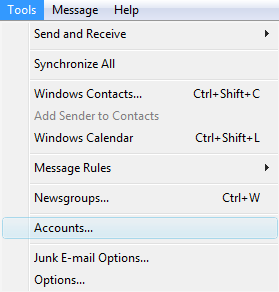
2. Click on the "Add..." button here to setup the email account in Windows Mail

3. Select "E-mail Account" here and the click the "Next" button
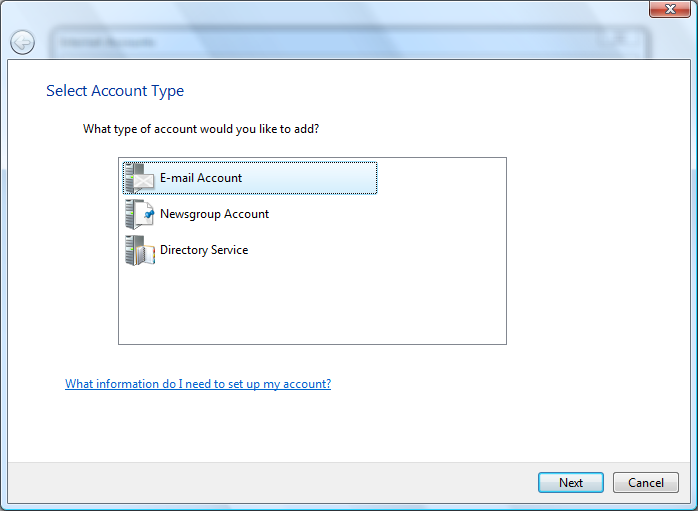
4. Enter your name in the "Display name:" field here and then click the "Next" button
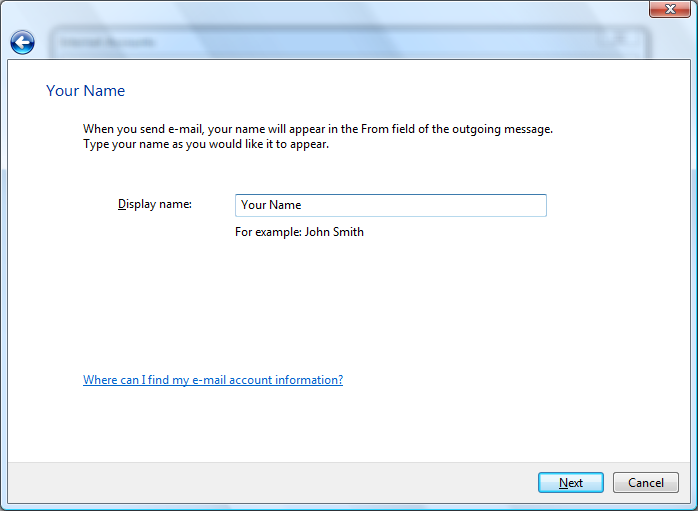
5. Enter your email address in the "E-mail address:" field here and then click on the "Next" button
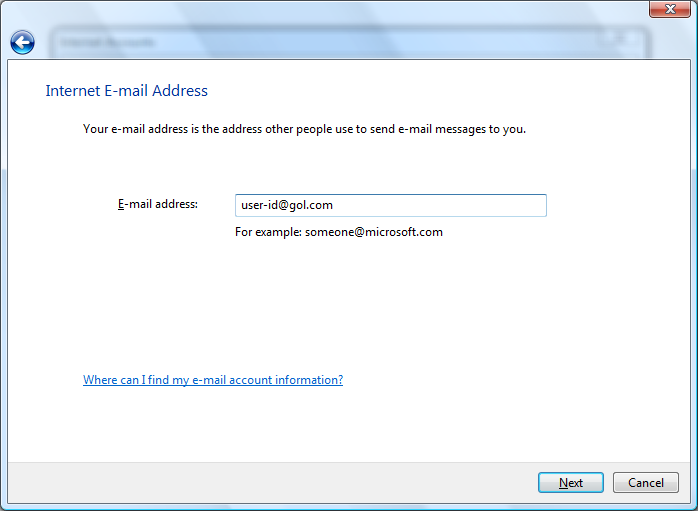
6. Choose and enter the following settings here:
Incoming e-mail server type: POP3*
Incoming mail (POP3 or IMAP) server: popmail.gol.com
Outgoing e-mail server (SMTP) name: mail.gol.com
Outgoing server requires authentication: Check
Click on the "Next" button here after entering these settings
*NOTE - If you are not sure of the difference between a POP3 and IMAP type account, please see our FAQ here
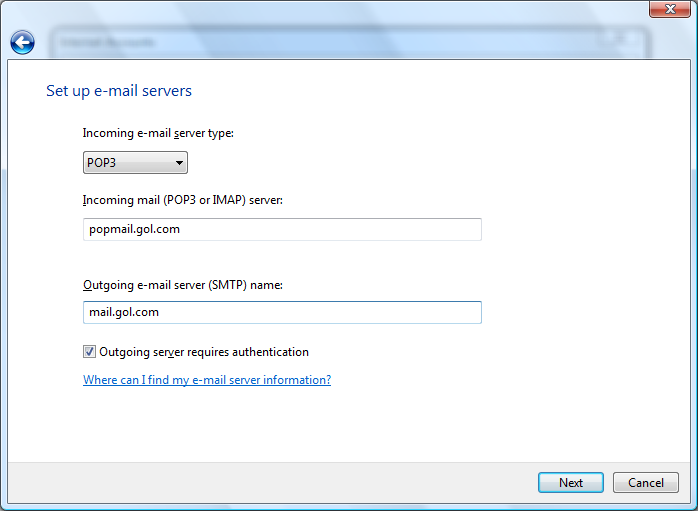
7. Enter the following settings here:
E-mail username: Enter your email account here (e.g. user-id@gol.com)
Password: Enter your Rakuten Broadband Premium account password here
Remeber password: Check
Click on the "Next" button here after entering these settings
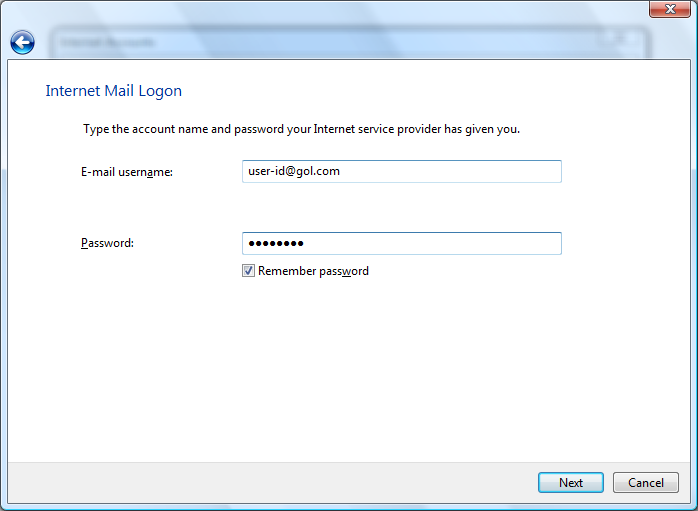
8. You have now setup the email account in Windows Mail. Click the "Finish" button here
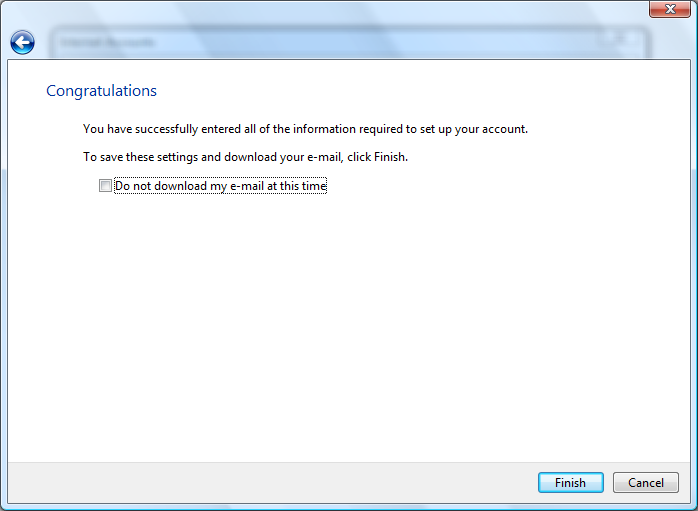
9. You can now see the email account listed here. Click on the account and then click on the "Properties" button
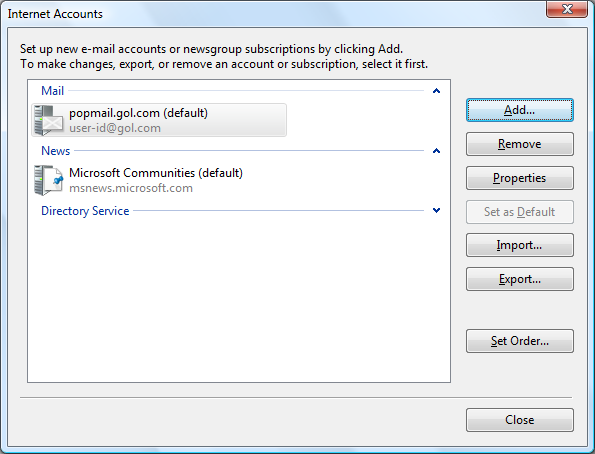
10. Click on the "Advanced" tab here and make sure you have the following settings:
Outgoing mail (SMTP): 587
This server requires a secure connection (SSL): Do not check
Incoming mail (POP3): 110
This server requires a secure connection (SSL): Do not check
Leave a copy of messages on server: Do not check*
Click the "Apply" button here and then "OK" to close this screen and save the settings
*NOTE - We recommend leaving this option unchecked to prevent your mailbox getting full. If you would like to store mail on the server for a certain period of time, you can check this box. We would then recommend that you check the option "Remove from server after 5 days" to prevent the mailbox getting full
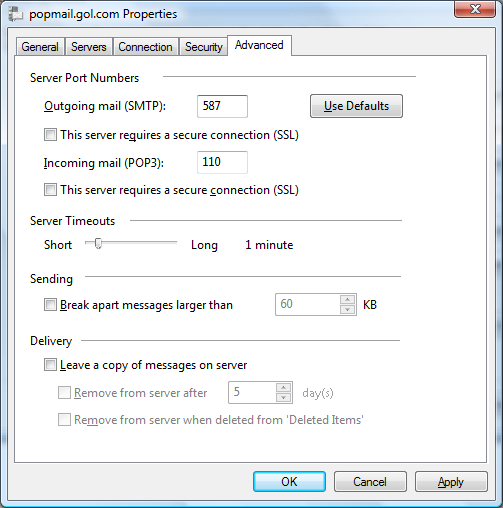
You should now be able to send and receive mail using Windows Mail
Author: Support
Last update: 2017-07-03 02:50
Email » Windows Live Mail
Q. How do I setup my account in Windows Live Mail?
A. Please follow the instructions below to setup your account in Windows Live Mail
1. Open Windows Live Mail and click on the "Tools" menu at the top of the screen and then "Accounts"
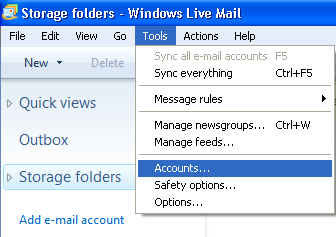
NOTE - If you cannot see the "Tools" menu in Windows Live Mail, press the Alt and T keys on your keyboard to show this
2. Click on the "Add..." button on the right hand side of the screen here
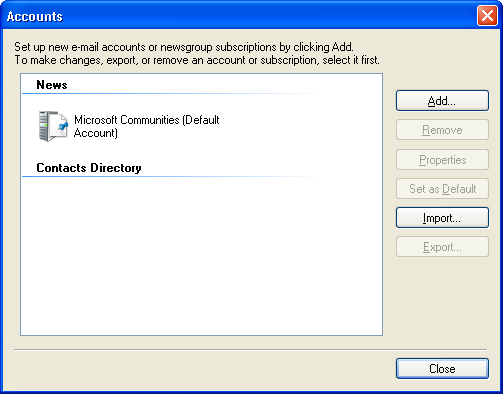
3. Select "E-mail Account" here and click the "Next" button
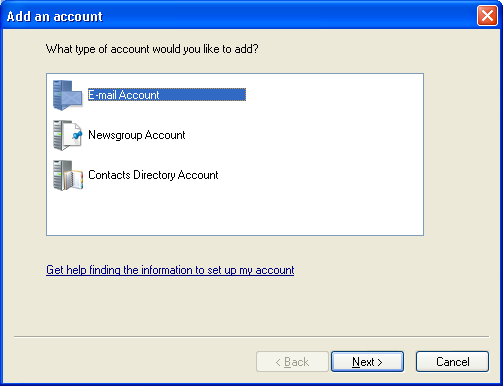
4. Enter your account information here
- Email address: Your email address (e.g. user-id@gol.com)
- Password: Your Rakuten Broadband Premium account password
- Remember password - Check
- Display Name: Your name
- Manually configure server settings for e-mail account - Check
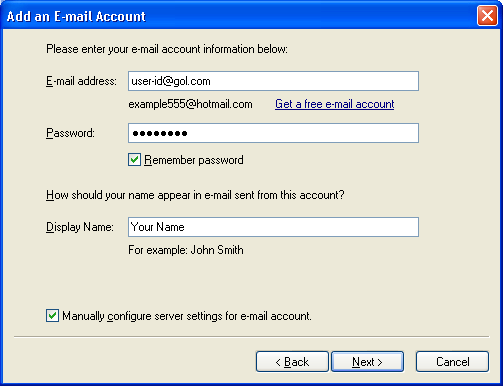
Click the "Next" button here after entering this information
5. Enter the following information here
Incoming Server Information
- My incoming mail server is a POP3 server
- Incoming server: popmail.gol.com
- Port: 110
- This server requires a secure connection (SSL) - Do not check
- Log on using: Clear text authentication
- Login ID (if different from e-mail address): user-id@gol.com
Outgoing Server Information
- Outgoing server: mail.gol.com
- Port: 587
- This server requires a secure connection (SSL) - Do not check
- My outgoing server requires authentication - Check
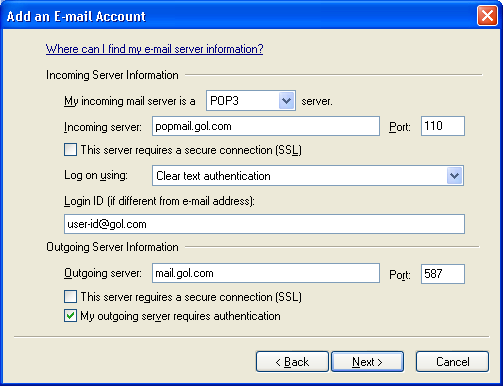
Click the "Next" button here after entering this information
6. Your account has now been setup. Click "Finish" to close this screen
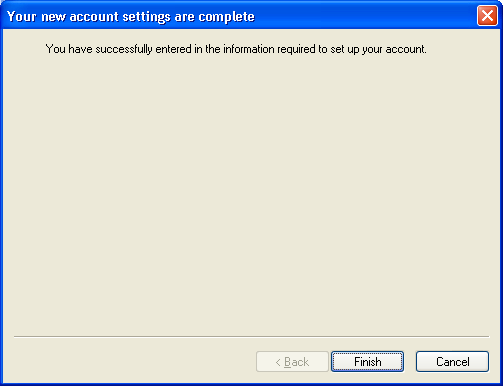
You should now be able to send and receive email using Windows Live Mail
Author: Support
Last update: 2017-07-03 02:51
Email » Apple Mail 4-8
Q. How do I setup my account in Apple Mail 4-8?
A. Step 1. Create a new profile
1. Open the Apple Mail software and then click on "Mail" and "Preferences..." in the top left corner of the screen.
2.Select the "Accounts" icon at the top of the screen and then click on the "+" button in the bottom left corner to add a new account.
(If you already have an account setup, continue on to "Step 2. Configuring/Modifying SMTP (outgoing mail) server.")
3. Enter your information into the first screen
Full Name: Your Name
Email Address: user-id@gol.com
Password: Your Rakuten Broadband Premium account password
Click on the "Continue" button to go to the next screen
4. Enter the "Incoming Mail Server" information as show below;
Account Type: POP
Description: The name of your account (For example, My Account)
Incoming Mail Server: popmail.gol.com
User Name: user-id@gol.com
Password: Your Rakuten Broadband Premium account password
Click on the "Continue" button to test these settings and then go to the next screen
5. You may be asked to select the security settings for Incoming Mail
Use Secure Sockets Layer (SSL) - Unchecked
Authentication: Password
Click on the "Continue" button to go to the next screen
6. Enter the "Outgoing Mail Server" information as show below;
Description: The name for the SMTP server (For example, GOL SMTP)
Outgoing Mail Server: mail.gol.com
Use only this server: Check
Use Authentication: Check
User Name: user-id@gol.com
Password: Your Rakuten Broadband Premium account password
Click on the "Continue" button to test these settings and then go to the next screen
7. You may be asked to select the security settings for Outgoing Mail
Use Secure Sockets Layer (SSL) - Unchecked
Authentication: Password
Click on the "Continue" button to go to the next screen
8. You will now see an Account Summary screen showing all of your settings. Check the box "Take Account Online" and then click the "Create" button to complete the setup of the account.
Step 2. Configuring/Modifying SMTP (outgoing mail) server
1. After completing the setup of your account, you should be returned to the "Accounts" screen. If not, click on "Mail" and then "Preferences..." in the top left corner of the screen to return to this window. You can now see your account and all of your details listed here.
2. Click on the "Advanced" tab in this window to check the incoming mail settings for your account.
Enable this account: Check
Include when automatically checking for new mail: Check
Remove copy from server after retrieving a message: Check and choose your own preference from the drop-down menu box.
Please note, the mailbox is only 100MB in size by default.
Port: 110
Use SSL: Do not check
Authentication: Password
3. Click on the "Account Information" tab again, click on the drop-down menu next to "Outgoing Mail Server (SMTP):" and then select the option "Edit Server List..."
4.Click on the "Advanced" tab in the following screen and enter the information as shown;
Use default ports (25, 465, 587): Check
Use Secure Sockets Layer (SSL): Do not check
Authentication: Password
User Name: user-id@gol.com
Password: Your Rakuten Broadband Premium account password
Click on the "OK" button to save these changes and return to the "Accounts" screen
5. Close the "Accounts" window and make sure to click "Save" to save the changes when prompted
Author: Support
Last update: 2017-07-03 02:55
Contact
Q. How can I contact Rakuten Broadband Premium?
A. Please refer to the information below for details on how to contact us;
All Inquiries
Email: rbbp-support@comm.rakuten.co.jp
Our English support hours are from 9am to 5:30pm, Monday to Friday. If you need to contact us over the weekend or on a national holiday, you can give our Japanese support line a call on 0120-987-700. You can also refer to our Japanese FAQ Site and Support Pages for more information.
Author: Support
Last update: 2021-08-19 10:33
Q. How can I contact NTT?
A. In the event that you need to contact NTT, please refer to the following information;
NTT East - http://www.flets.com/
- Technical Support - 0120-289-113 (English support)
- Fiber Optic and ADSL general inquiries - 0120-565-950 (English support)
- Fiber Optic and ADSL general inquiries - 0120-116-116 (Japanese support)
NTT East Area
Hokkaido, Aomori, Iwate, Miyagi, Akita, Yamagata,
Fukushima, Ibaraki, Tochigi, Gunma, Saitama, Chiba, Tokyo, Kanagawa,
Niigata, Yamanashi, Nagano
NTT West - http://www.flets-w.com/
- Fiber Optic and ADSL general inquiries - 0120-064-337 (English support)
- Fiber Optic and ADSL general inquiries - 0120-248-995 (Japanese support)
NTT West Area
Toyama, Ishikawa, Fukui, Gifu, Shizuoka, Aichi, Mie,
Shiga, Kyoto, Osaka, Hyogo, Nara, Wakayama, Tottori, Shimane, Okayama,
Hiroshima, Yamaguchi, Tokushima, Kagawa, Ehime, Kochi, Fukuoka, Saga,
Nagasaki, Kumamoto, Oita, Miyazaki, Kagoshima, Okinawa
Author: Support
Last update: 2015-04-09 08:20
Email » Apple Mail 9
Q. How do I setup my account in Apple Mail 9?
A. Step 1. Create a new profile
1. Open the Apple Mail software and then click on "Mail" and "Preferences..." in the top left corner of the screen.
2.Select the "Accounts" icon at the top of the screen and then click on the "+" button in the bottom left corner to add a new account. Please choose "Other Mail Account..." from the list.
(If you already have an account setup, continue on to Step 2. Configuring/Modifying SMTP (outgoing mail) server.")
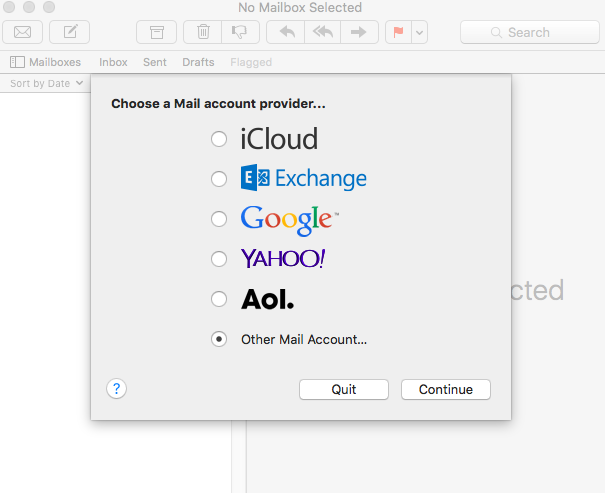
3. Enter your information into the first screen.
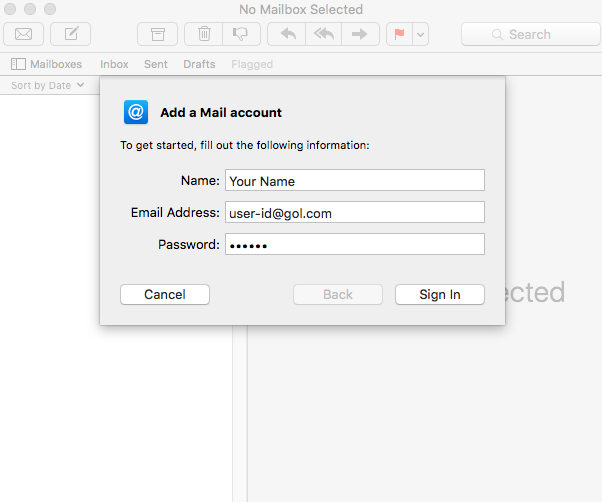
Full Name: Your Name
Email Address: user-id@gol.com
Password: Your Rakuten Broadband Premium account password
Click on the "Sign In" button to go to the next screen.
4. You will see the following image saying "Unable to verify account name or password". This is OK. Enter the information as show below where "user-id" is your GOL ID/Email address, the click "Sign In".
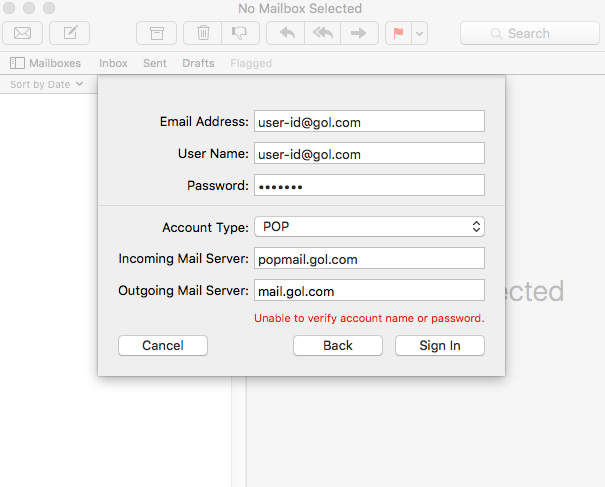
5. On this screen, click on the "Outgoing Mail Server (SMTP)" drop down menu and choose "Edit SMTP Server List", then proceed to step 6.
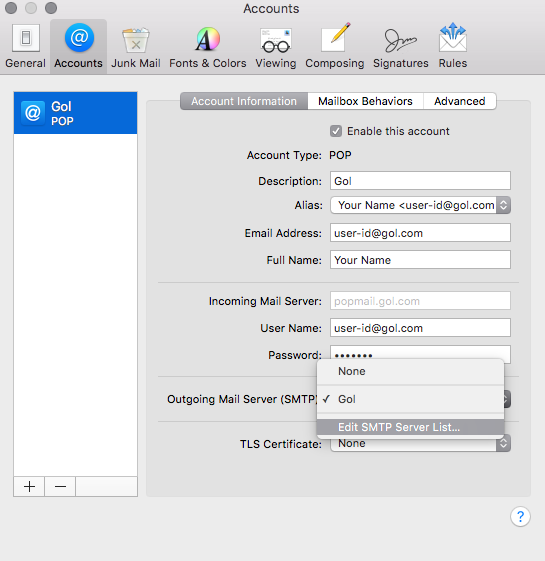
6. Choose the "Account Information" button on the left side and enter the information as shown below. After entering the information select the "Advanced"tab on the right side. Do not click "OK".

7. Enter the information as shown below.
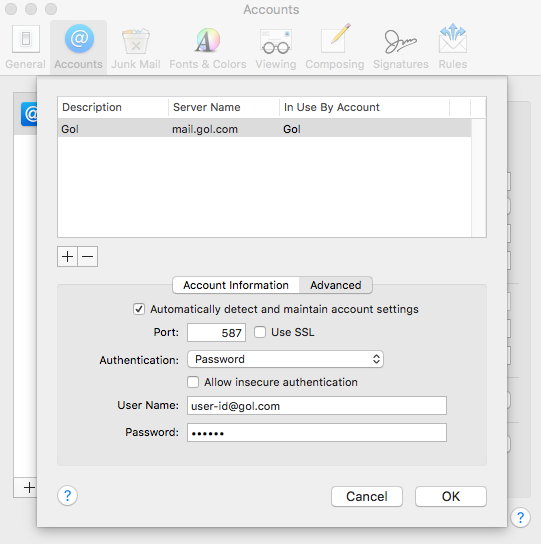
Automatically detect and maintain account settings: Checked
Port: 587
Use Secure Sockets Layer (SSL): Unchecked
Authentication: Password
Allow insecre authentication: Unchecked
User Name: Your email address
Password: Your Rakuten Broadband Premium account password
Click on the "OK" button to save these changes and return to the "Accounts" screen
8. You will now see your account as shown below. Click the circle on the top left to close this window. You may be asked to "Save". If so, click "Yes". Now go to the Mail application to verify that your account is working.
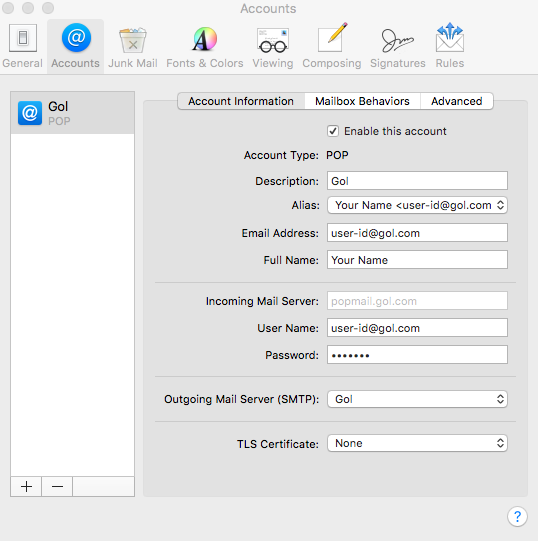
Step 2. Configuring/Modifying SMTP (outgoing mail) server
1. After completing the setup of your account, you should be returned to the "Accounts" screen. If not, click on "Mail" and then "Preferences..." in the top left corner of the screen to return to this window. You can now see your account and all of your details listed here.
2. Click on the "Advanced" tab in this window to check the incoming mail settings for your account.
Enable this account: Check
Include when automatically checking for new mail: Check
Remove copy from server after retrieving a message: Check and choose your own preference from the drop-down menu box.
Please note, the mailbox is only 100MB in size by default.
Port: 110
Use SSL: Do not check
Authentication: Password
3. Click on the "Account Information" tab again, click on the drop-down menu next to "Outgoing Mail Server (SMTP):" and then select the option "Edit Server List..."
4.Click on the "Advanced" tab in the following screen and enter the information as shown.
Automatically detect and maintain account settings: Checked
Port: 587
Use Secure Sockets Layer (SSL): Unchecked
Authentication: Password
Allow insecre authentication: Unchecked
User Name: Your email address
Password: Your Rakuten Broadband Premium account password
Click on the "OK" button to save these changes and return to the "Accounts" screen
5. Close the "Accounts" window and make sure to click "Save" to save the changes when prompted
Author: Support
Last update: 2018-01-26 02:59
Email » Apple Mail 10-11
Q. How do I setup my account in Apple Mail 10-11?
1. Open the Apple Mail software and then click on "Mail" and "Preferences..." in the top left corner of the screen.
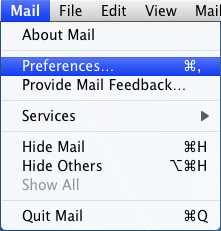
2.Select the "Accounts" icon at the top of the screen and then click on the "+" button in the bottom left corner to add a new account. Please choose "Other Mail Account..." from the list.
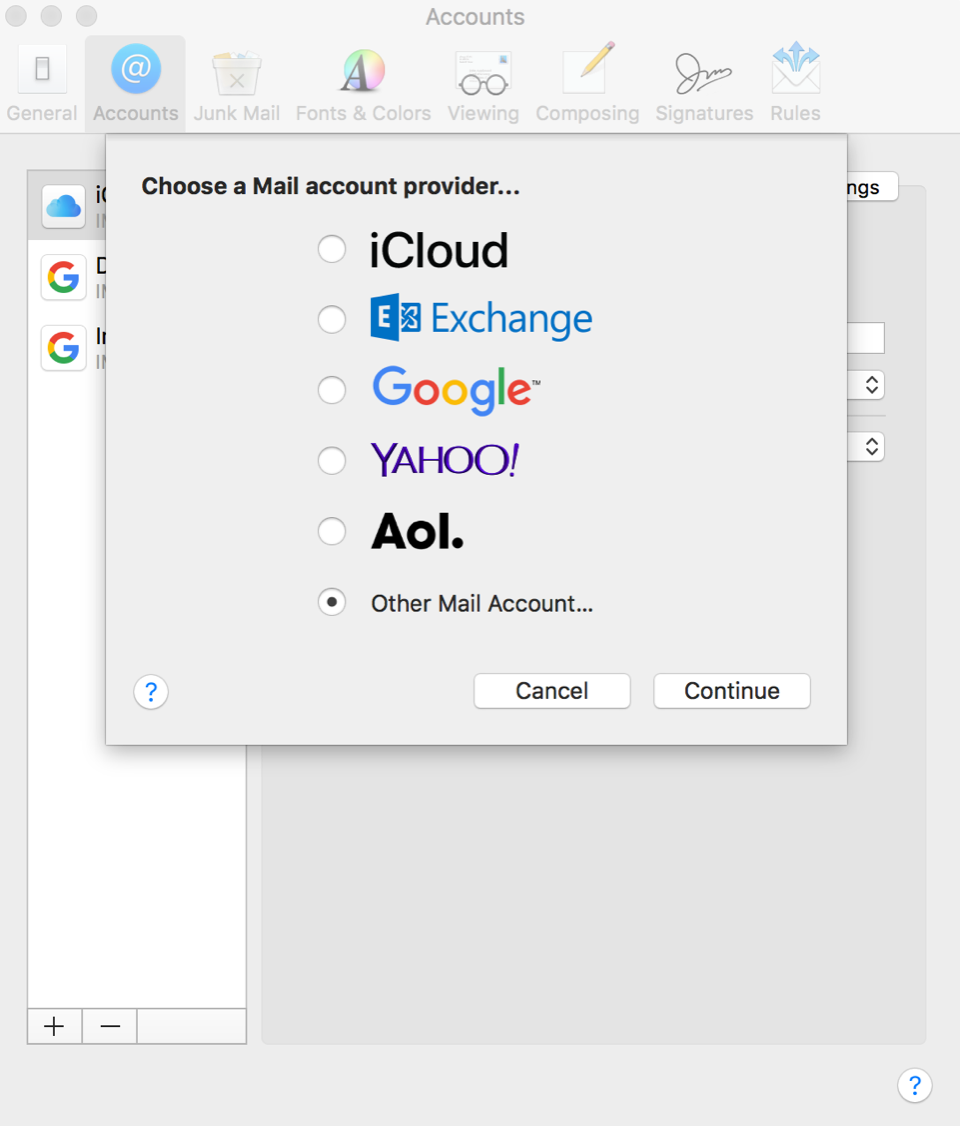
3. Enter your information into the first screen.
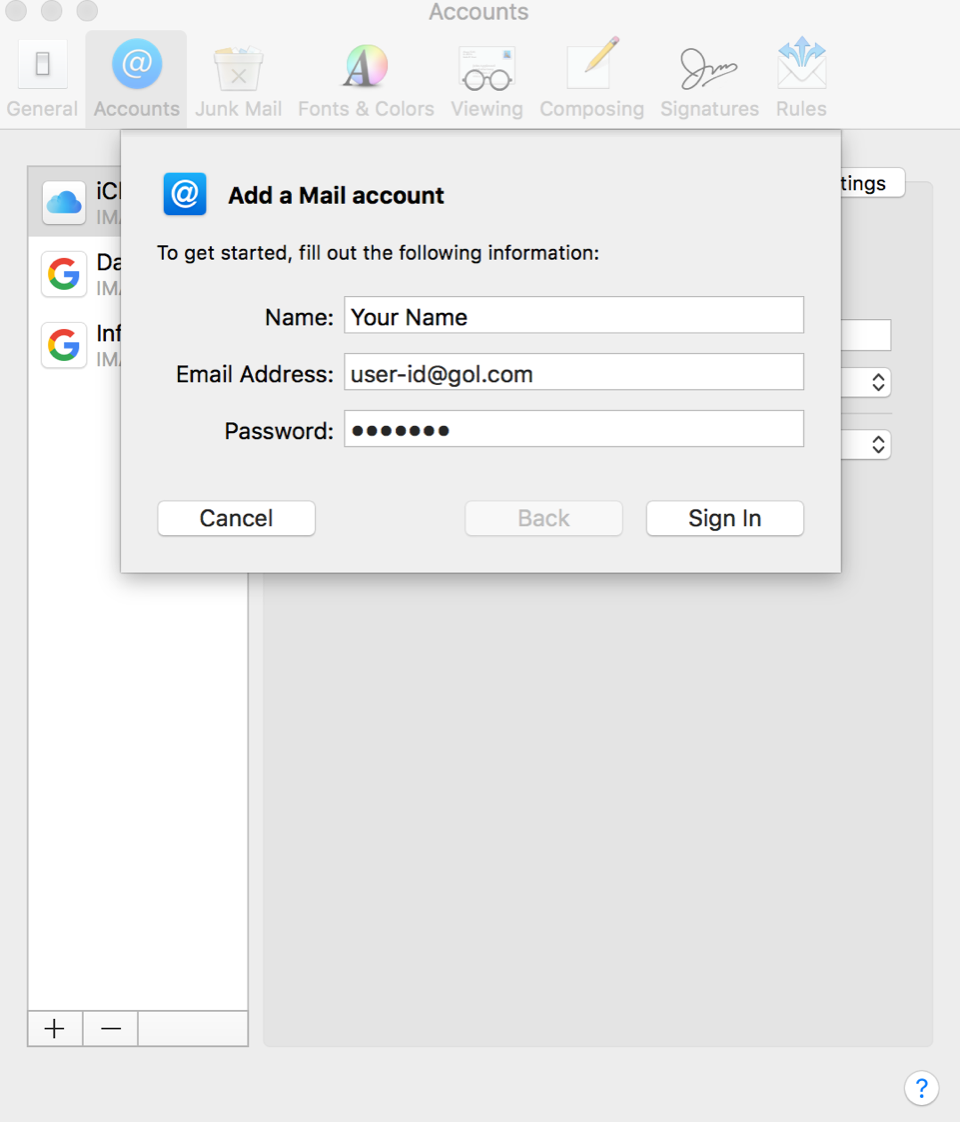
Full Name: Your Name
Email Address: user-id@gol.com
Password: Your Rakuten Broadband Premium account password
Click on the "Sign In" button to go to the next screen.
4. You will see the following image saying "Unable to verify account name or password". This is OK. Enter the information as show below where "user-id" is your GOL ID/Email address, the click "Sign In".
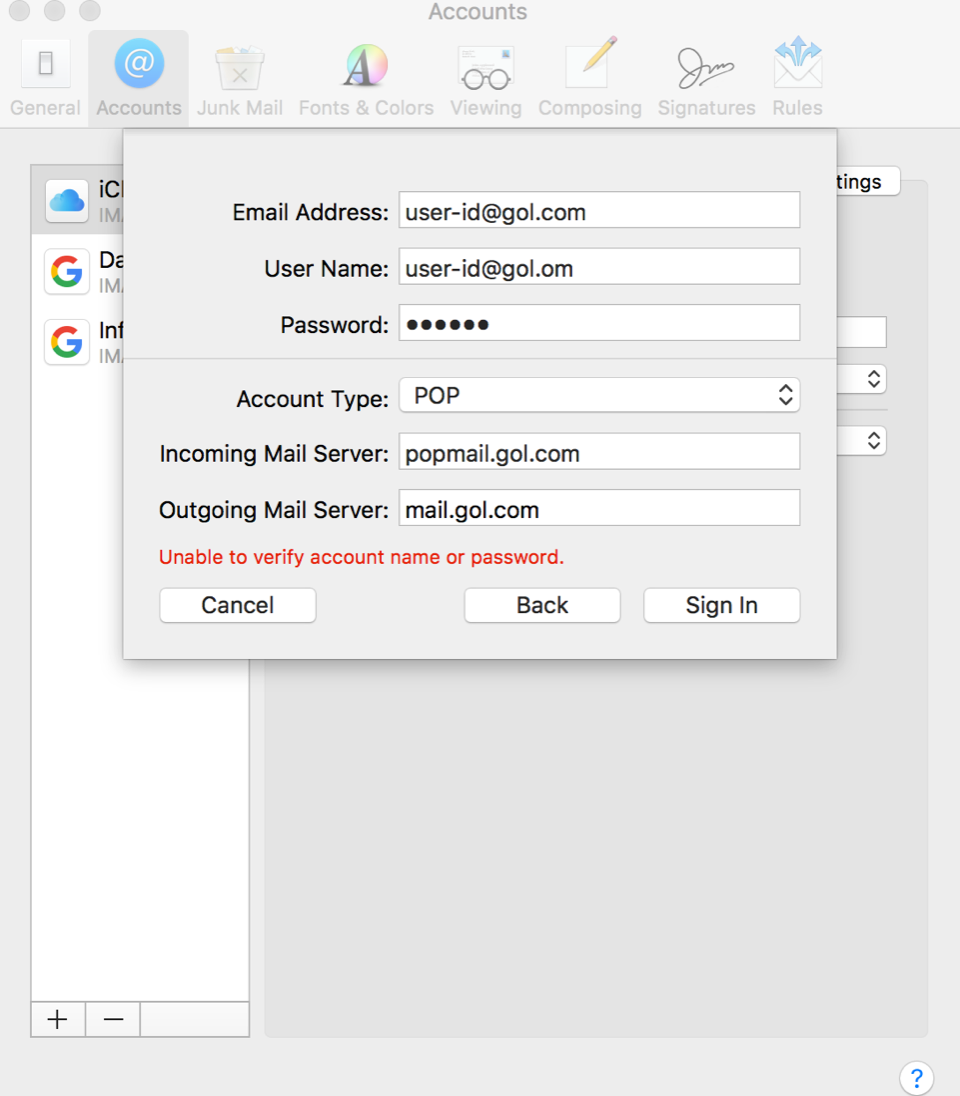
5. Under "Server Settings", click on the "Accounts" under "Outgoing Mail Server (SMTP)" drop down menu and "Edit SMTP Server List".
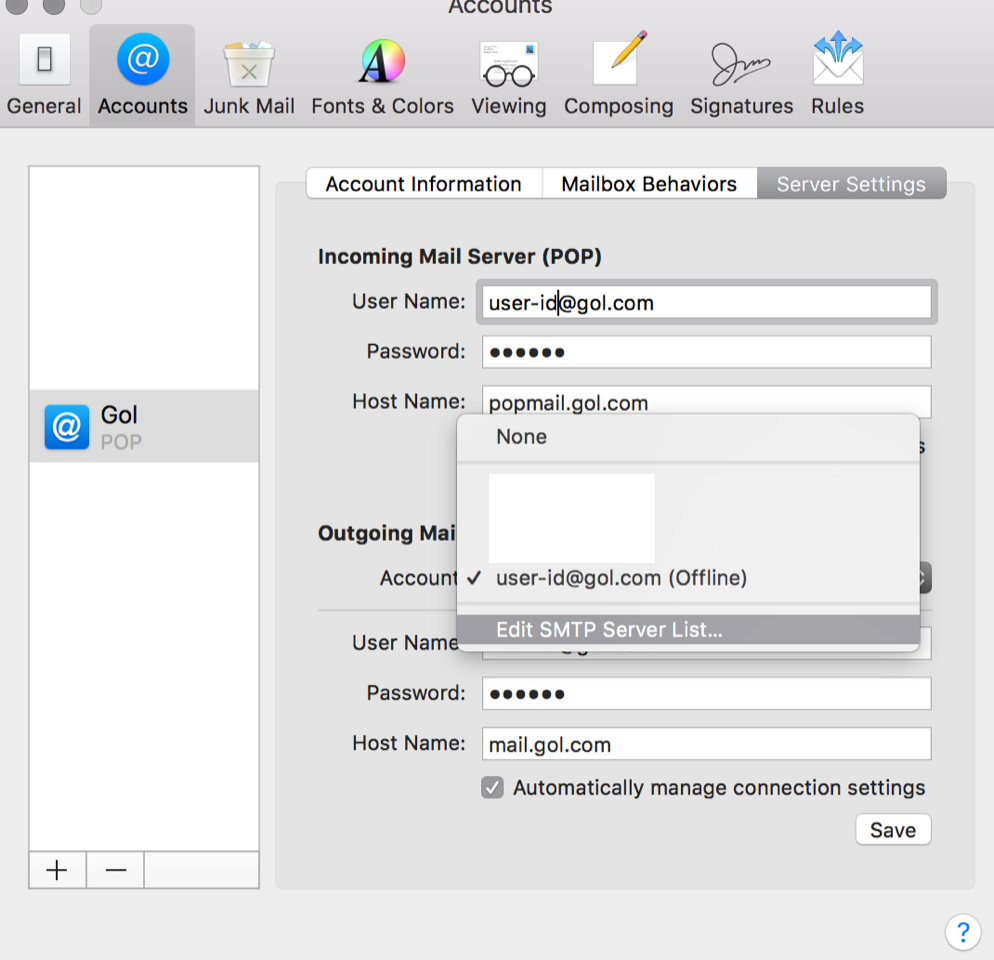
6. Then, choose the "Server Settings" button on the left side and enter the information as shown below.
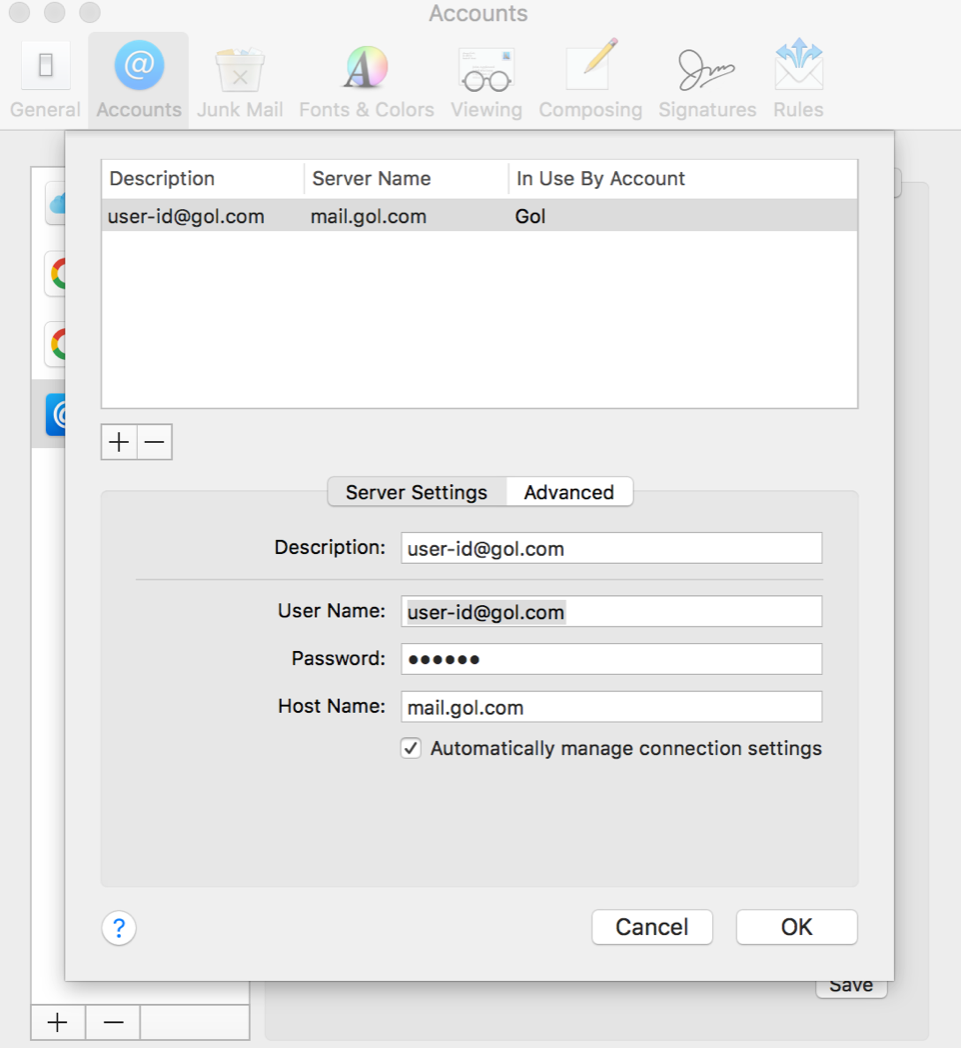
6. You will now see your account as shown below. Click the circle on the top left to close this window. You may be asked to "Save". If so, click "Yes". Now go to the Mail application to verify that your account is working.
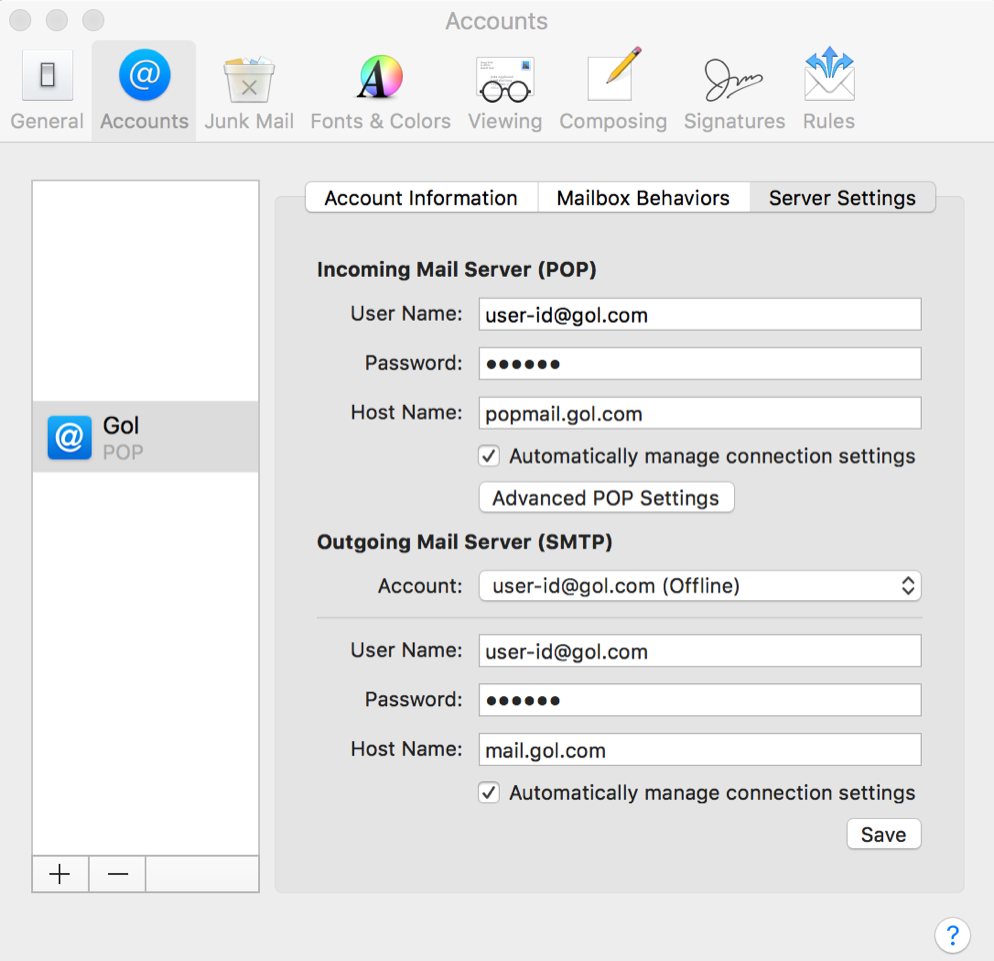
Author:
Last update: 2018-01-26 03:41
Email » Thunderbird 3-24
Q. How do I setup my account in Thunderbird 3?
A. Step 1. Create a new profile
1. Open Thunderbird 3 and click on "Tools" and then "Account Settings..." here
(If you already have an account setup, continue on to "Step 2. Configuring/Modifying SMTP (outgoing mail) server.")
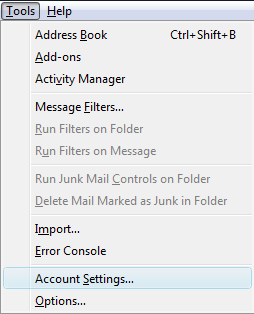
2. Click on "Account Actions" and then "Add Mail Account..." in the bottom left corner of the screen
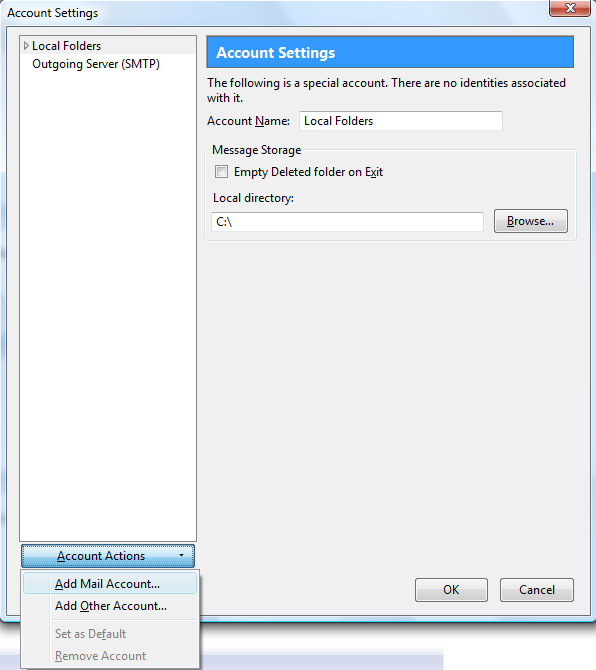
3. Enter your account information here;
Your name: Enter your name here
Email address: Enter your email address
Password: Enter your Rakuten Broadband Premium account password
Remember password: Check this if you would like Thunderbird to remember your password
Click on "Continue" once this information has been entered
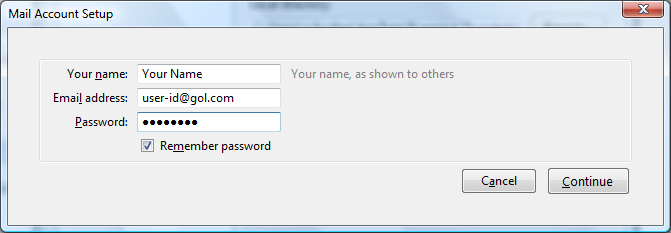
4. Click on the "Edit" button here after Thunderbird attempts to complete the account settings itself
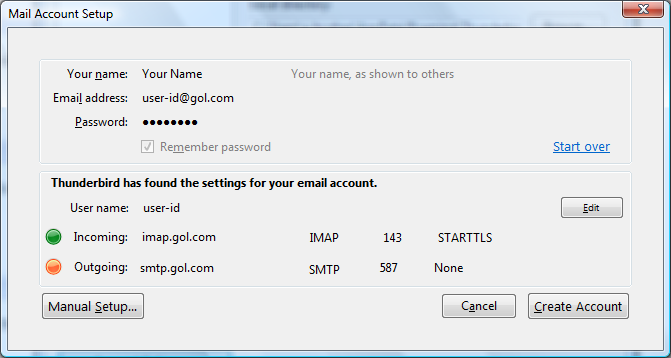
5. Update the account settings here so that they are the same as shown below
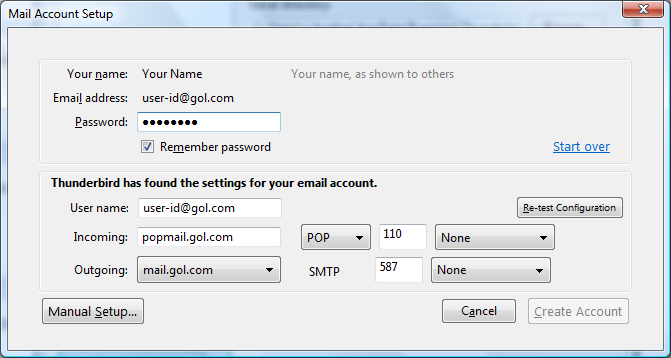
Please make sure you have the following settings;
User name: Enter your email address
Incoming: popmail.gol.com
Outgoing: mail.gol.com (Default)
Make sure you select the "POP" protocol, the port numbers are 110 (Incoming) and 587 (Outgoing) and that "None" has been selected in the drop down menu boxes on the right hand side
Click "Re-test Configuration" after updating these settings
6. Click on "Create Account" after the updated settings have been tested by Thunderbird
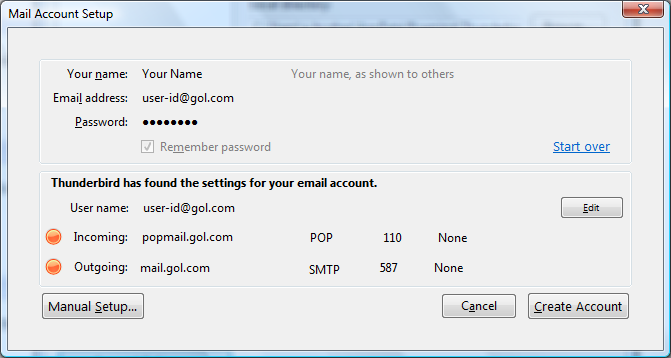
7. You may see the following screen as no secure connection has been selected for incoming or outgoing mail. Check the "I understand the risks." box here and then click "Create Account"
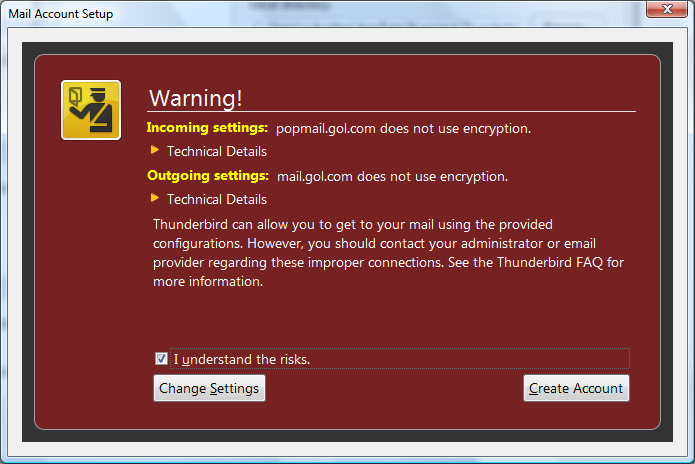
NOTE - It is possible to use a secure connection when sending or receiving mail. However, we usually recommend turning this off at first to confirm that you are able to send and receive mail without any problems. Once you can send and receive mail without any problems, these settings can be updated in Thunderbird
Step 2. Configuring/Modifying SMTP (outgoing mail) server
1. After creating the account in Step 1, you should be returned to the Account Settings window. If you are not returned to this screen or need to access it again, click on "Tools" and then "Account Settings..." in Thunderbird
2. You should now see your account listed in the left hand side menu. Select "Outgoing Server (SMTP)" here
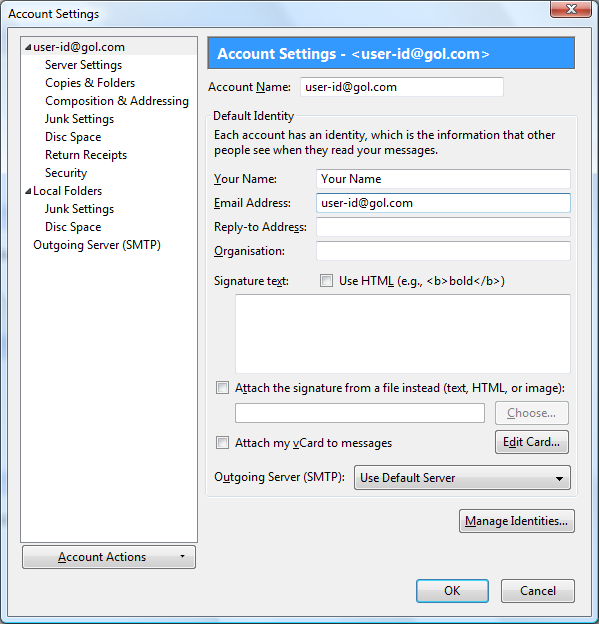
3. Select the mail.gol.com server on the right hand side of the screen and click the "Edit..." button

NOTE - If the mail.gol.com server is not the "(Default)" server, you can change this by selecting mail.gol.com and then clicking the "Set Default" button on the right hand side
4. Depending on the version of Thunderbird 3 you are using, you should see one of the screens below;
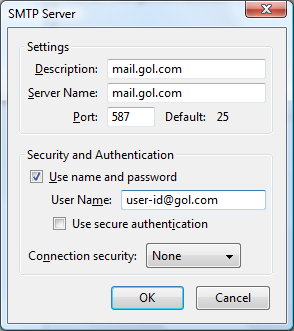
Please make sure you have the following settings;
Description: mail.gol.com
Server name: mail.gol.com
Port: 587
Use name and password: Checked
User name: Enter your Rakuten Broadband Premium email address
Use secure authentication: Unchecked
Connection security: None
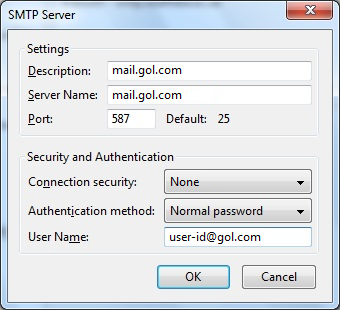
Please make sure you have the following settings;
Description: mail.gol.com
Server name: mail.gol.com
Port: 587
Connection security: None
Authentication method: Normal password*
User name: Enter your email address
*If you do not have this option, please select "Password, transmitted insecurely"
Once you have checked these settings, click "OK". You will be returned to the Account Settings screen and you can click "OK" again here to close this screen
You should now be able to send and receive email in Thunderbird 3. If you have any problems sending or receiving mail after confirming the settings you have are correct, please refer to our other FAQs or contact us
Author: Support
Last update: 2018-05-24 04:40
Optional Services » IP Phone
Q. How do I setup my FUSION IP Phone account?
A. If you are using the rental modem (Aterm WD701CV) or rental router (Aterm WR7610HV), please follow these instructions to setup your IP phone account.
NOTE - If you have not yet setup the internet connection in the Aterm modem or router you are using, please do this first. You can find instructions on how to setup the Aterm device here
1. Open a web browser and go to the FUSION IP Phone site. You should see the following screen. Click the 次へ button here to continue
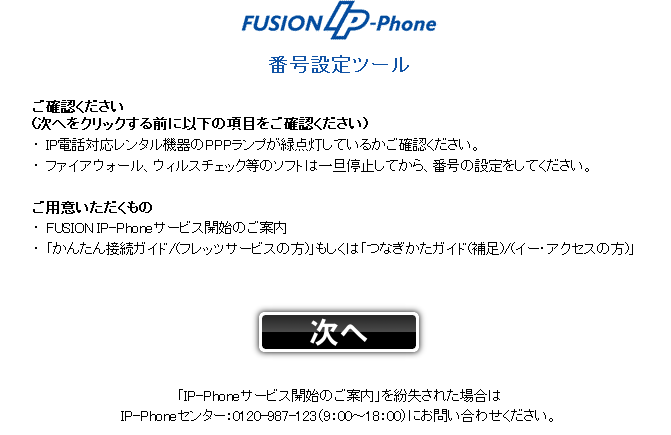
2. You will now be asked to login. Please enter the following information to do so;
サイトログインID - FUSION
パスワード - GOL
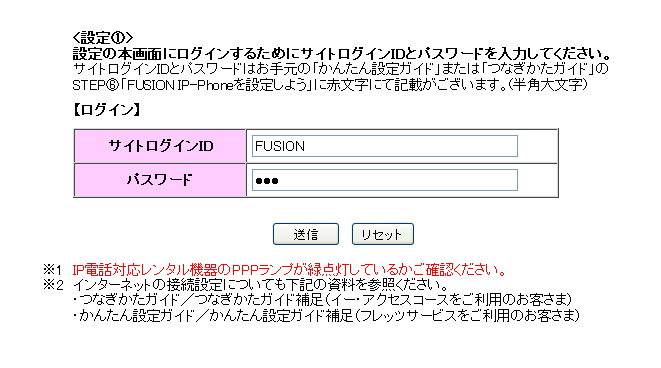
Click the 送信 button after entering this information to continue
3. You will now be asked to enter your FUSION IP Phone account information.
アカウントID (Account ID) - 12 digit number starting with 815
IP加入電話パスワード (IP Phone Subscriber Password) - 8 digit password
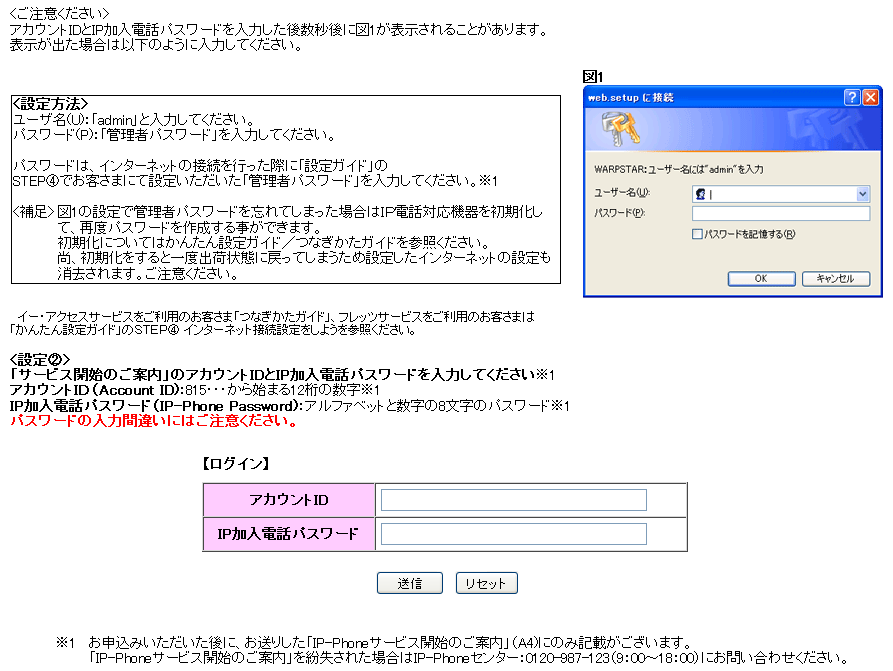
Once you have entered your IP Phone account information, click the 送信 to continue
NOTE - If you do not have a copy of your IP Phone account information and/or cannot remember it, please contact the FUSION IP Phone Call Centre on 0120-987-100. (Japanese support only)
4. You will now be asked to enter the user ID and password to access your rental modem/router.
ユーザ名(U): admin
パスワード(P): This is the password you assigned to the modem/router when it was initially configured.
If you cannot remember what the password is, you may need to reset the device back to its factory default settings and the reconfigure it. Please refer to this FAQ page for information on how to do this
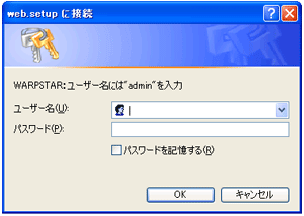
Click the "OK" button after entering the user name and password to send the IP Phone account information to the modem/router
5. Once the settings have been saved inside the device, you should see the following screen confirming this

You can now use your FUSION IP Phone
If you are using your own VoIP router, the settings you need to use, alongside the FUSION IP Phone account information, are as follows;
SIP Domain: fusion.sip.0038.net
Address: 61.114.168.10
Please note, in order to use the FUSION IP Phone service, you will need to make sure your router is compatible with the service. This site here has a full list or routers that are compatible with the FUSION IP Phone service.
Unfortunately, Rakuten Broadband Premium cannot provide technical support for third party devices.
If you have any questions about the FUSION IP Phone account, please contact the FUSION IP Phone Call Centre on 0120-987-100. (Japanese support only)
Author: Support
Last update: 2017-11-28 06:48
Q. How do I connect my phone to my VoIP router to use the IP phone service?
A. If you are using the Aterm WR7610HV device, you can find instructions on how to connect your phone to this VoIP router here
If you are using your own VoIP router, you will need to check the instruction guide that came with this device
Author: Support
Last update: 2011-10-25 04:40
Internet Connection Setup » Hikari Premium (NTT West)
Q. How do I setup my Hikari Premium account? (NTT West only)
A. If you are in one of the NTT West* areas and using a Hikari Premium Mansion** or Hikari Premium Family type service, the connection setup instructions are slightly different to those provided for other operating systems. The reason for this is that NTT provide 2 devices to you when you use a Hikari Premium service, an ONU (Optical Network Unit, converts the fiber signal to data) and a CTU (an IPv6 bridge).
In order to connect to the internet in NTT West areas when using a Hikari Premium type service, please refer to the instructions at the link below.
http://www.gol.com/english/support/manual/internet/pdf/ntt_west_setup.pdf
*NTT West Areas: Toyama, Ishikawa, Fukui, Gifu, Shizuoka, Aichi, Mie,
Shiga, Kyoto, Osaka, Hyogo, Nara, Wakayama, Tottori, Shimane, Okayama,
Hiroshima, Yamaguchi, Tokushima, Kagawa, Ehime, Kochi, Fukuoka, Saga,
Nagasaki, Kumamoto, Oita, Miyazaki, Kagoshima, Okinawa
** If you are not using a Hikari Premium type connection and are only using a BFLETS type fiber service from NTT, you can refer to the regular connection setup instructions for your operating system.
Author: Support
Last update: 2015-01-22 09:07
Email » iPhone/iPad
Q. How do I setup my account in my iPhone/iPad?
A. Please follow these instructions to setup your @gol.com account in your iPhone
1. Open the Apple iPhone menu and tap "Settings"

2. Tap the "Mail, Contacts, Calendars" option

3. Tap the "Add Account…" option

4. Tap the "Other" option

5. Tap the "Add Mail Account" option

6. Enter your information here
Name - Enter your name here
Address - Enter your email address here (user-id@gol.com)
Password - Your Rakuten Broadband Premium account password
Description - Enter a name for the account (e.g. user-id@gol.com)
Click on the "Save" button to save the changes and go to the next screen

7. Select "POP" as the account type and then tap the "Host Name" option
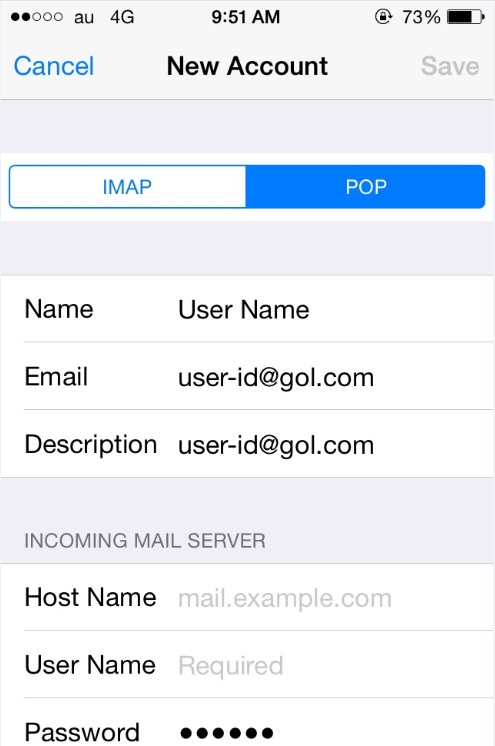
8. Enter the Incoming Mail Server information here
Host Name - Enter popmail.gol.com here
User Name - Enter your email address here (e.g. user-id@gol.com)
Password - Your Rakuten Broadband Premium account password
Click on the "Save" button to save the changes and go to the next screen
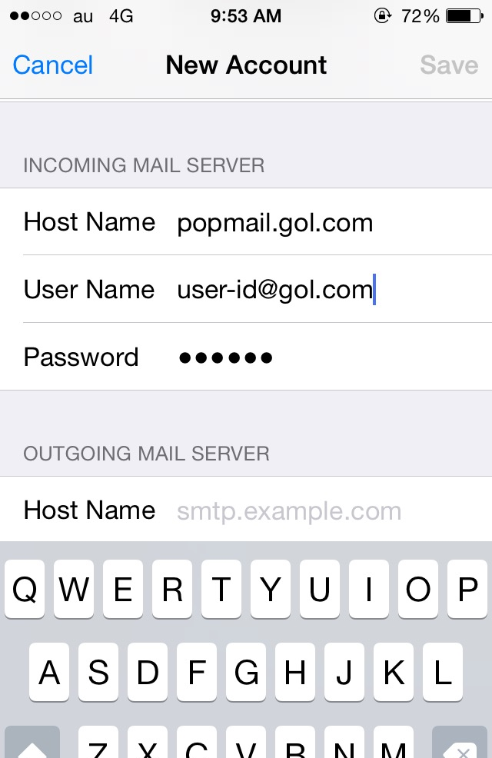
9. Enter the Outgoing Mail Server information here
Host Name - Enter mail.gol.com here
User Name - Enter your email address here (e.g. user-id@gol.com)
Password - Your Rakuten Broadband Premium account password
Click on the "Save" button to save the changes and go to the next screen
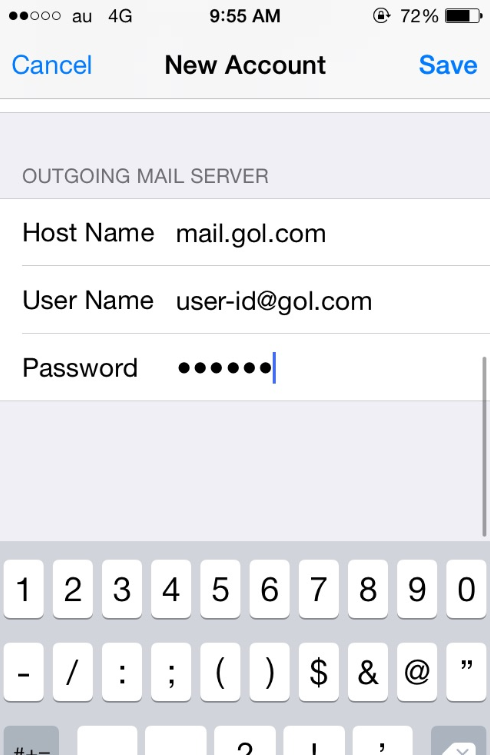
10. Tap the option for the GOL account you have created (e.g. user-id@gol.com)
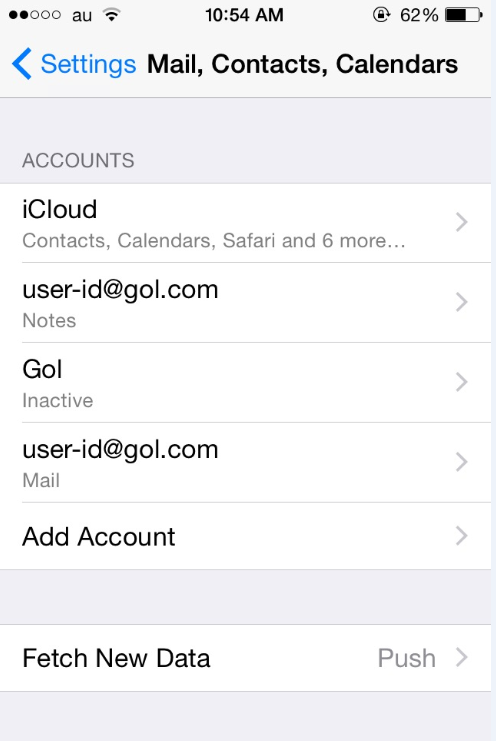
11. Tap the "SMTP mail.gol.com >" option
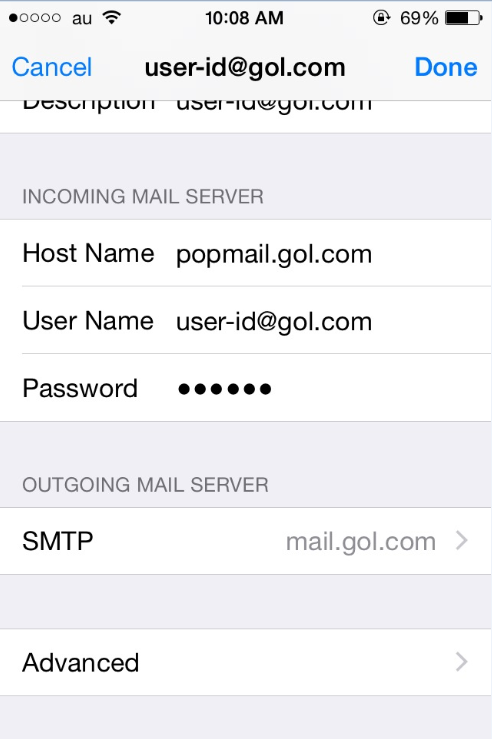
12. Make sure that the mail.gol.com SMTP server is set to "On" and is the "Primary Server". Now tap the "mail.gol.com On >" button.
IMPORTANT: If you have several GOL SMTP SERVERS that are set to 'Off' as you can see below, please tap on each one of these separately to open and edit. You can now choose 'Delete' at the bottom of the page to delete these unused GOL SMTP SERVERS. Having multiple GOL SMTP SERVERS may disable your iPhone from sending email from your GOL account.
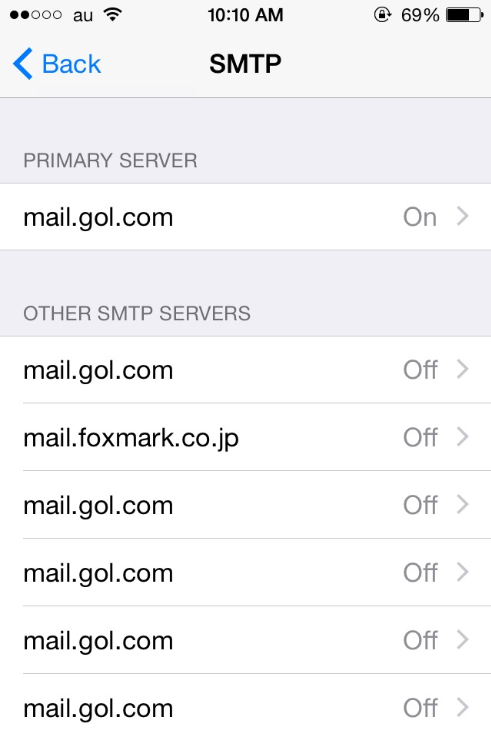
13. Make sure that you have the following settings
Host Name - mail.gol.com
User Name - Your email address here (e.g. user-id@gol.com)
Password - Your Rakuten Broadband Premium account password
Use SSL - OFF
Authentication - Password
Server Port - 587
Click on the "SMTP" button to save the changes and go back to the main account screen
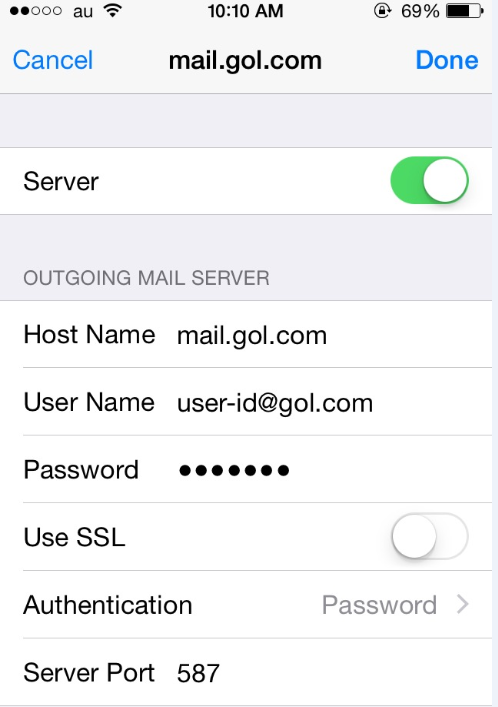
14. Once you have been returned to the main account screen, tap the "Advanced" button
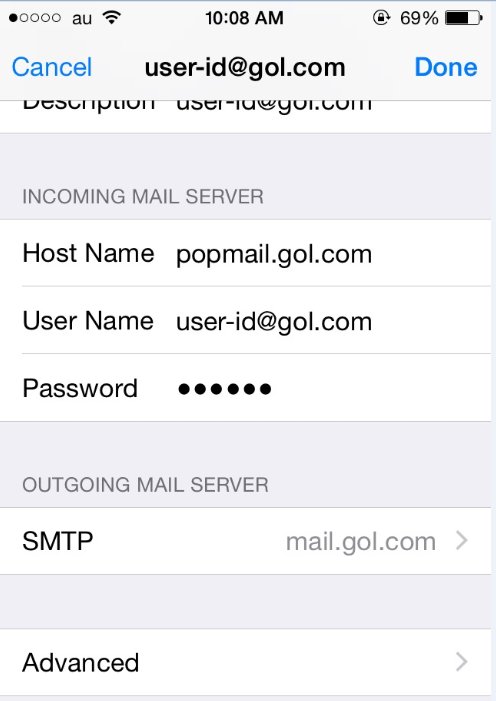
15. Make sure that you have the following settings
Remove - After one week (You can choose your own option here but it should be noted that gol.com mailboxes only provide 100MB of storage space by default)
Use SSL - OFF
Authentication - Password
Delete from server - Never
Server Port - 110
Click on the "user-id@gol.com" button to save the changes and go back to the main account screen
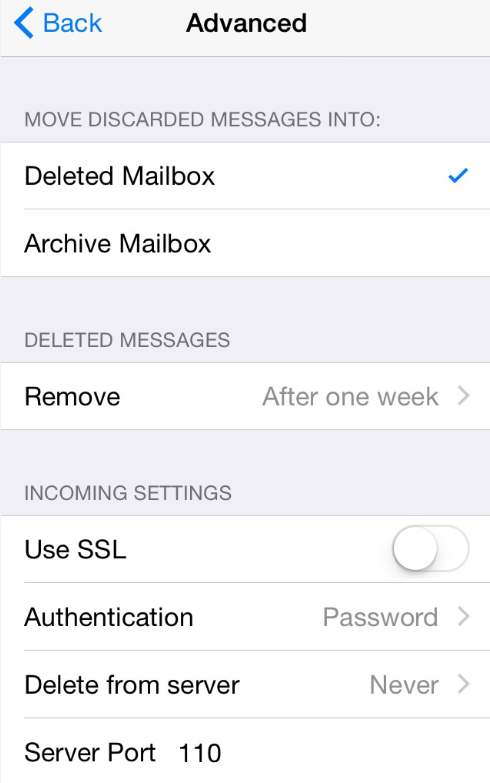
16. You should now be able to send and receive email on your iPhone with your GOL account. If you have any problems, please feel free to contact us.
Author: Support
Last update: 2017-07-03 03:49
Internet Connection Setup » Troubleshooting
Q. I can't connect to the internet. What could be the problem?
A. There are several reasons why you may be unable to connect to the internet. We normally recommend going through the following steps to find out the cause;
1. Contact NTT* and ask them to confirm the status of the account with them, i.e. confirm whether it is enabled or disabled. You can also ask them to test the line from their end of see if they can see any problems with it.
2. If NTT can confirm that everything is OK, please contact us so that we can confirm the status of your account with us here. Alternatively, go to the Webmail site and try logging in here with your user ID and password. If you are able to login, your account with Rakuten Broadband Premium account is active.
3. If the account is active with both NTT and Rakuten Broadband Premium, then the next step depends on the configuration in your home.
*Please note, if you are using the eAccess ADSL service, please refer to the instructions at the bottom of this page.
NTT FLETS ADSL and Fiber Optics Users in NTT East areas
If you are using a router
1. If you are using a router but one or more of the computers connected to the router can access the internet;
The problem is likely with the router itself. You can try to confirm this yourself by connecting one of the computers to the router by cable, if it's setup wirelessly, and then try browsing again. If this works, the problem is likely being caused by the wireless settings either in the router or on the computer itself.
If you are unable to connect to the internet when the computer is connected to the router directly, you can try switching the cable from one socket to another on the router to test this. You can also try switching cables to make sure this is not the issue. If you are still unable to connect at this point, you will need to either contact the manufacturer of the router or browse their website and support forums for assistance.
Please note, if you are using the Aterm WR7610HV router provided by Rakuten Broadband Premium, please contact us in this instance.
2. If you are using a router and all of the computers connected to it cannot access the internet;
Again, the problem is likely with the router itself. If all of the computers connected to the router are connecting wirelessly, we suggest you try connecting one of the computers to the router by cable and then try browsing again. If this works, the problem is likely being caused by the wireless settings either in the router or on the computer itself.
If you are unable to connect to the internet when the computer is connected to the router directly, the router itself could be misconfigured or no longer working at all. You can test this by trying to access the routers firmware, usualy by browsing to 192.168.1.1 or by using the Airport Utility if you are using an Apple device. If you can access the router's firmware, you may just need to reconfigure the router to get it working again. You can confirm how to do this either by using the router setup manual or by checking their support sites online, if you can access the internet in another way. Rakuten Broadband Premium cannot provide technical support for third party routers.
Please note, if you are using the Aterm WR7610HV router provided by Rakuten Broadband Premium, please contact us in this instance.
If you are using a router, it is worth trying to connect the computer directly to the NTT device to test the connection as well. This should confirm whether the problem is with the router itself or the computer.
If you are connecting directly to the NTT device
If you are connecting directly and have setup the connection ID and password in your computer as per our instructions here, you may see one of the following error messages;
Windows users
Error 678 in XP and Error 815 in Vista - This error appears when there is no connection to our PPPoE server available. This is almost always caused by either a disabled account with NTT or a faulty line or NTT device. Please contact NTT if you are receiving this error message to confirm the status of the account with them.
Error 691 - This error appears when either the user name or password has been entered incorrectly. The only other instance in which this message appears is when the connection ID you have received from Rakuten Broadband Premium does not match the service type from NTT. For example, you are using a Mansion type fiber optic service from NTT but have received a Family type connection ID from us. If this is the case, please contact us so that we can update the connection ID or go to the Members Station and make the change there yourself.
Mac users
Could not find a PPPoE server - This error when there is no connection to our PPPoE server available. This is almost always caused by either a disabled account with NTT or a faulty line or NTT device. Please contact NTT if you are receiving this error message to confirm the status of the account with them.
Authentication failed - This error appears when either the user name or password has been entered incorrectly. The only other instance in which this message appears is when the connection ID you have received from Rakuten Broadband Premium does not match the service type from NTT. For example, you are using a Mansion type fiber optic service from NTT but have received a Family type connection ID from us. If this is the case, please contact us so that we can update the connection ID or go to the Members Station and make the change there yourself.
NTT West Premium Family/Mansion Type Fiber Optic Users
If you are in the NTT West area and using the Family type fiber optic service from NTT, it's likely that you have 2 devices from NTT, an ONU and a CTU. In this instance, the ONU is connected to the wall and the CTU and the computer or router is connected to the CTU.
If you are using a router and this is connected to the CTU, we recommend simply trying to connect the computer directly to the CTU to see if you can browse the internet. If you are unable to do so, we recommend contacting NTT to ask them if they can check the line and account status from their end before contacting us.
If you are not using a router and you are connected directly to the CTU but cannot access the internet, we recommend contacting NTT to ask them if they can check the line and account status from their end before contacting us.
eAccess ADSL Users
If you are using the eAccess ADSL service, please contact us directly if you are unable to connect to the internet.
Author: Support
Last update: 2017-07-03 03:33
Q. Do Rakuten Broadband Premium restrict bandwidth or otherwise throttle file-sharing and P2P traffic?
A. A bandwidth limiting system was implemented at the end of November 2010 for users of file sharing and P2P software (Winny, Gnutella, Bittorrent, etc.) This was implemented in order to allow all users of our internet services to connect and browse the internet without being affected by file sharers using large amounts of bandwidth.
This restriction was ultimately introduced as a result of heavy bandwidth users exchanging large and continuous amounts of data via file-sharing and P2P software. This will mean that users of file-sharing software will be prevented from using the maximum amount of bandwidth available to them but will not prevent the software from working entirely.
The restrictions to file-sharing software users will not affect users of email services, web browsing (http/https traffic) and FTP uploads and downloads. In addition, there is no need to change the settings in your own browser, email client or the connection setup itself.
Start date
End of November 2010
Customers affected by the restrictions
Customers using file-sharing and P2P software such as Winny, Gnutella, Bittorrent, etc
We thank you for your understanding of this matter and would like to thank you for continuing to use our internet services.
Author: Support
Last update: 2017-07-03 03:34
Q. How do I setup my Rakuten Broadband Premium account in my Aterm WD701CV modem?
This entry is in revision and can not be displayed.Author: Support
Last update: 2021-01-06 02:45
Q. Can you provide more information about the P2P restrictions being implemented by Rakuten Broadband Premium?
A. Please see the following questions and answers for more information about the P2P and file sharing restrictions being implemented;
Q. Do I have any control over the P2P restrictions?
A. Unfortunately no and, in fact, neither do Rakuten Broadband Premium. Our POI provider with NTT has implemented these restrictions to reduce bandwidth being used by file sharing and P2P software such as Share, Winny, Gnutella, Bittorrent, etc.
Q. When I signed up with Rakuten Broadband Premium, I was not notified of these restrictions. Why not?
A. These restrictions were implemented at the end of November 2010 and anyone signing up after this time and asking about throttling would have been informed of these restrictions. Article 2 of the End User Agreement notes that changes to existing contracts are also possible. (End User Agreement)
Q. Will it sill be possible for me to using P2P and file sharing software at all?
A. Yes, we can confirm that you will still be able to use P2P and file sharing software but the amount of bandwidth available will be restricted to prevent increased traffic from these sources affecting HTTP and other traffic.
Q. Why are the restrictions being implemented now?
A. The restrictions are being put into place to prevent users of P2P and file sharing software clogging the network and using very large and continuous amounts of bandwidth for file transfers. This will prevent regular HTTP and other traffic from being affected in the future.
Q. I’m not sure what P2P and file sharing is. I currently use email and just browse websites so will these changes affect me?
A. No, regular email and web browsing (HTTP) will not be affected by the restrictions.
Q. Will instant messaging software be affected by the restrictions?
A. No. Programs such as Skype, MSN Messenger and other messaging software will not be affected.
Q. Will video streaming be affected by the restrictions?
A. Video streaming should not be affected (e.g. YouTube) except in instances where Bittorrent or other file sharing protocols are in use.
Q. Will my IP TV or IP Phone services be affected by the restrictions?
A. No, users of these services will not be affected.
Q. Will online gaming be affected by the restrictions?
A. Online gaming should not be affected except in instances where Bittorrent or other file sharing protocols are in use.
Q. Will FTP file transfers be affected by the restrictions?
A. No, FTP file transfers will continue to work as they do now.
Q. Will online trading tools be affected by the restrictions?
A. Online trading tools should not be affected except in instances where Bittorrent or other file sharing protocols are in use.
Q. We are running a business and exchange a lot of data on a daily basis. Will we be affected by the restrictions?
A. No, businesses that exchange a lot of data should not be affected unless they are using P2P or other file sharing software on their network.
Q. What are the upload/download restrictions for P2P and file sharing traffic?
A. There are no daily, weekly or monthly limits for this kind of traffic but it will be restricted based on the port numbers being used by the corresponding software. Unfortunately, we are unable to provide the exact upload/download limits (e.g. KB/s) or port numbers being blocked as we have not been informed of this.
Q. What will happen if I continue to use P2P and file sharing software?
A. In some cases, users who are constantly transferring files over P2P and other file sharing software maybe restricted further.
Q. Are there going to be additions to the current restrictions in the future?
A. Potentially yes if traffic from other P2P software increases or there's no notable decrease in bandwidth being used by these applications. This will be monitored over the next few months and further adjustments may be made.
Q. If I choose to cancel my service as a result of these changes, will there be any penalty for doing so?
A. No, unless you have signed up under a campaign.
If you have any further questions about the P2P and file sharing restrictions being implemented, please contact us.
Author: Support
Last update: 2017-07-03 03:37
Q. How do I find my Aterm WD701CV modem wireless network name and password?
This entry is in revision and can not be displayed.Author: Support
Last update: 2021-01-06 02:44
Q. How do I setup my Rakuten Broadband Premium account in my Aterm WR7610HV router?
This entry is in revision and can not be displayed.Author: Support
Last update: 2021-01-06 02:46
Q. How do I connect my Aterm WR7610HV router to my computer, phone and NTT device?
This entry is in revision and can not be displayed.Author: Support
Last update: 2021-01-06 02:46
Q. How do I restore the factory default settings to the Aterm WD701CV modem?
This entry is in revision and can not be displayed.Author: Support
Last update: 2021-01-06 02:45
Q. How do I restore the factory default settings to the Aterm WR7610HV router?
This entry is in revision and can not be displayed.Author: Support
Last update: 2021-01-06 02:46
Security » Apple OS
Q. How can I fix Adware and Malware issues?
1. If you have recurring pop-up windows or your browswer seems to have been hijacked, we recommend reading the excellent article 'How to fix adware problems on your mac' at the link below.
http://www.imore.com/how-fix-adware-problems-your-mac
2. Further and as mentioned in the artice above, we recommend the free application, AdwareMedic. Click the link below to go to the homepage and download the application:
http://www.adwaremedic.com/index.php
3. If this still does not fix your issues entirely and need a more thorough removal, follow the simple steps in the article at the link below:
http://malwaretips.com/blogs/remove-mac-os-x-virus/
Author: Support
Last update: 2015-02-03 00:24
Security » Windows OS
Q. How can I fix Adware and Malware issues?
1. If you have recurring pop-up windows or your browswer seems to have
been hijacked, we recommend reading the following webpage on the Microsoft website 'Scan for spyware and other potentially unwanted software' at the link below:
http://windows.microsoft.com/en-us/windows/scan-for-spyware-unwanted-software#1TC=windows-7
2. Further and as mentioned on the Microsoft webpage above, we recommend using the free Microsoft Security Essentials application to scan and remove unwanted software. Click the link below to go to the homepage and
download the application:
http://windows.microsoft.com/en-us/windows/security-essentials-download
Author: Support
Last update: 2015-02-03 00:25
Email » Troubleshooting
Q. I can receive email but I can't send anything. What's causing this?
A. Please confirm that you have setup your email client correctly and that you have the correct email settings
If the settings are correct, any Anti-Virus or Firewall software you are using may be interfering in the sending procedure. If you disable this software and continue to have the same problem sending mail, please contact us.
Author: Support
Last update: 2011-06-29 02:24
Q. I can't receive or send email. What's causing this?
A. If you are unable to receive email, your mailbox could be full. In order to check this, please go to our Webmail site and login here with your user ID (the part before the @gol.com in your email address) and password. Also make sure you select "IMAP" as the login type as opposed to the default setting "POP".
Once you have logged in to the site, you should be able to see the amount of data being used by the Inbox and other folder in the top right hand corner of the screen. If you can't see this, please go to "Options" in the Webmail site and then look for "Disk & Folder Options". Here, change the "Show quota" option to "in message listing" and then save the changes by clicking on the "Apply' button in the bottom left hand corner of the screen.
If the amount of space you are using exceeds 100MB (100,000KB) then you will need to delete some email from the Webmail site to clear up space. After doing this, email should start arriving to you again within 60 minutes.
If the mailbox was full but you are still unable to send email, please refer to our FAQ about this here
If you continue to have problems sending or receiving mail after checking the mailbox isn't full and that you have the correct settings, please contact us.
Author: Support
Last update: 2016-09-26 02:41
Q. How do I check the spam filter settings for my email account?
A. In order to check the current filter settings for your @gol.com email account, please login to the Members Station. Once you have logged in, click on the option "Advanced SPAM Filter/Virus Settings" in the left hand side menu. You should now be able to see the current spam filter settings for your account here.
Please make sure the option "Filter Spam Mail" has been checked and then check the boxes in "Language Filters", "Local Black Lists" and "Realtime Black Lists". You can then save these changes at the bottom of the screen by clicking on the "Update Spam/Virus Filter Settings".
Please note, if you expect to receive email in Chinese, Korean or Russian or from these locations, please do not add the corresponding language filter.
If you are using the "Advanced SPAM Filtering Service" or "Virus Filter" service as well, you will have additional options on this screen. We recommend setting the "Spam Assassin Filtering Level" setting to level 7 by default and checking the options "Greylisting", "SES" and "Virus Filter".
If you are not currently using the "Advanced SPAM Filtering Service" or "Virus Filter" service, you can apply for one or both of these services in the Members Station. The charge for each service is 100yen per month excluding tax and once you have applied for it, you should be able to access the additional settings within an hour.
If you have any questions about spam/virus filtering on @gol.com accounts, please do not hesitate to contact us
Author: Support
Last update: 2022-06-23 04:57
Q. How do I check how much storage space my email account is using?
A. In order to check how much storage space your mail account is using, you will need to login to the Webmail site with your user ID* and password
*Your user ID is the part of your email address before the @ mark, i.e. The user ID for the email account user-id@gol.com is just "user-id" (without the punctuation marks)
Please note, when logging into Webmail, please select "IMAP" in the "Type:" field (the default is POP) to make sure you are able to see all mail currently being stored on the server
Once you have logged in to the Webmail site, click on "Options" at the top of the screen and then look for "Quota Options" here. Next to the "Show quota" message, select the option "in message listing" here and then click the "Apply" button at the bottom of this screen to save the changes
After making this change, click on "Inbox" at the top of the screen (or the "Go" button next to it) to return to the Inbox where you should now be able to see the amount of storage space being used in the top right hand corner. This will be labeled "Disk Usage" and will show the amount of storage space being used in KB
The amount of storage space available to you depends on whether you are using our Mail Plus service or not;
Default - 100MB (100,000KB)
Mail Plus 1 - 200MB (200,000KB)
Mail Plus 2 - 1GB (1,000,000KB)
Mail Plus 3 - 2GB (2,000,000KB)
Mail Plus 4 - 3GB (3,000,000KB)
If you are not sure whether you are using the Mail Plus service or not, you can check this in the Members Station. Login here with your user ID and password and then select the Mail Plus option from the left hand side menu where you can check to see if you are using the service or not
If the amount of mail being stored on the server exceeds the amount available, you will not be able to receive new mail and any mail sent to your account will be queued up and then delivered when disk space is made available. If the mailbox remains full for 24 hours, you will be sent an email notification confirming this and any mail that has been queued up will be returned to the sender noting that your mailbox is full
Any mail sent to your account after the full mailbox notification has been sent to you will immediately be rejected and the sender will receive a notice confirming the reason for this is the mailbox is full
If you have any further questions about your mailbox or the Webmail site, please do not hesitate to contact us
Author: Support
Last update: 2017-07-03 03:06
Q. How can I prevent my mailbox from getting full?
A. In order to prevent your mailbox from getting full, we recommend that you do the following;
1. Setup your account in POP mode on your computer and any other devices you may be using to check your email.
Using the account in POP mode means only received messages take up storage space on the server. For more information about the difference between POP and IMAP type accounts, please see our FAQ page here.
2. Setup your POP account to regularly remove received email from the server.
Any POP account that you setup can be configured to store email on our server for a certain period of time. If you are only using the account on one computer or other device, you can setup the account to remove email from the server immediately after downloading it.
If you are using the email account on multiple computers and/or other devices, you can setup the POP accounts to keep email on the server for a certain period of time before it is removed which should* allow each device to receive all of the email. In this case, we would recommend setting up the account to remove email from the server after 1 week, maximum.
*If you are using multiple devices and the accounts on each device are setup to remove email from the server after one week, you will need to make sure each device connects to the server at least once every week to guarantee that each device receives all of the email.
3. Apply for the Mail Plus service.
The default size of the mailbox for @gol.com accounts is currently 100MB but this can be increased** by applying for the Mail Plus service. It is possible to increase the size of the mailbox from 100MB all the way up to 3GB via the Members Station and using this service will allow you to either store email on the server for a longer period of time (POP) or to synchronize the Inbox, Sent and Trash folders for one account on multiple devices (IMAP).
**If your mailbox is full at the time you apply for the Mail Plus service, the change in size will not go through until the mailbox is cleared of enough email to below the current maximum. For example, if your mailbox is 100MB in size and you have 102MB of email stored on the server, the change will not go through until the amount of email being stored on the server totals less than 100MB. For more information on checking how much email storage space you are using, please see our FAQ page here.
4. Setup mail forwarding. If you are currently using another email account that has more storage space available, it is possible to setup mail forwarding so that any email sent to your @gol.com account is automatically forwarded to another email account of your choosing. This can be setup via the Members Station and in the Mail Forwarding section here, you are given 2 choices for the type of forwarding you’d like to setup;
Keep a local copy?
Yes – If you choose this option, email will both be forwarded to the email account/s of your choosing and stored on our server here.
No – If you choose this option, email will only be forwarded to the email account/s of your choosing and will not be stored on our server here.
For more information about your email account, please refer to our other FAQ pages or feel free to contact us.
Author: Support
Last update: 2016-09-26 02:44
Q. I cannot receive email but I have only a few messages in my Inbox. What’s causing this?
A. This problem usually occurs when you have setup
your email account in IMAP mode on a computer of other device. This results in
not only received messages being stored on the server in the Inbox but also Sent
messages and Deleted messages.
In order to check how much storage space your email
account is currently using, please refer to our FAQ page here. This will also
explain how to see other folders on the server such as “Sent Messages” and “Deleted Messages”.
If you are using an IMAP type account, it’s likely
that this problem is going to reoccur. In order to help prevent this type of
problem, please refer to our FAQ page here on preventing your mailbox from
getting full.
If you are not using an IMAP type account, it’s
likely that you have received 1 or more emails with very large attachments that
are taking up all of the available space on the server. In order to check how
much storage space your email account is currently using, please refer to our
FAQ page here.
For more information about your email account,
please refer to our other FAQ pages or feel free to contact us.
Author: Support
Last update: 2013-12-26 06:21
Q. I cannot send email from my iPhone. What's causing this?
A. If you are unable to send email from your iPhone, please check the following information.
1. Please check the Outgoing Mail Server information below.
Host Name - mail.gol.com
User Name - Enter your email address here (e.g. user-id@gol.com)
Password - Your account password
2. Make sure that you have the following settings.
Use SSL - OFF
Authentication - Password
Server Port - 587
3. Make sure that the mail.gol.com SMTP server is set to "On" and is the "Primary Server".
NOTE: If there are multiple "GOL" SMTP servers listed already, this can prevent you from being able to send email from your iPhone. If you do have several SMTP servers named "GOL" that are set to "Off'" please tap on each one of these separately to view the SMTP server information. Once here, you can choose "Delete" at the bottom of the page to remove them.
Author: Support
Last update: 2017-07-03 03:07
Q. What is the size limit for incoming and outgoing mail?
A. The size limit for incoming mail is 50MB.
With regards to outgoing mail, 40MB is the limit but it should be noted that some mail providers will reject a mail of this size. If you want to send a large file to a contact, we would recommend looking at a file sharing service instead of using email to do this.
We would also like to note that due to the process of encoding attachments in the MIME format when sending mail, the size of the email will often be significantly larger than the size of the attached file itself.
Author: Support
Last update: 2022-06-23 04:30
Q. How do I block and report spam mail?
A. By default, the email accounts are provided with no spam filtering enabled on them. The result of this is that after a certain period of time, it is likely that the amount of spam mail that you receive will increase significantly.
There are several free spam filters that can be enabled on your account at any time. Our FAQ page here describes how to check your current spam filter settings and update them.
With regards to reporting spam, this should only be submitted when all of the available filters have been enabled in the Members Station. If the spam filters are not enabled, any spam reports will be ignored as the existing filters would have likely blocked them anyway.
If you are using all of the filters already and want to report a mail as spam, the simplest way to do this is via the Webmail site. If you login to the site and click on the message you want to report, there is a "Junk" option there for you to use. Clicking that button will move the mail to the "Junk" folder (if folder settings are in the default state) and send a report to our team confirming that it is spam. Once completed, we would highly recommend deleting mail from the "Junk" folder as well to prevent your mailbox becoming full.
Alternatively, spam can be reported by sending the mail with the full headers to spam@gol.com. You should be able to do this from the mail application you are using but please note that if headers are not included and/or you do not have filtering enabled, any reports will simply be ignored.
Author: Support
Last update: 2022-06-24 05:40
About Us
Rakuten Broadband Premium (formerly FUSION GOL)
Rakuten Broadband Premium (formerly known as FUSION GOL) is part of Rakuten Communications providing services to both consumers and companies in Japan.
On July 1st 2017, FUSION GOL was formerly rebranded as Rakuten Broadband Premium as part of an intiative to bring all services in line with "Rakuten" as the common name.
Author: Support
Last update: 2017-07-03 03:57
Email » Webmail
Q. I can't send or reply to email in Webmail. What's causing this?
A. If you are unable to send email from the Webmail site, please check the following;
In the Webmail site, click on the "Options" link at the top of the screen and then check the "Default Identity" listed in the top left corner of the screen. If there is no default identity setup, please click on the "Identities" link and add a new one. Please make sure to check the box "Set to default" before clicking the "Add" button to create the new identity. You should now be able to send mail from the Webmail site.
If you continue to have problems sending mail from the Webmail site after checking the above, please contact us.
Author: Support
Last update: 2015-05-15 08:06
Q. How do I use the Roundcube Webmail site?
This entry is in revision and can not be displayed.Author: Support
Last update: 2018-09-03 10:21